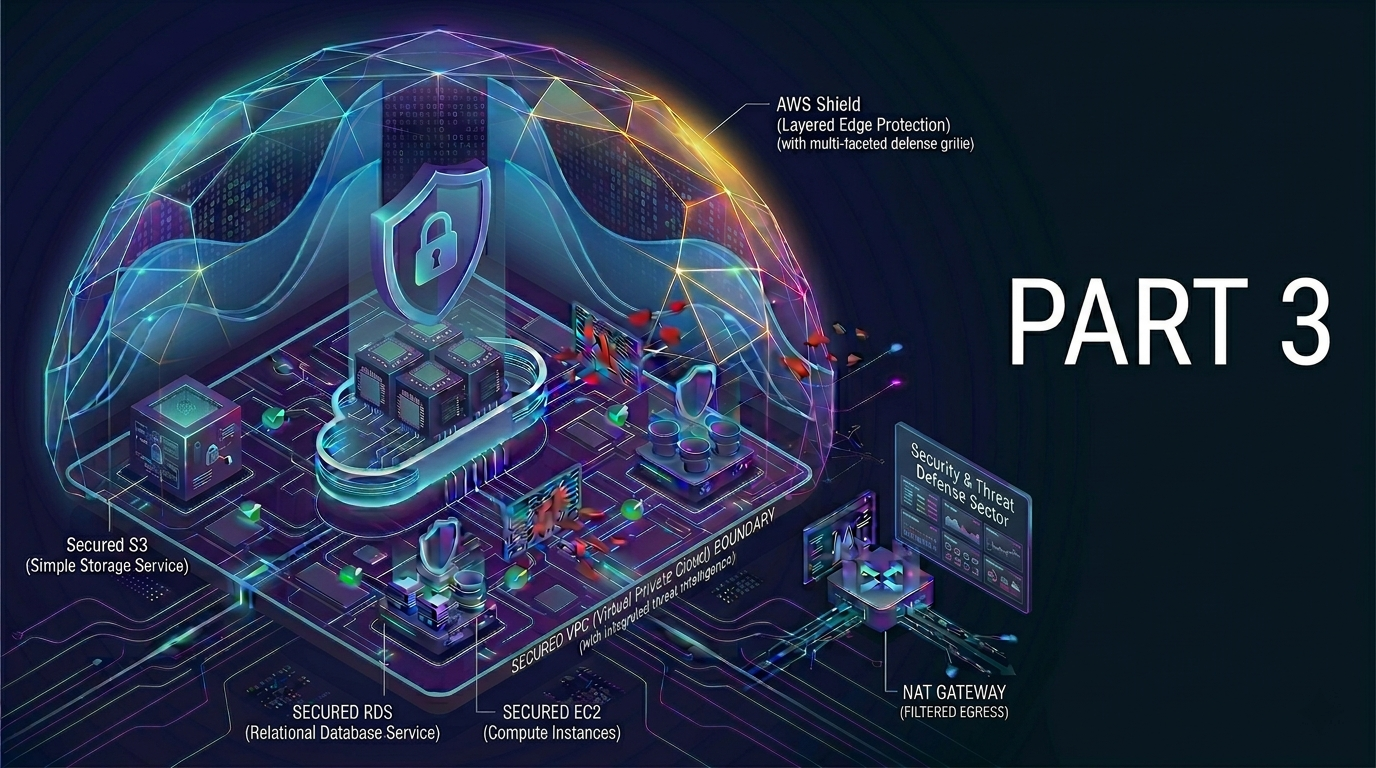
In order to run the application backend in a secure way, we’ll deploy the EC2 instance inside a private subnet of the secured VPC. There will be a Bastion Host deployed in the public subnet for administrative access only. Last but not least, we’ll securely route the inbound traffic via Application Load Balancer (ALB) hosted on the public subnet.
Step 1: Setup EC2 Instance and Launch It in Private Subnet
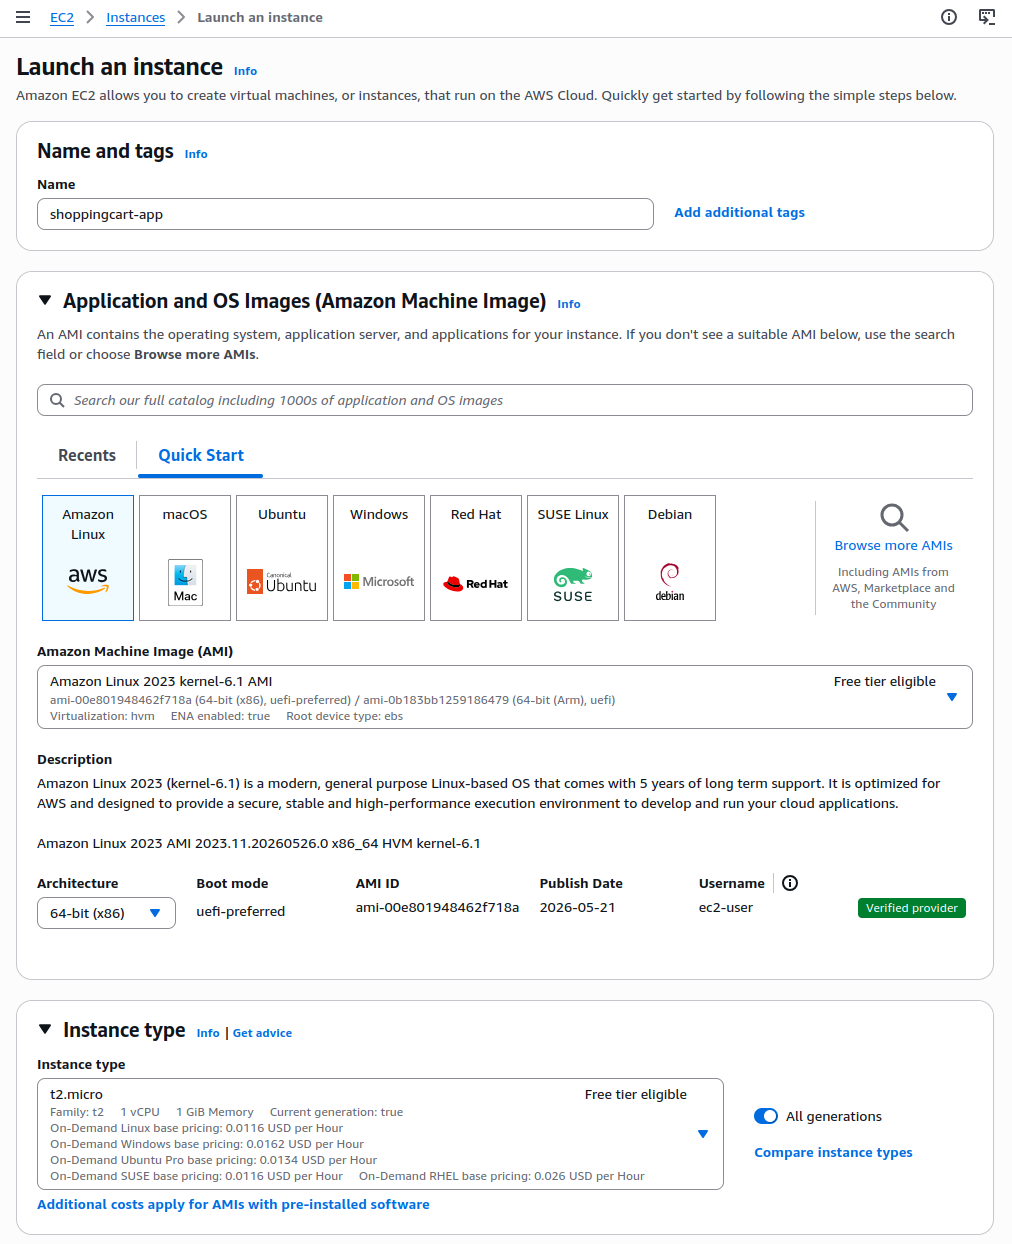
- Go to the EC2 Dashboard, click Launch Instance
- Name:
shoppingcart-app - AMI: Amazon Linux 2 or Amazon Linux 2023 (both supported)
- Instance type:
t2.micro(Free Tier eligible)
- Name:
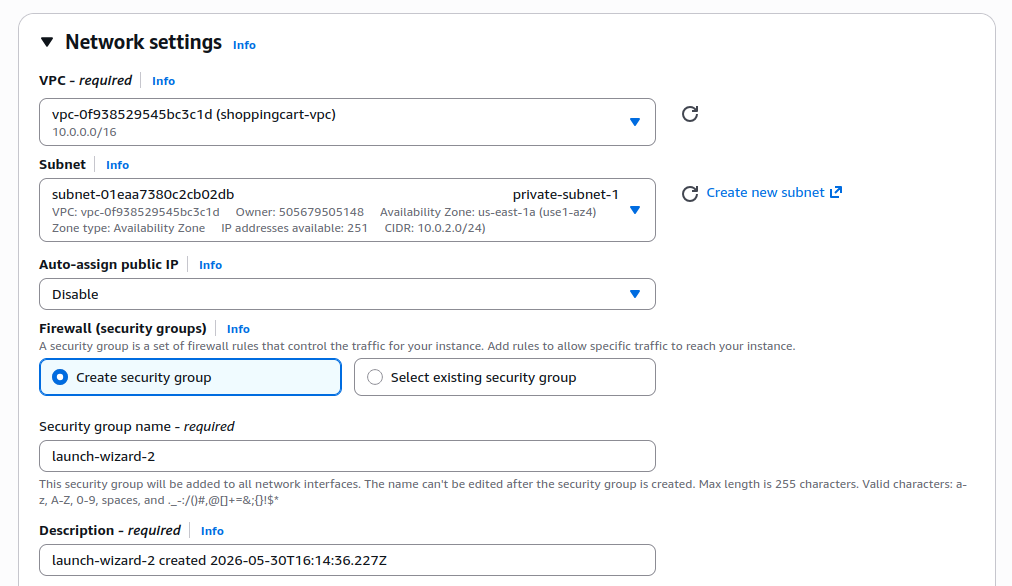
- Network Settings section, click edit:
- VPC: Select
shoppingcart-vpc - Subnet: Choose
private-subnet-1 - Auto-assign public IP: Select Disable
- VPC: Select
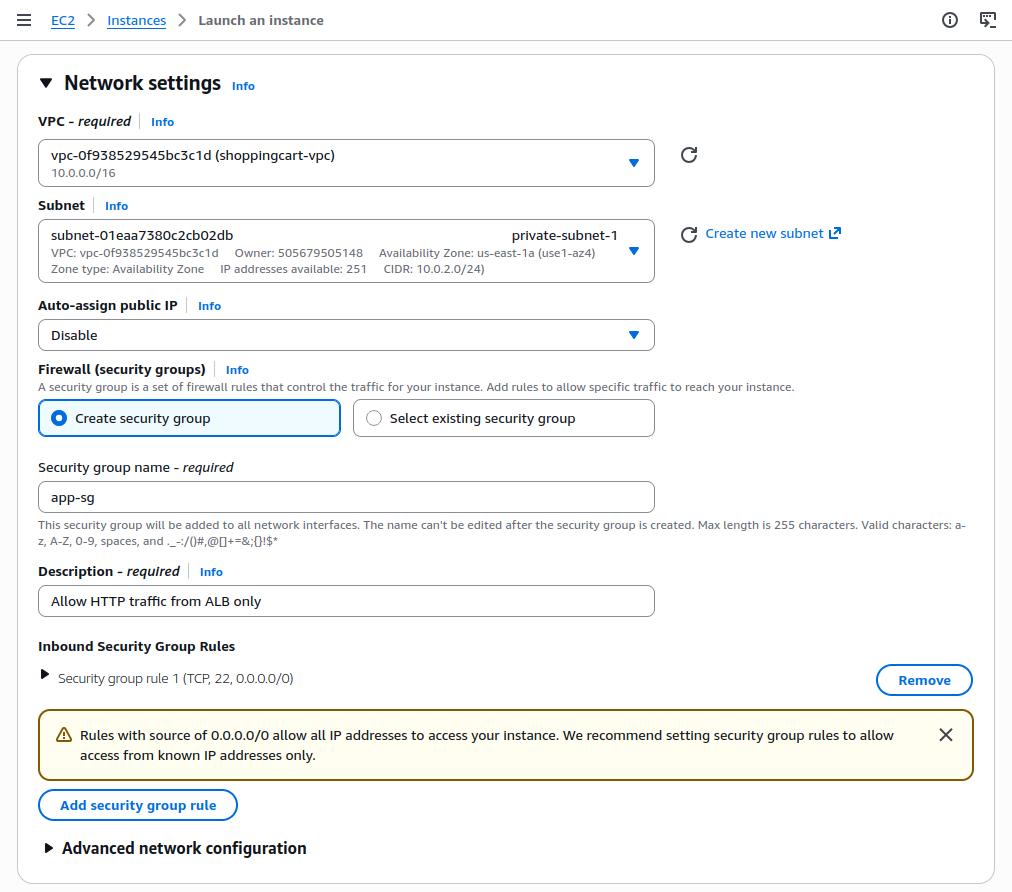
- Click Edit security groups, click Create a new security group
- Security group name:
app-sg - Description: Allow HTTP traffic from ALB only
- Leave the outbound rule as default:
- Allows all outbound traffic (this is required for EC2 to access the internet via the NAT Gateway)
- Click Launch Instance
- Security group name:
Step 2: Setup Application Load Balancer (ALB)
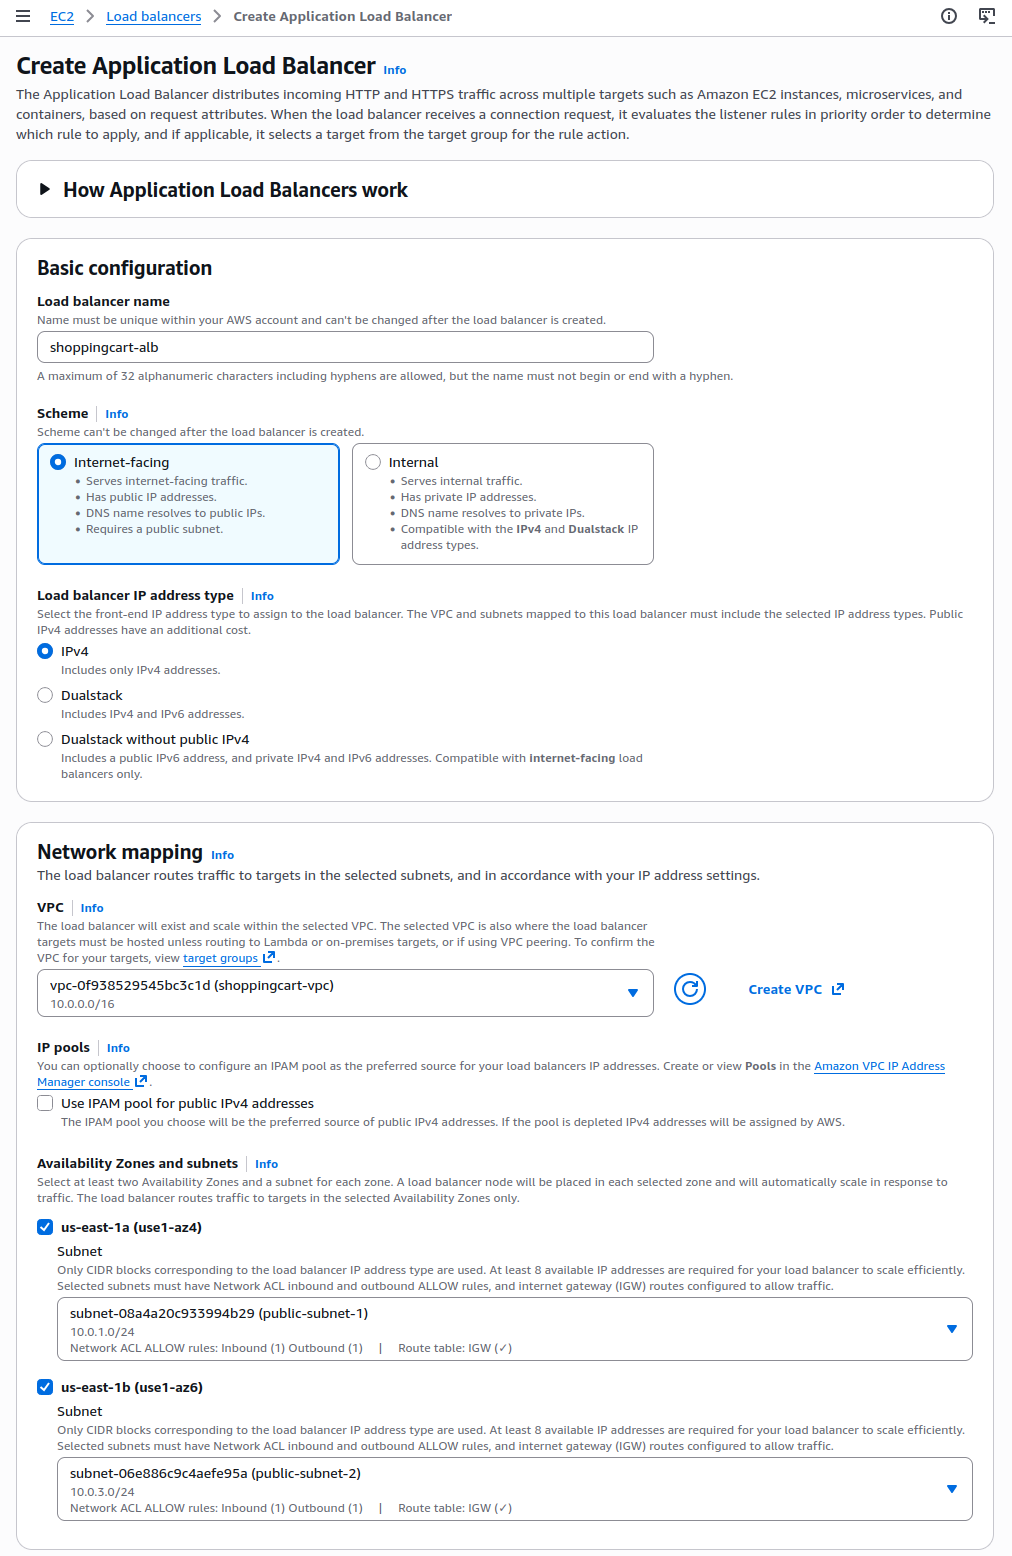
- Go to the EC2 Dashboard and from the left menu, click Load Balancers, click Create Load Balancer, Select Application Load Balancer.
- Configure Load Balancer Basics:
- Name:
shoppingcart-alb - Scheme: Internet-facing
- IP address type: IPv4
- Network mapping:
- VPC: Select
securecart-vpc
- VPC: Select
- Mappings (Availability Zones):
- Check
us-east-1a→ selectpublic-subnet-1 - Check
us-east-1b→ selectpublic-subnet-2
- Check
- Name:
- Configure Load Balancer Basics:
- Configure Security Group:
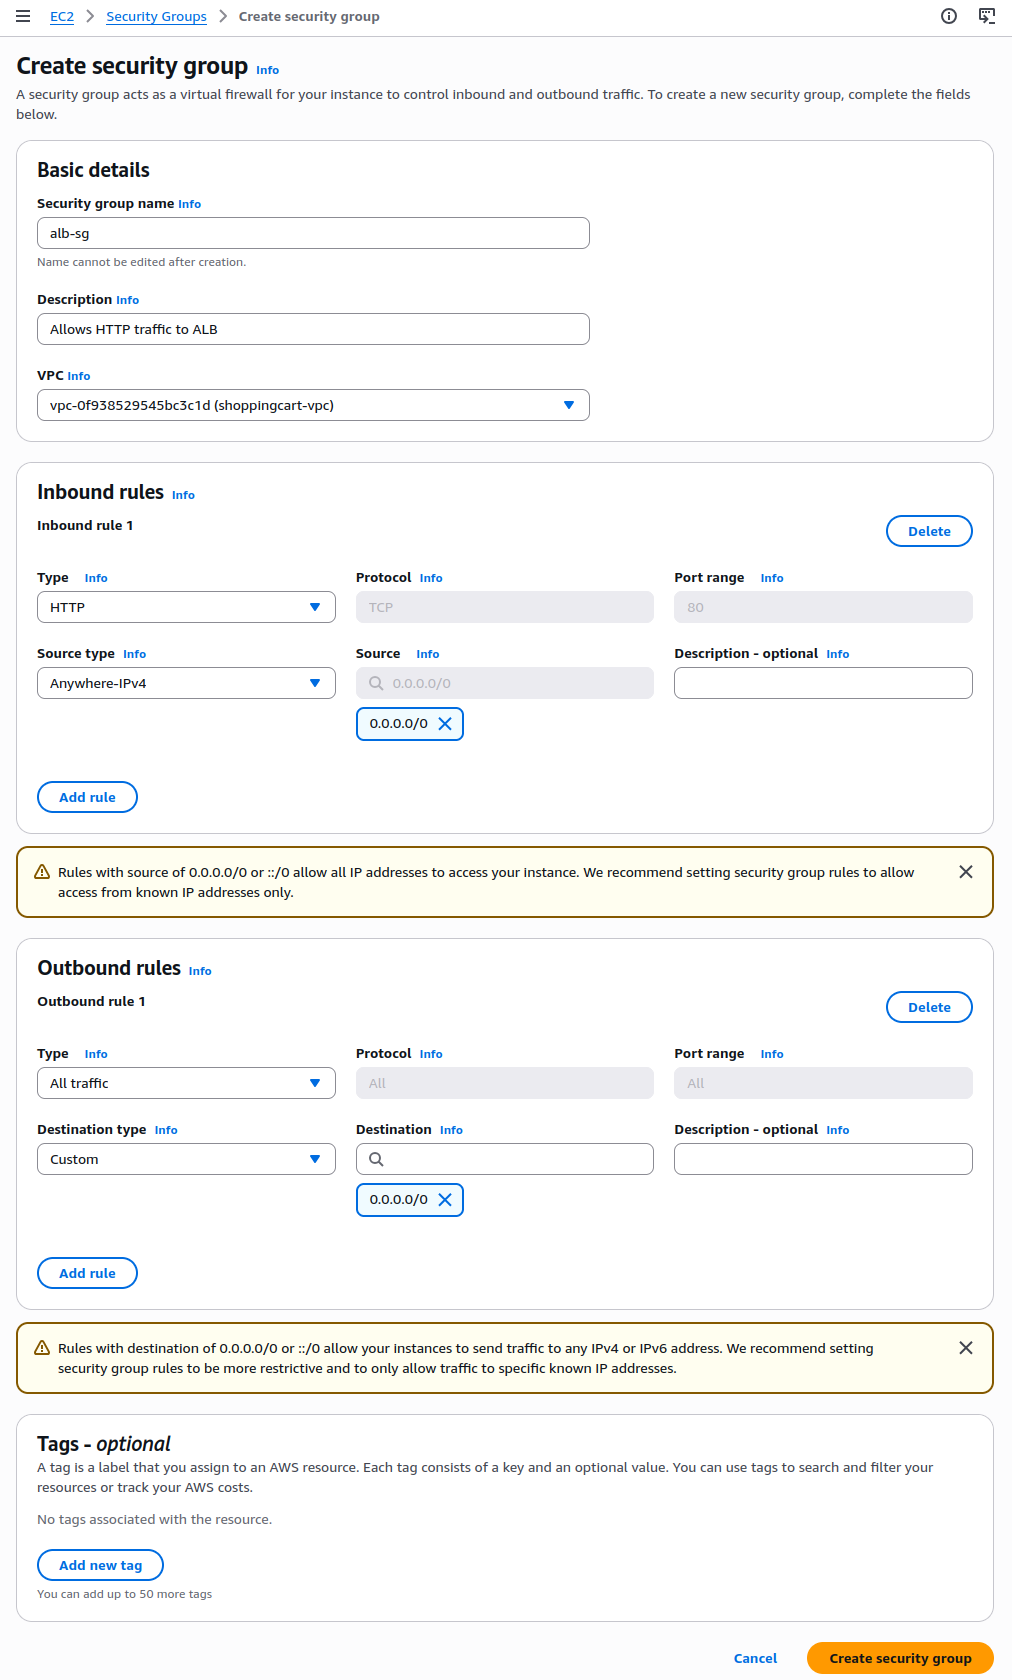
- Choose Create a new security group
- Name:
alb-sg - Description: Allow HTTP traffic to ALB
- VPC: shoppingcart-vpc
- Add Inbound rule:
- Type: HTTP
- Port: 80
- Source:
0.0.0.0/0(allows public access to ALB)
- Leave the Outbound rule as default (all traffic allowed)
- Click Create Security Group and return back to ALB configuration page
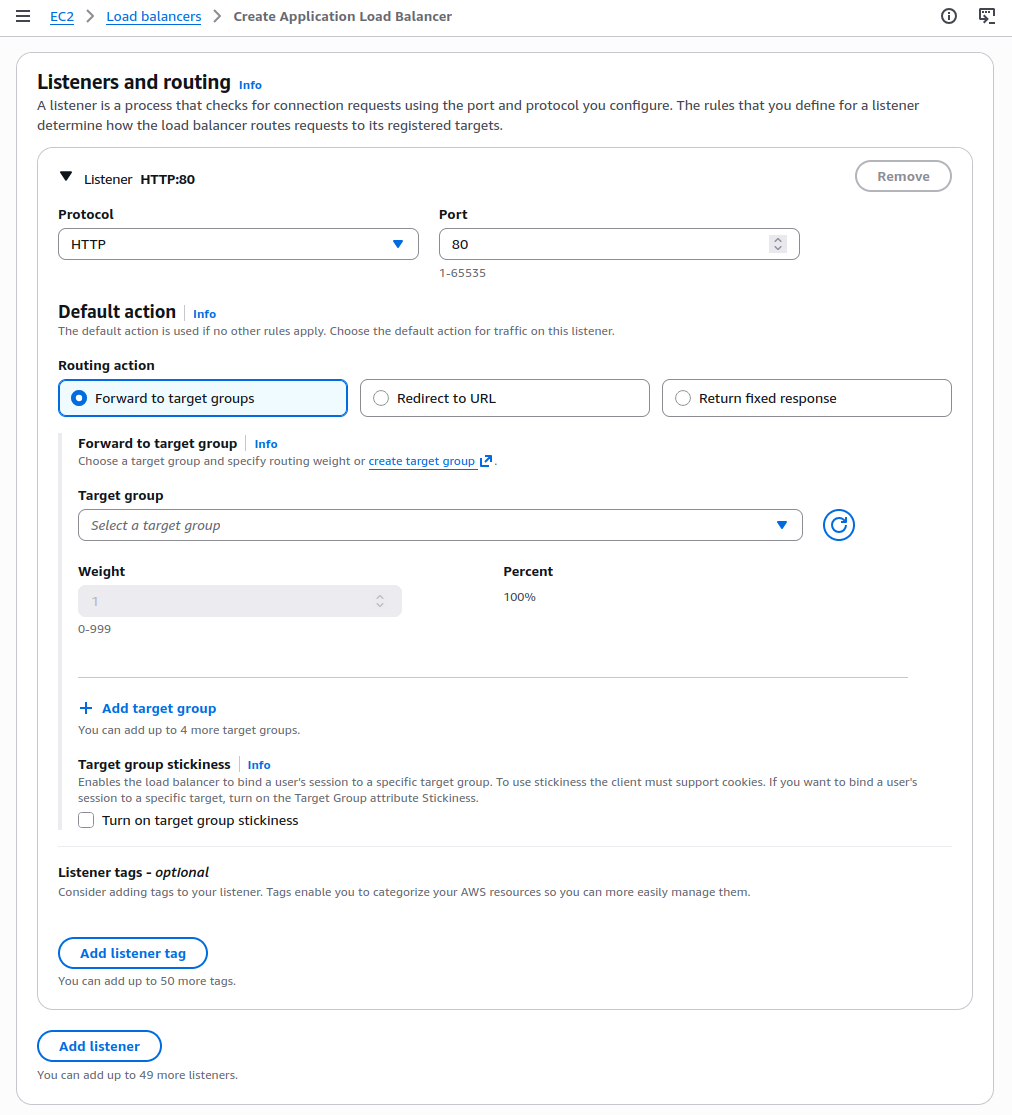
- Configure Listener and Routing:
- Protocol: HTTP
- Port: 80
- Default action: Forward to a target group
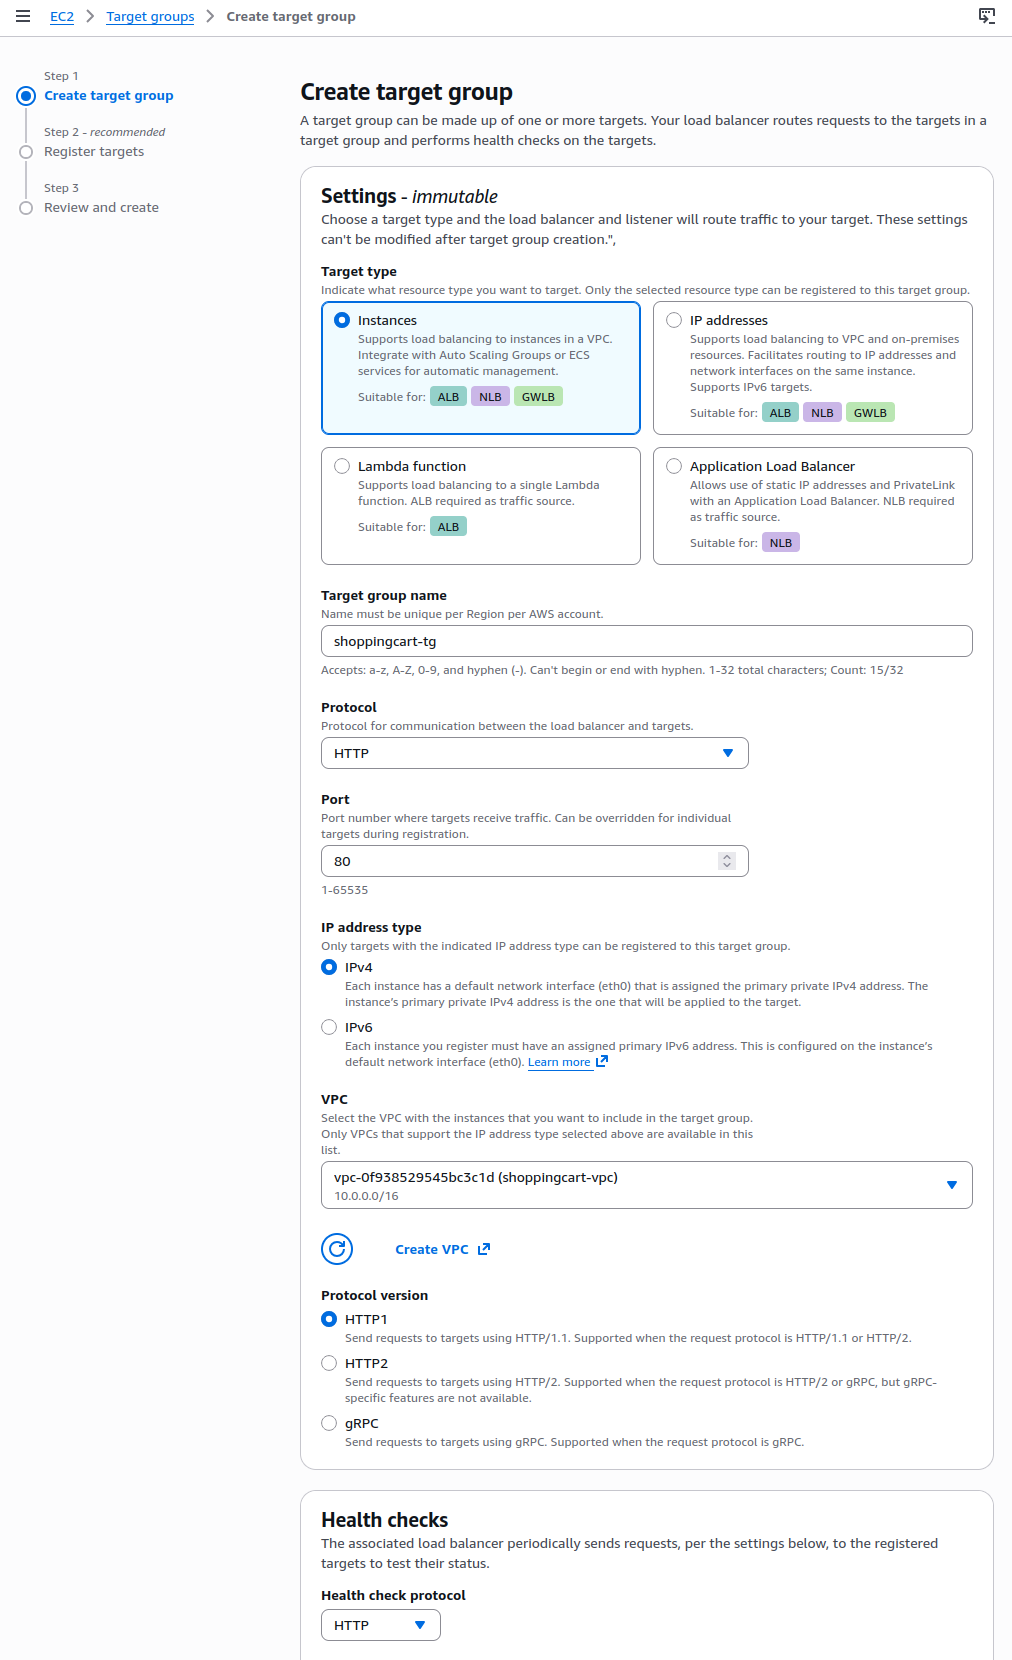
- Click Create target group:
- Name:
shoppingcart-tg - Target type: Instance
- Protocol: HTTP
- Port: 80
- VPC:
shoppingcart-vpc
- Name:
- Click Next
- Register Targets:
- On the “Register targets” page:
- Select your EC2 instance (
shoppingcart-app) - Click Include as pending below
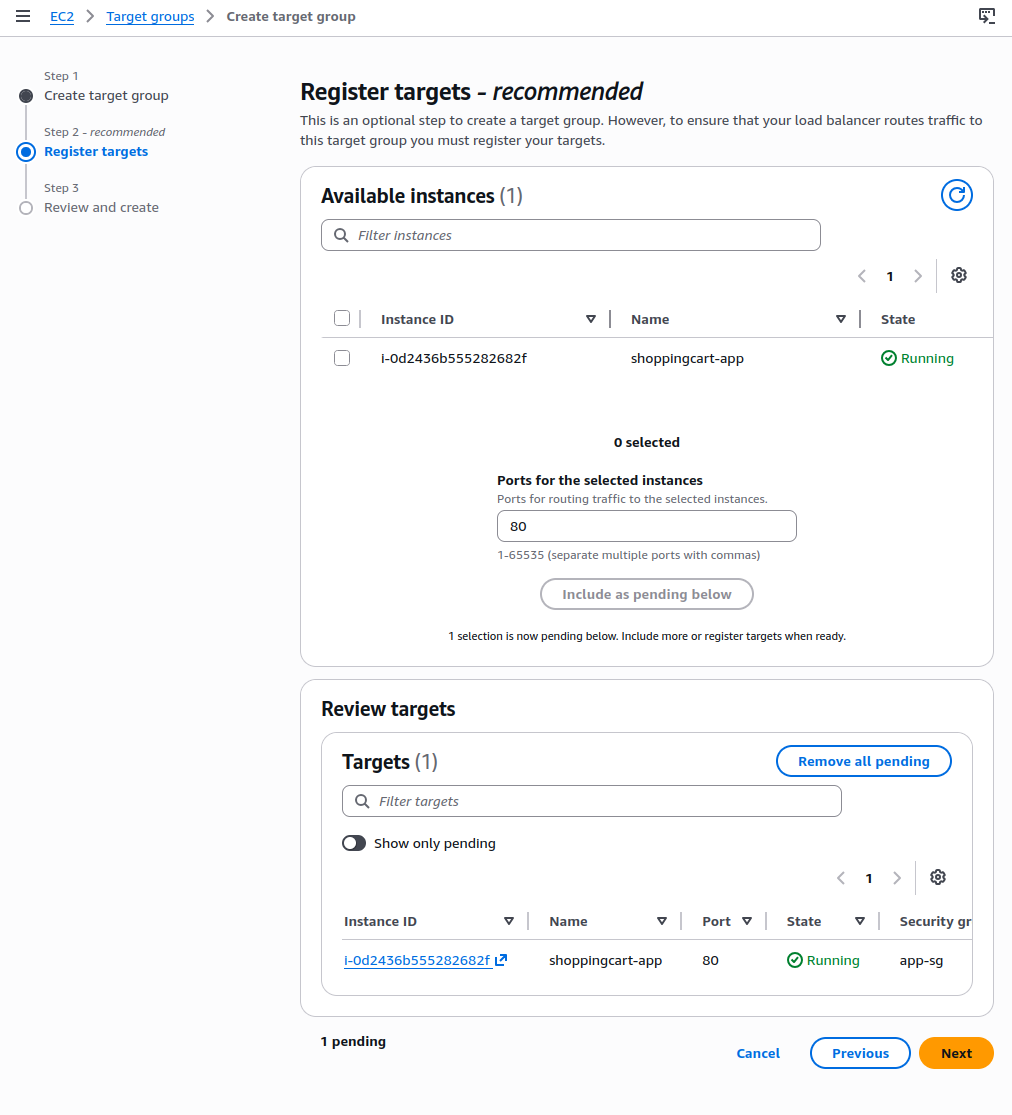
- Click Next, click Create Target Group
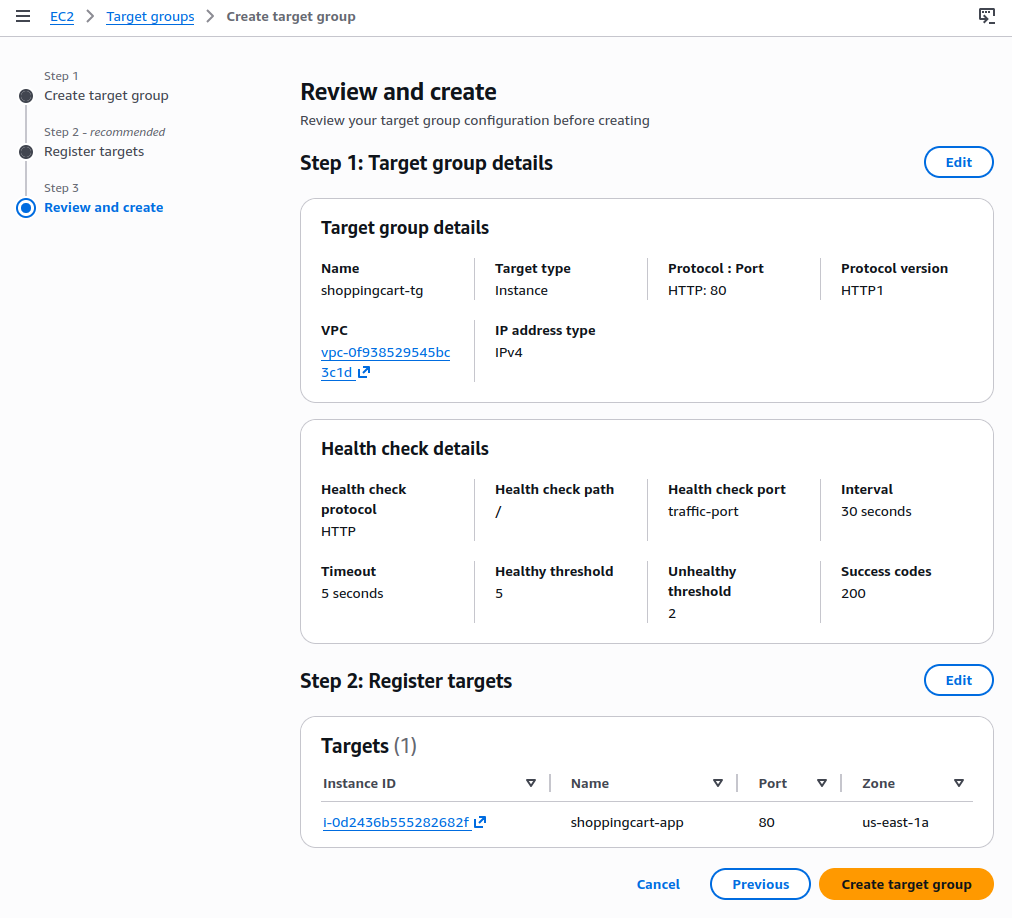
- Return back to the ALB configuration page and select the newly created target group
- Click Create Load Balancer
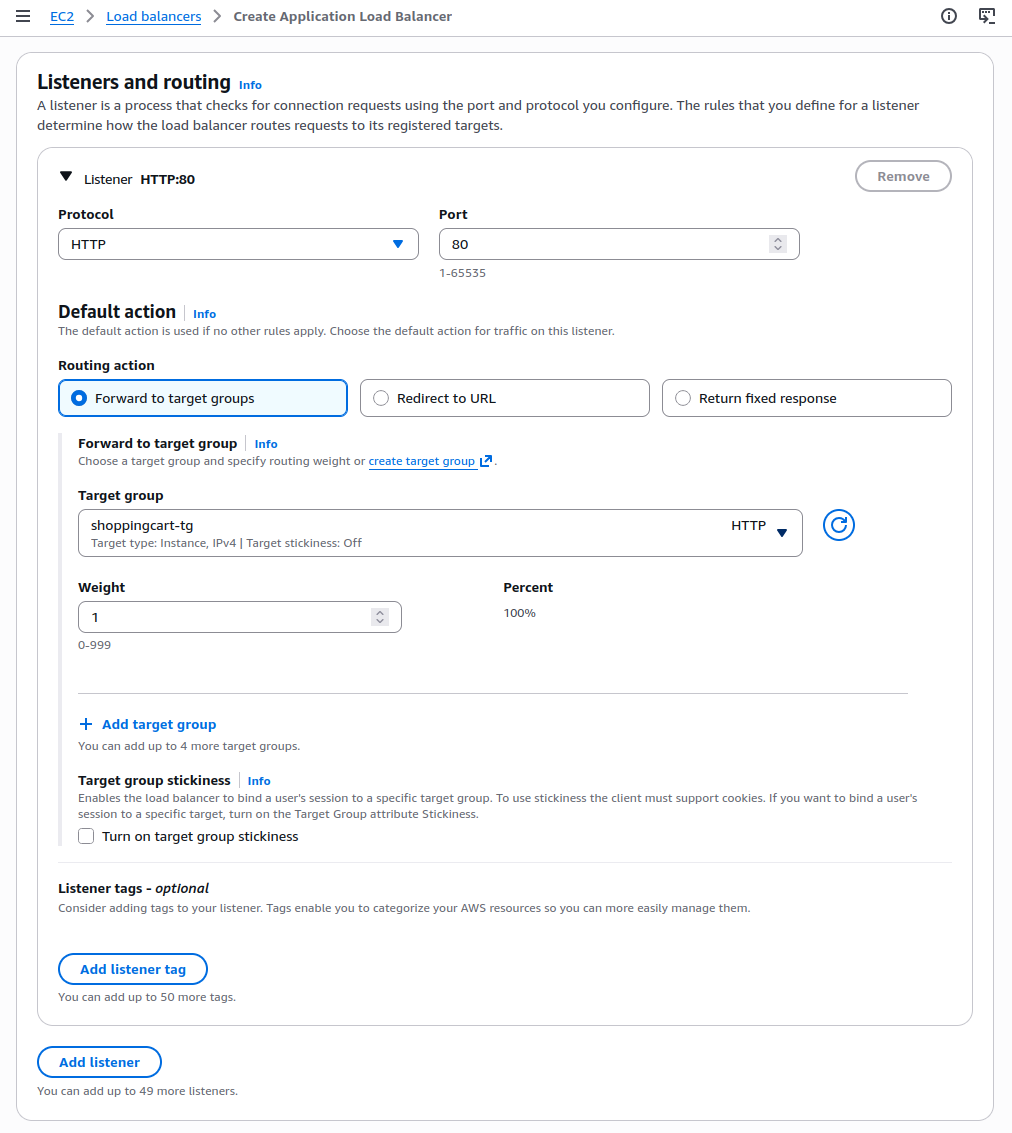
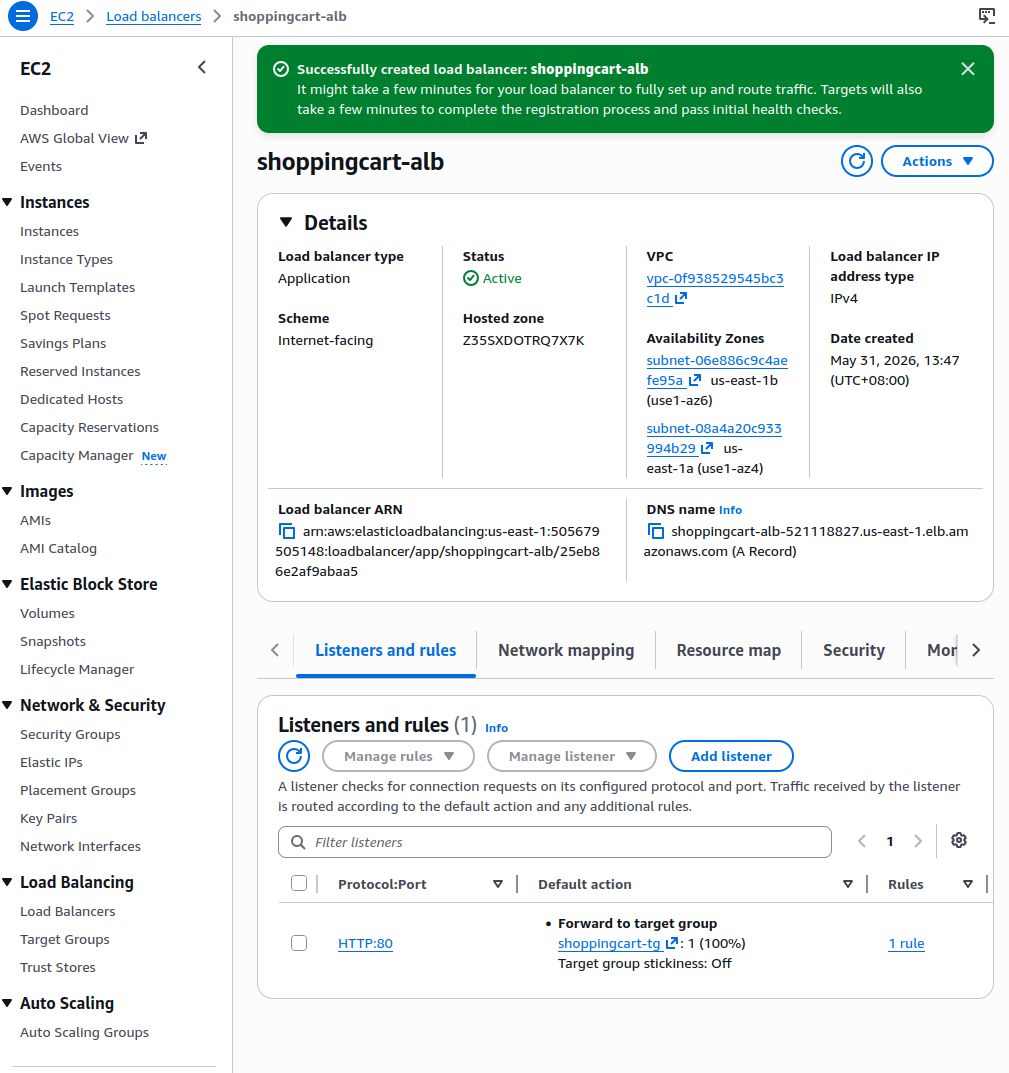
After a couple of minutes, the ALB will be in the active status
Step 3: Update Security Group of EC2 to Allow Application Load Balancer (ALB)
- Go to the EC2 Dashboard and navigate to the left menu, click Security Groups
- Find and click on the security group for your EC2 instance (usually
app-sg) - Go to the Inbound rules tab, click Edit inbound rules
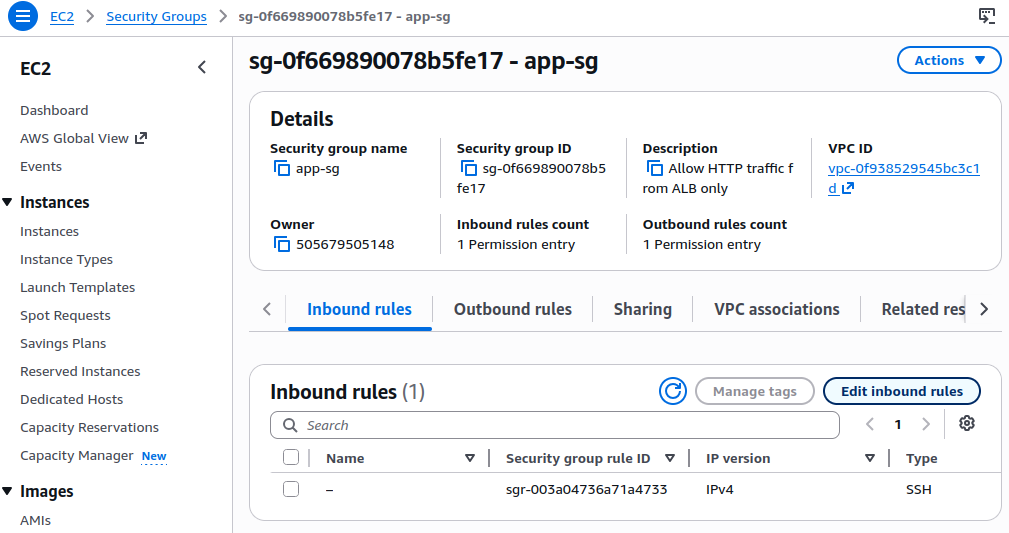
- Click Add rule:
- Type: HTTP
- Port: 80
- Source: Custom. In the dropdown, select
alb-sg(our ALB security group) - This ensures that only the ALB can send traffic to our EC2 instance.
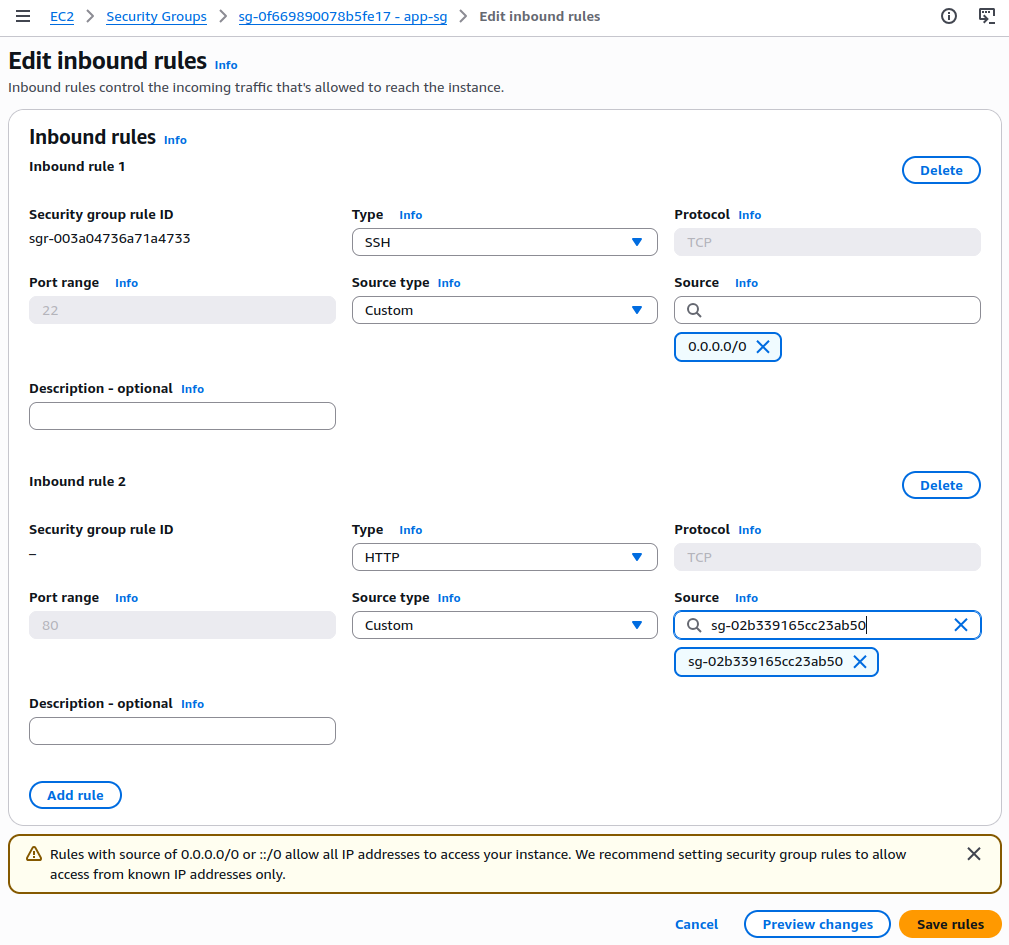
Click Save rules
Step 4: Setup Bastion Host in The Public Subnet
While putting the application within the EC2 deployed in the private subnet is a good security practice in the real-world case, this means we can’t SSH into EC2 instance directly. That’s why we need to setup the bastion host to allow us securely access the EC2 instance from a public subnet to do such administrative task (i.e. installing updates) before we can terminate to reduce cost and avoid exposure.
- Go to EC2 Dashboard, click Launch Instance
- Name:
bastion-host - Choose Amazon Linux 2023,
t2.micro
- Name:
- Select the existing key pair: shopping-cart-app-key-pair
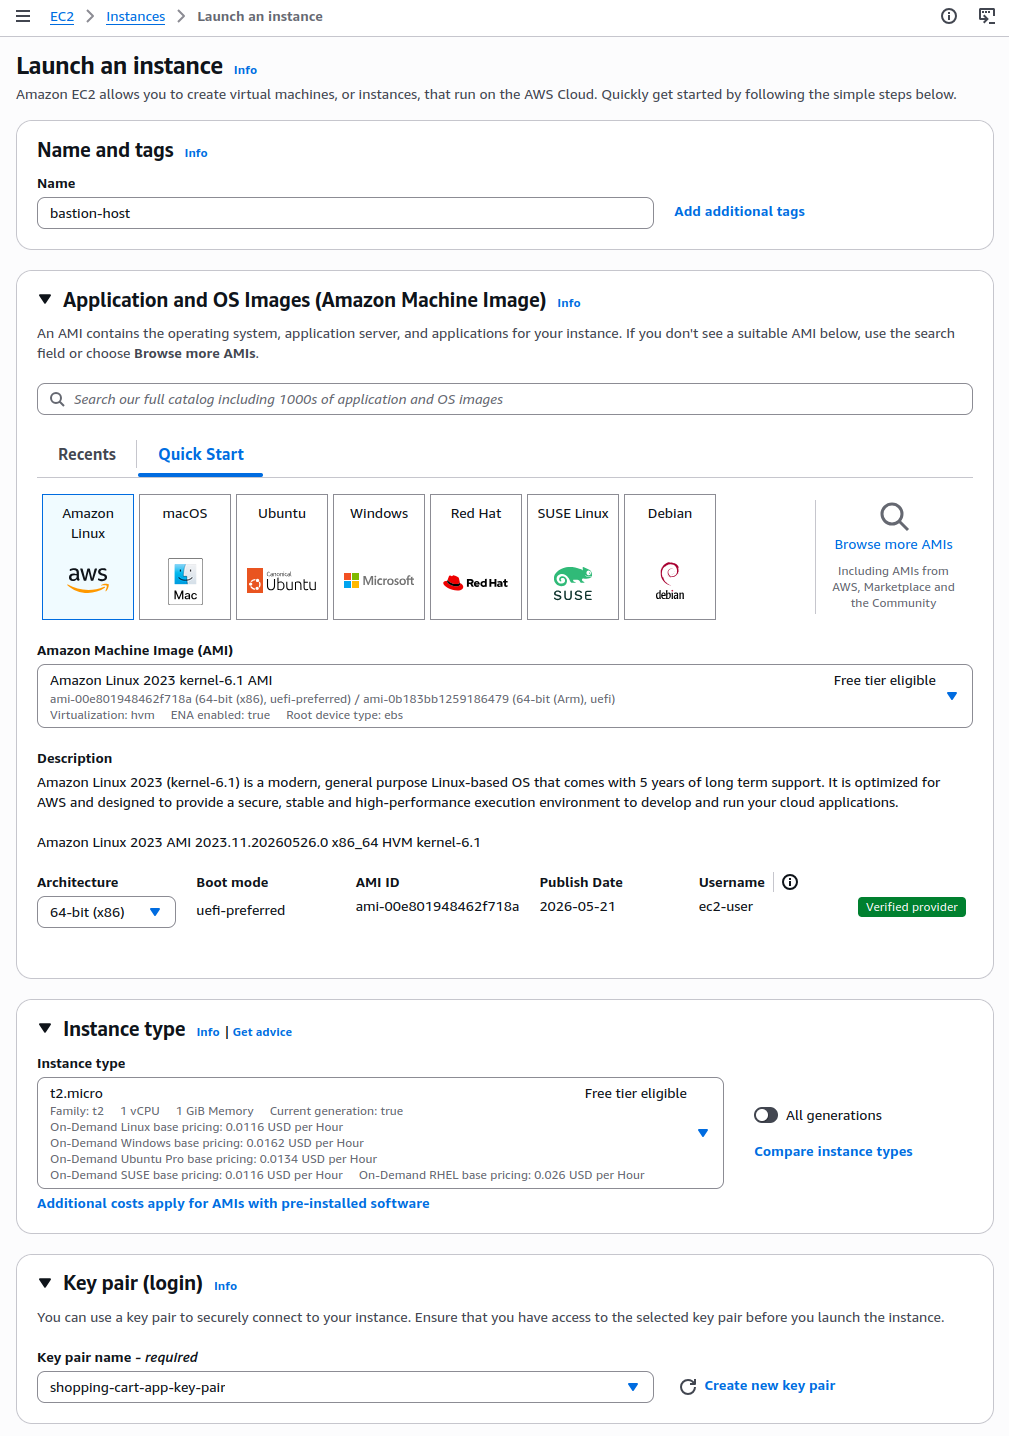
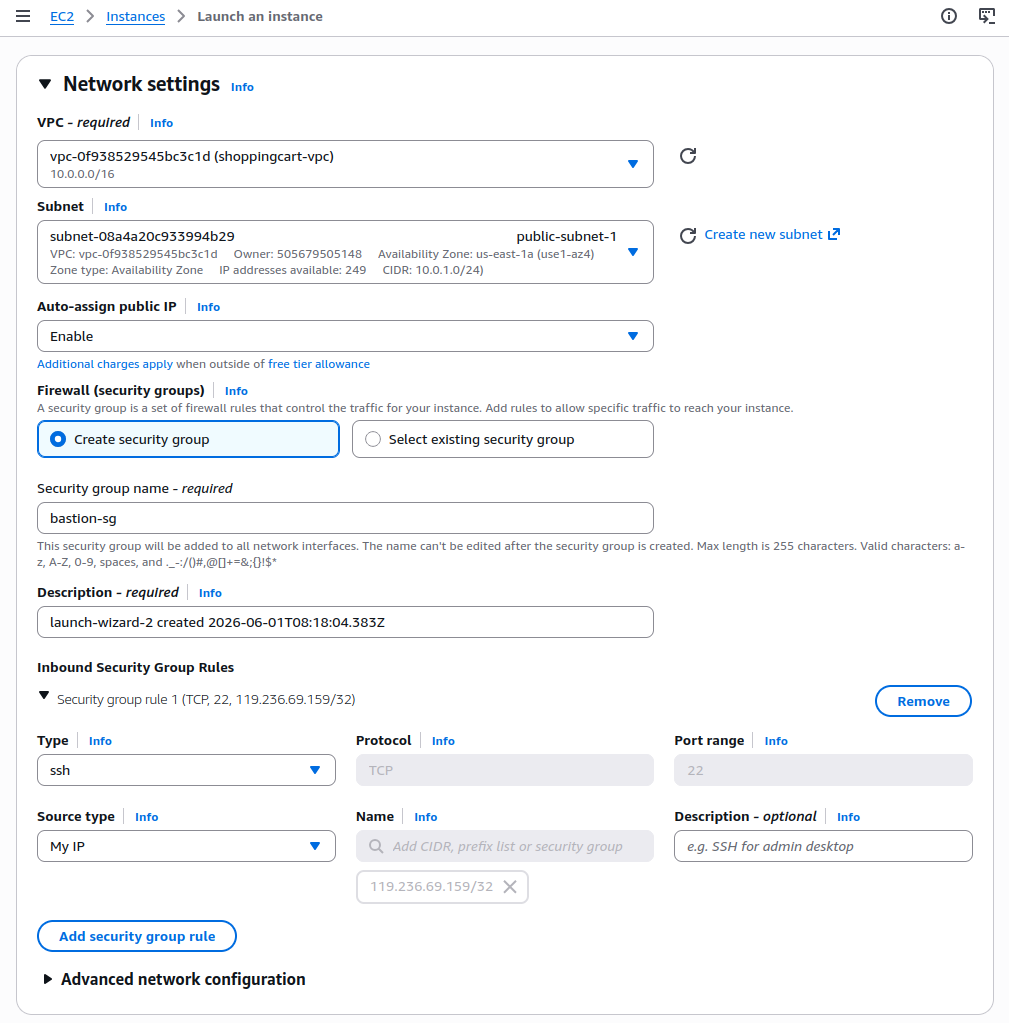
- Configure Network Settings:
- VPC:
shoppingcart-vpc - Subnet:
public-subnet-1 - Auto-assign Public IP: Enable (default)
- VPC:
- Create security group:
- Name:
bastion-sg - Inbound Rule:
- Type: SSH
- Port: 22
- Source:
My IP
- Outbound Rule: Leave as Allow all
- Name:
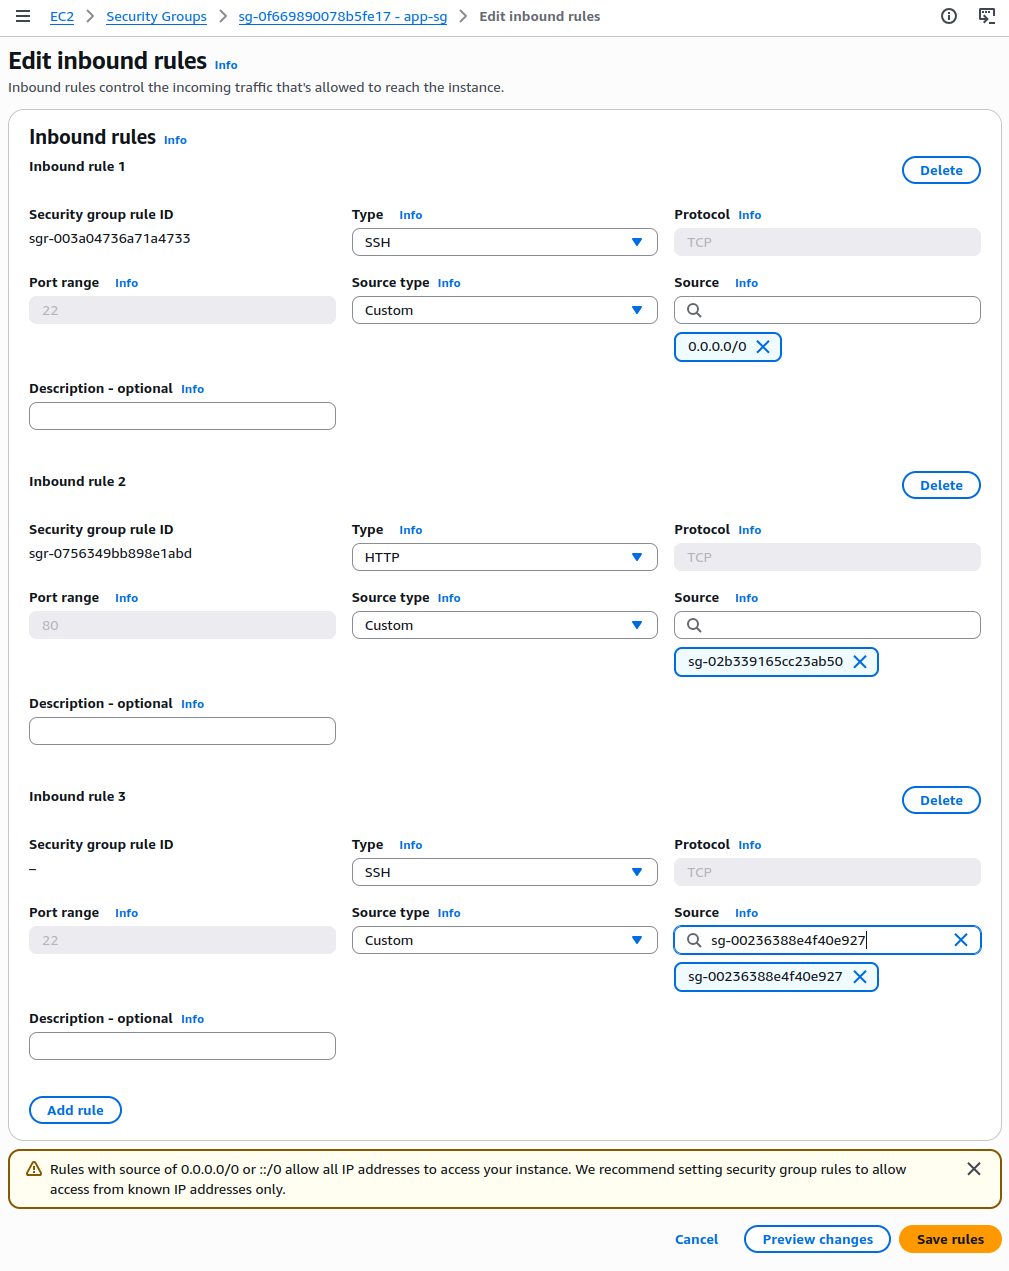
- In order to allow only the bastion host to connect to our private EC2 instance, we need to Update App EC2 Security Group to Allow SSH from Bastion
- Go to EC2 Dashboard, click Security Groups
- Find
app-sgand click on it - Go to Inbound rules, click Edit inbound rules
- Add:
- Type: SSH
- Port: 22
- Source: Custom, Select
bastion-sg
Step 5: SSH into App EC2 via Bastion Host
In this step we will try to connect to the EC2 application via bastion host by using the .pem key.
- Upload the .pem key to the bastion host by using this command from terminal
scp -i ~/<filepath>/<key_filename>.pem ~/<filepath>/<key_filename>.pem ec2-user@<Bastion_Public_IP>:/home/ec2-user/Please replace the <filepath> and <key_filename> with the filepath and filename of our own local machine.
Once we copied the .pem file to bastion host instance, we can connect to the bastion host using below command
ssh -i ~/<filepath>/<key_filename>.pem ec2-user@<Bastion_Public_IP>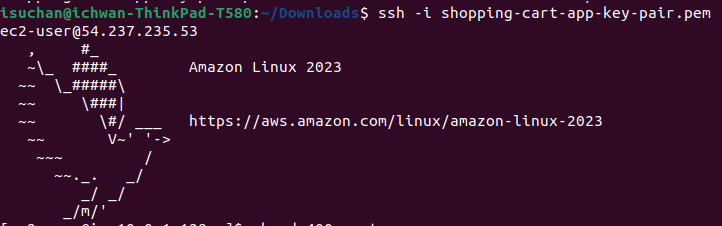
Once we connected inside the bastion host, run the following command to connect to the EC2 instance (shoppingcart-app)
chmod 400 <key_filename>.pem
ssh -i <key_filename>.pem ec2-user@<Private_IP_of_app_instance>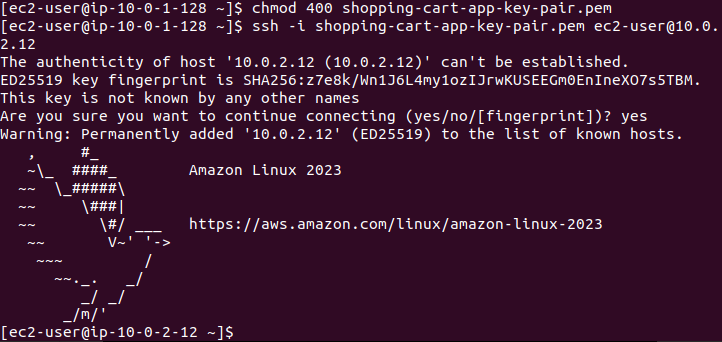
To find the private IP of the app instance, go to EC2 dashboard, select the EC2 instance and find the private IP value.
Step 6: Install Node.JS on EC2 Instance (shoppingcart-app)
Once connected inside the EC2 instance (shoppingcart-app), let’s install Node.JS by using following command:
curl -o- https://raw.githubusercontent.com/nvm-sh/nvm/v0.40.4/install.sh | bash
export NVM_DIR="$HOME/.nvm"
source "$NVM_DIR/nvm.sh"
nvm install 24
nvm use 24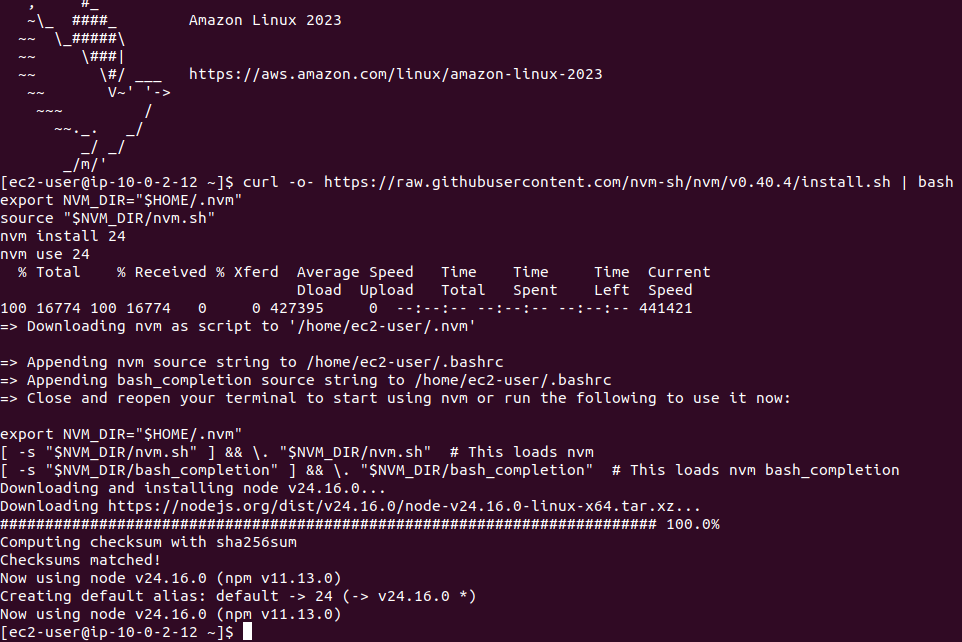
Create the application:
mkdir shoppingcart && cd shoppingcart
mkdir public

cat <<EOF > public/index.html
<!DOCTYPE html>
<html>
<head><title>ShoppingCart</title></head>
<body><h1>Welcome to ShoppingCart Production</h1><p>This is the secured demo page served by the EC2 on the private subnet</p></body>
</html>
EOF

cat <<EOF > server.js
const http = require('http');
const fs = require('fs');
const path = require('path');
const server = http.createServer((req, res) => {
  const filePath = path.join(__dirname, 'public', req.url === '/' ? 'index.html' : req.url);
  fs.readFile(filePath, (err, content) => {
    if (err) {
      res.writeHead(404); res.end('Not Found');
    } else {
      res.writeHead(200); res.end(content);
    }
  });
});
server.listen(80, '0.0.0.0/0');
EOF
Get the full path to Node.js and copy the output
[ec2-user@ip-172-31-18-36 shoppingcart]$ which node
~/.nvm/versions/node/v24.16.0/bin/node
Start the application
# Get the full path to Node.js
which node

# Copy the output path (e.g., /home/ec2-ser/.nvm/versions/node/v24.16.0/bin/node) Please adjust the node version on your own installation

# Start the server using the full path (& makes sure the task runs on background to keep terminal functional for operations)
sudo /home/ec2-user/.nvm/versions/node/v24.16.0/bin/node server.js &
Finally, test the application via the ALB
- Go to EC2 Dashboard, from left-side menu click Load Balancers
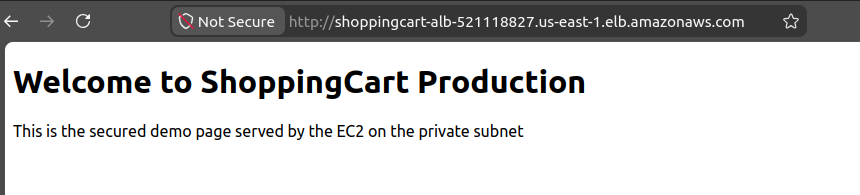
- Copy the DNS name of our ALB (i.e.
shoppingcart-alb-521118827.us-east-1.elb.amazonaws.com) - And paste it into our browser. We should see the message served by the application on EC2
- Copy the DNS name of our ALB (i.e.
Summary: Re-architecture for Secure Prod Deployment
As per demonstrated in this part, the EC2 instance is placed inside a private subnet, which means it doesn’t have a public IP and can’t be accessed directly from the internet. However, we can still access the app from your browser using the ALB DNS URL. That’s because the Application Load Balancer is in a public subnet, and it securely forwards traffic to the EC2 instance inside the private subnet.
This setup shows how real-world architectures use public ALBs to expose apps, while keeping backend resources like EC2 and RDS isolated for security.
In part 4, we’ll securely deploy RDS as the data layer and S3 as the storage layer of the application