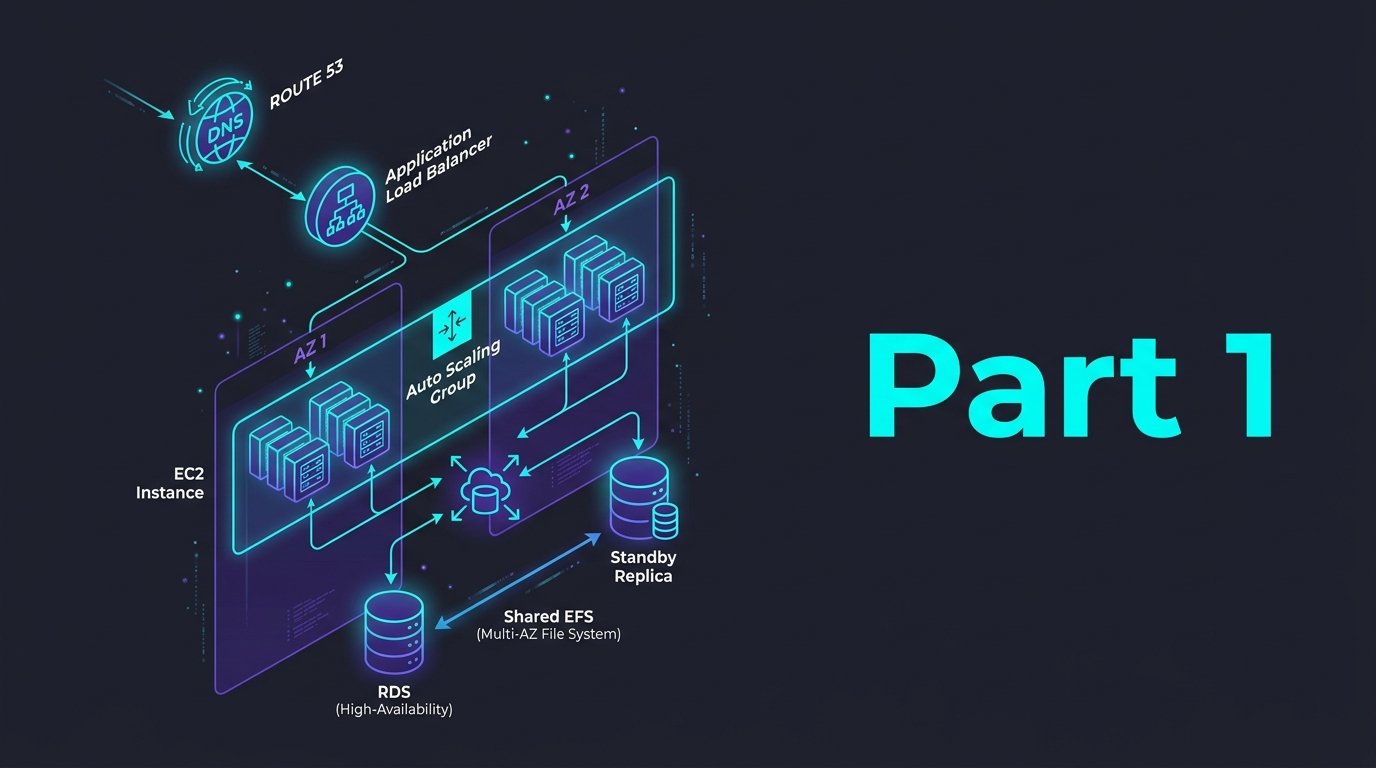
Reliability pillar is an architecture guideline that focuses on the ability of a workload to perform its intended function correctly and consistently when it is expected to. In this project we will re-architect a traditional application deployment where it lacks of fault-tolerance and high-availability. We will start by deploying a flash-sale application for an e-commerce flash campaign without fault-tolerance where if any of EC2 or RDS instance is down there will be a loss of access to customer transaction data.
To start of with, here is the to-be architecture diagram for this project:
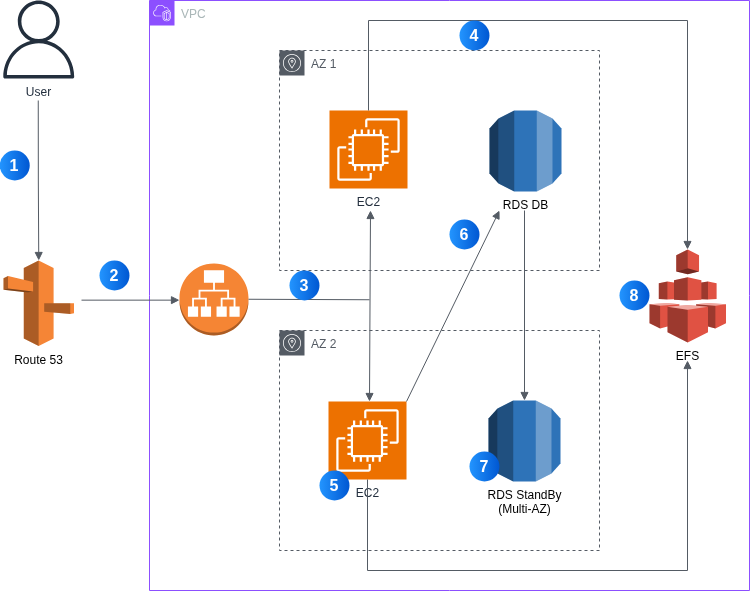
Below is the explanation of above architecture diagram:
- User makes a HTTPS request via browser
- Route53 resolves the domain and forward the request to ALB
- ALB forward the traffic to the healthy EC2 instances
- EC2 on the AZ-1 processes the request and read from EFS
- EC2 on the AZ-2 ensures high-availability via auto-scaling
- EC2 connects to the RDS primary for the data
- RDS standby provides automated fail-over
- EFS allows shared storage across both EC2s
Step 1: Launch EC2 With Launch Template
The launch template stores the configuration for launching EC2 instances (AMI, instance type, key pair, security groups, and user data scripts)
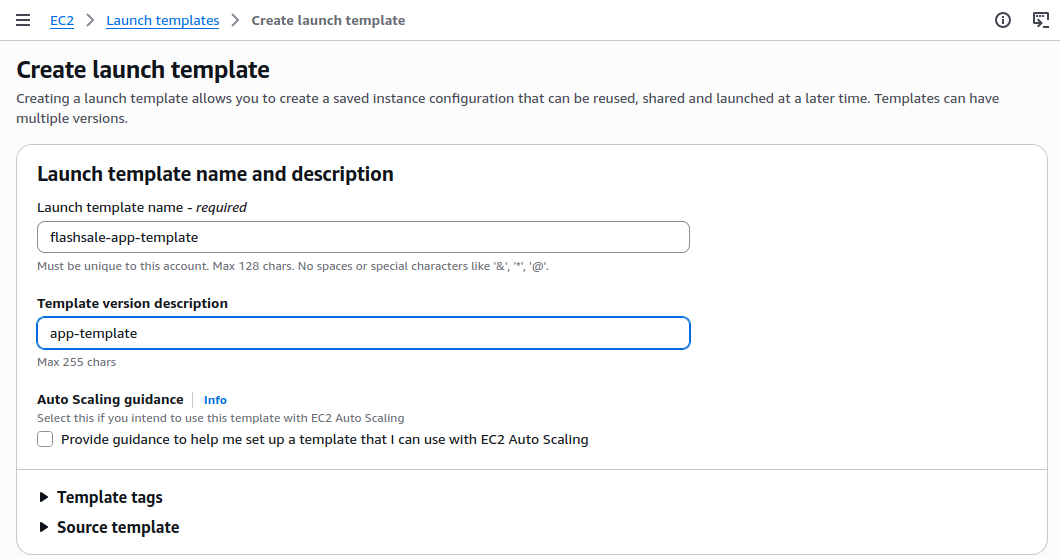
- Go to the EC2 Dashboard, click Launch Templates, click Create launch template
- Fill in the following details:
- Launch template name:
flashsale-app-template - Launch template version description:
app-template
- Launch template name:
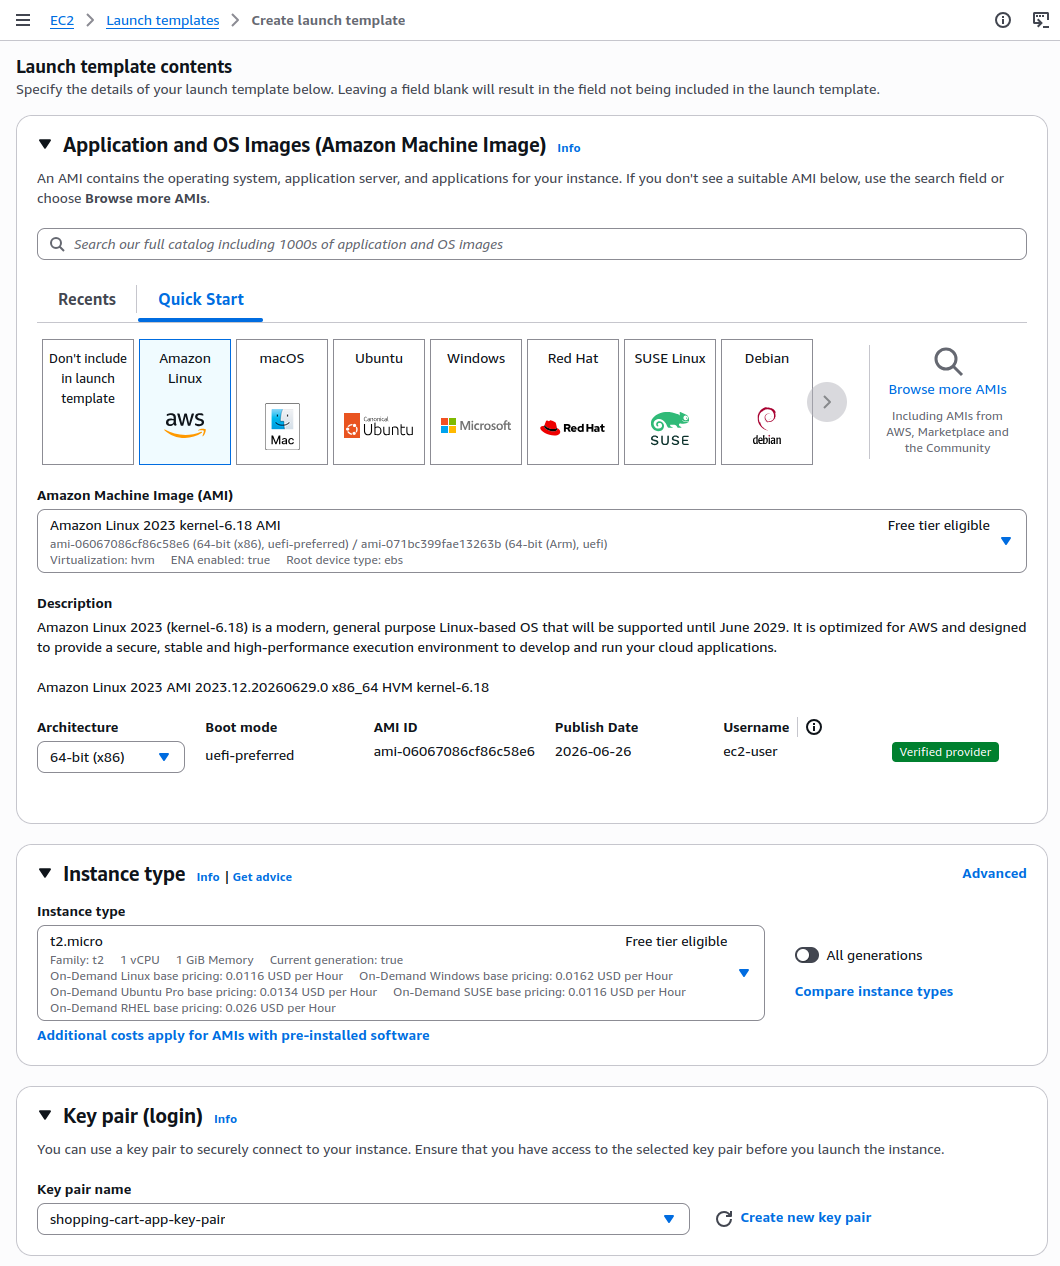
- AMI ID: Use the latest Amazon Linux 2 AMI
- Instance type:
t2.micro - Key pair: Select an existing one (i.e. form previous project)
- Click on create security group and name it:
flashsale-sg - Security group: Allow HTTP (80) and SSH (22) access
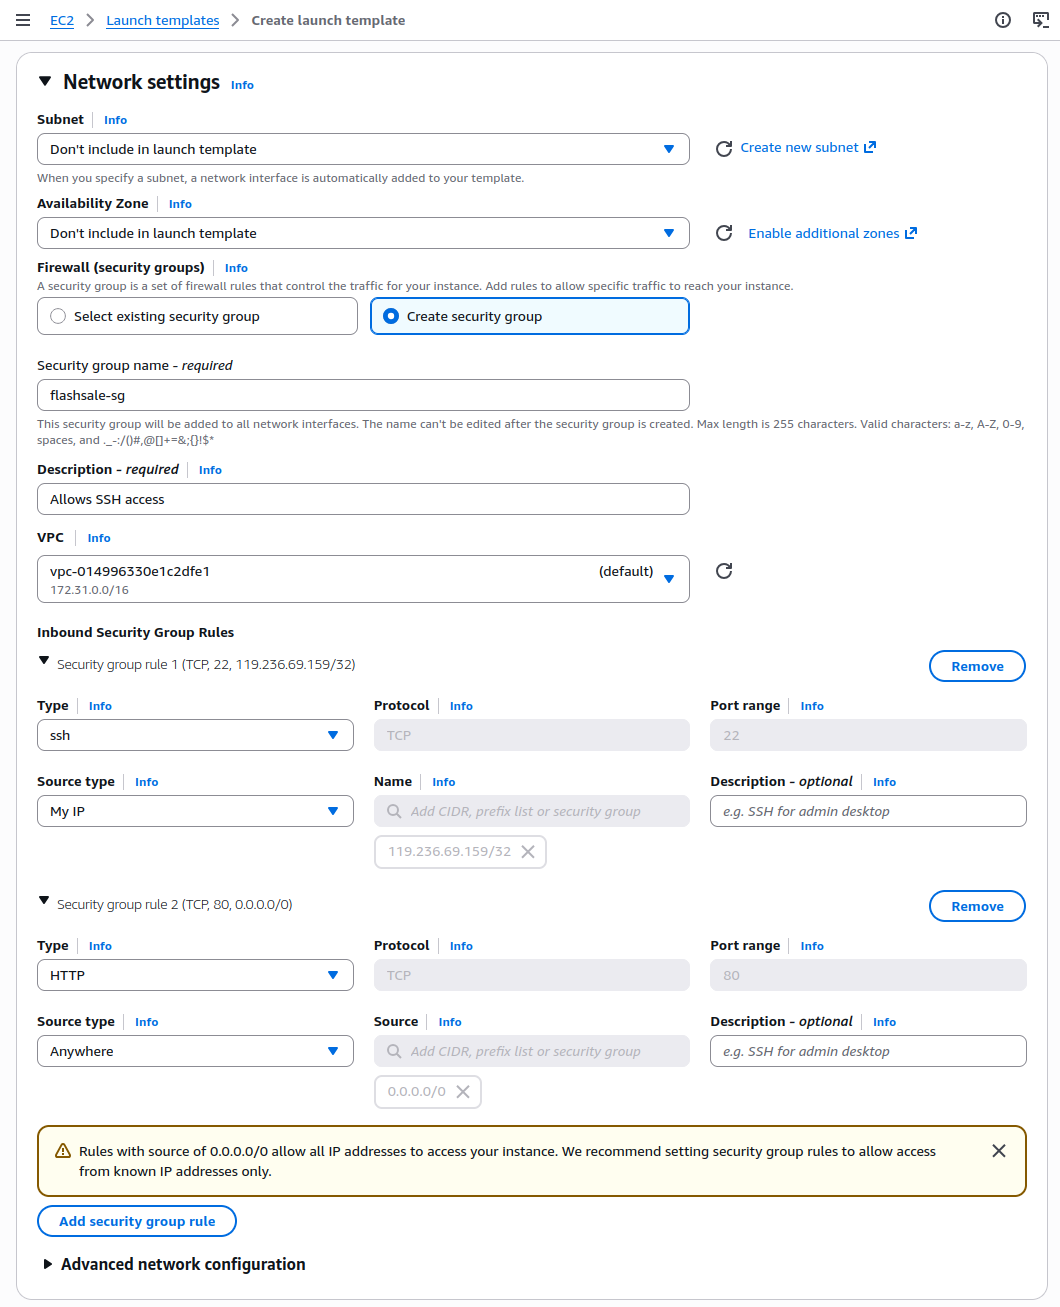
Leave both outbound and inbound rules for the moment as we will update it later.
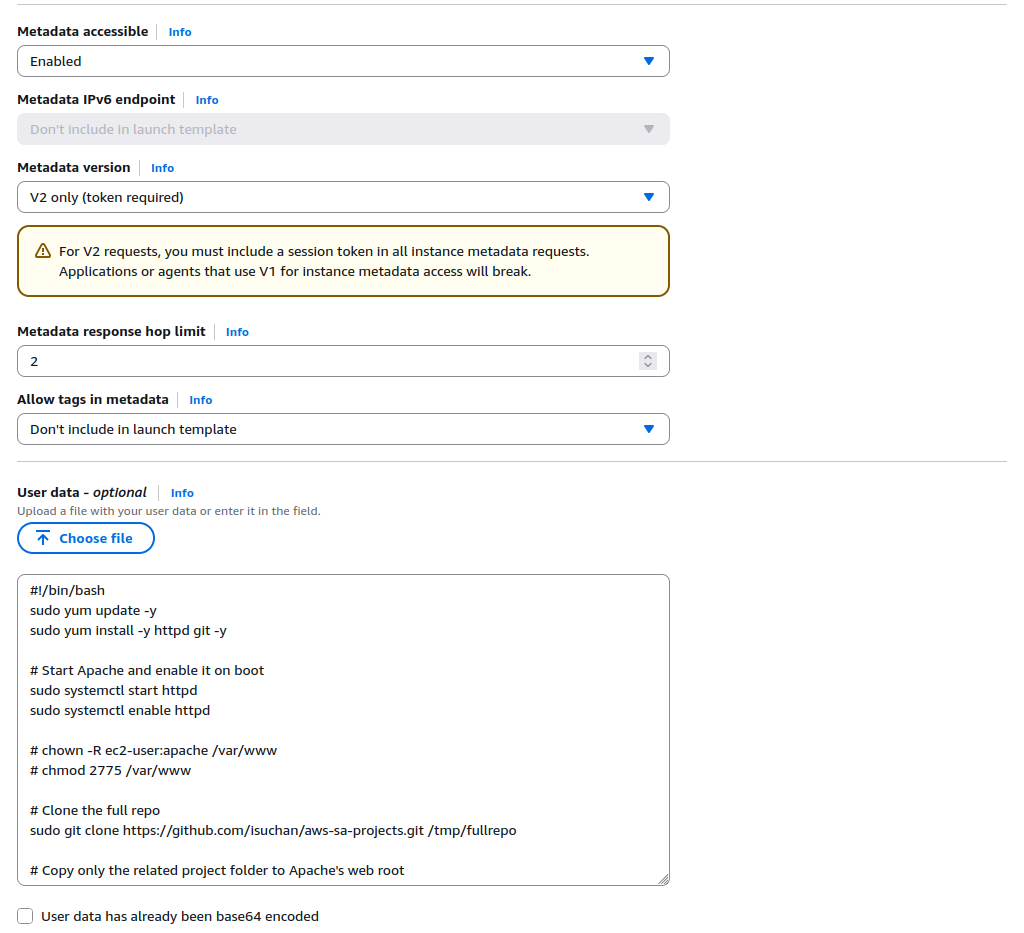
- Go to Advanced details > UserData > Paste the following script:
#!/bin/bash
sudo yum update -y
sudo yum install -y httpd git -y

# Start Apache and enable it on boot
sudo systemctl start httpd
sudo systemctl enable httpd

# Clone the full repo to a temporary directory
sudo git clone https://github.com/isuchan/aws-sa-projects.git /tmp/fullrepo

# Copy only the project2 from master branch folder to Apache's web root
sudo cp -r /tmp/fullrepo/project-2/* /var/www/html

# Restart Apache to serve the new content
sudo systemctl restart httpd
Remember: please change the github repository URL above with your own
Step 2: Create a Target Group
A target group is used by the load balancer to route traffic only to healthy EC2 instances. It performs continuous health checks.
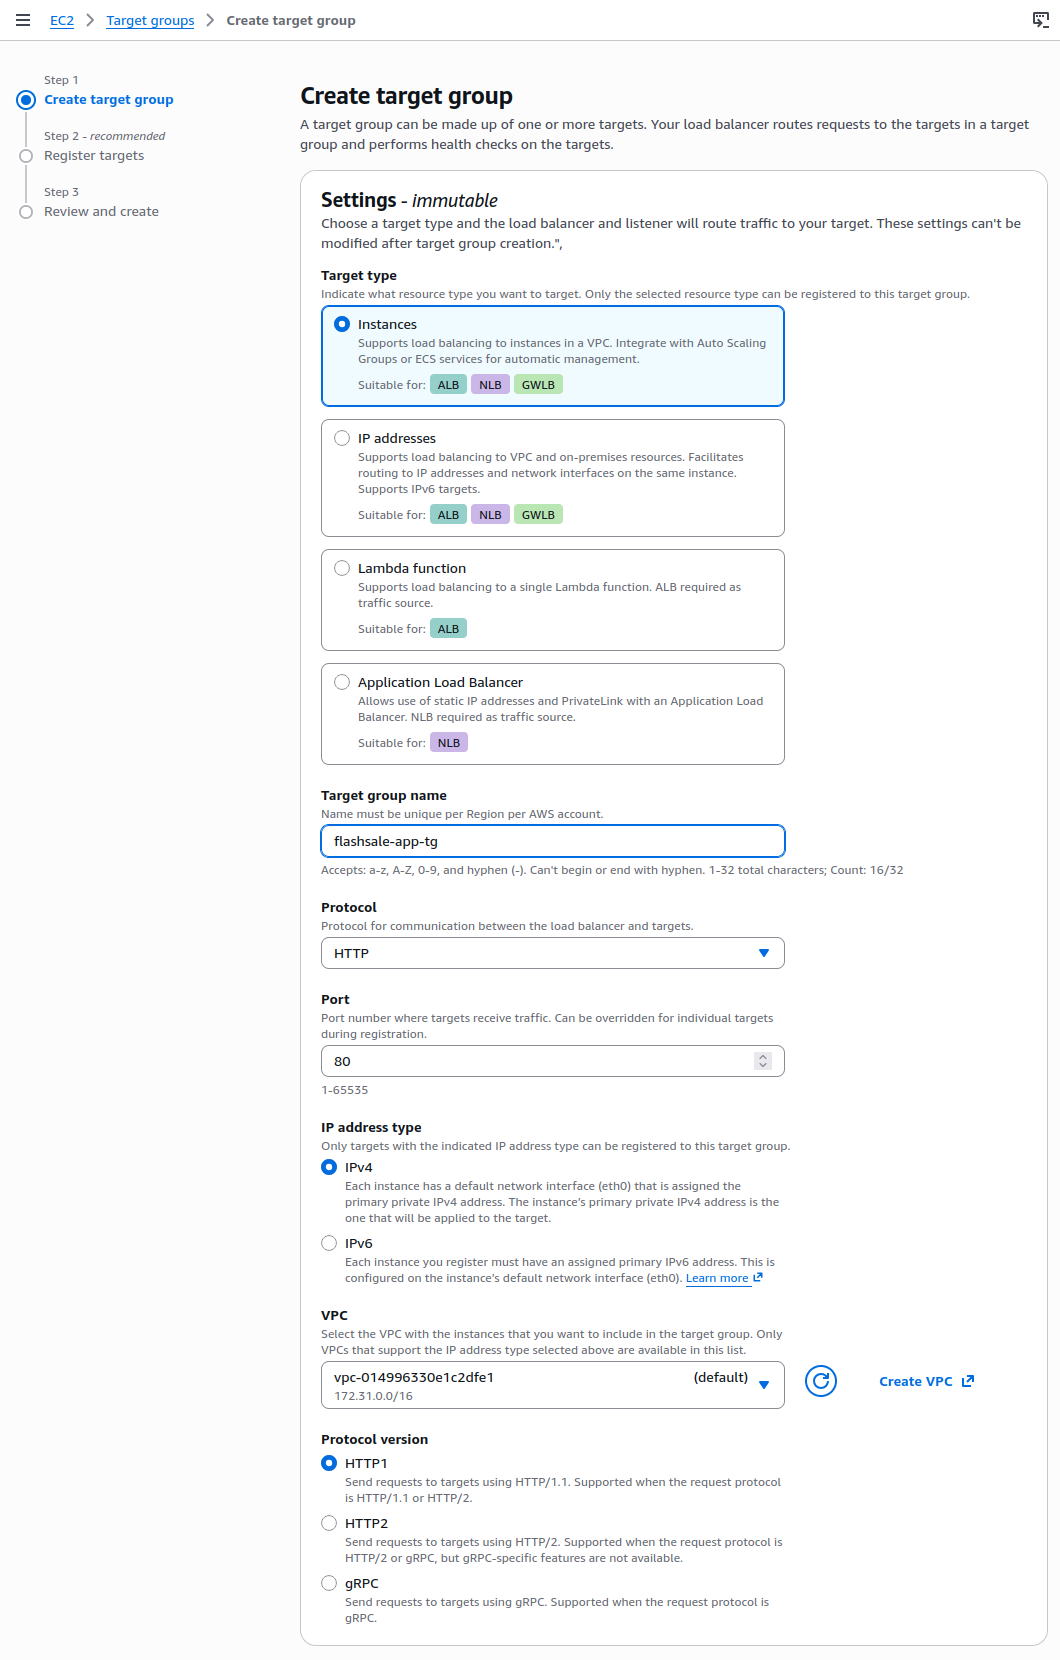
- Go to EC2, click Target Groups, click Create target group
- Choose:
- Target type: Instance
- Protocol: HTTP
- Port: 80
- VPC: Select your default or custom VPC
- Name the group:
flashsale-app-tg
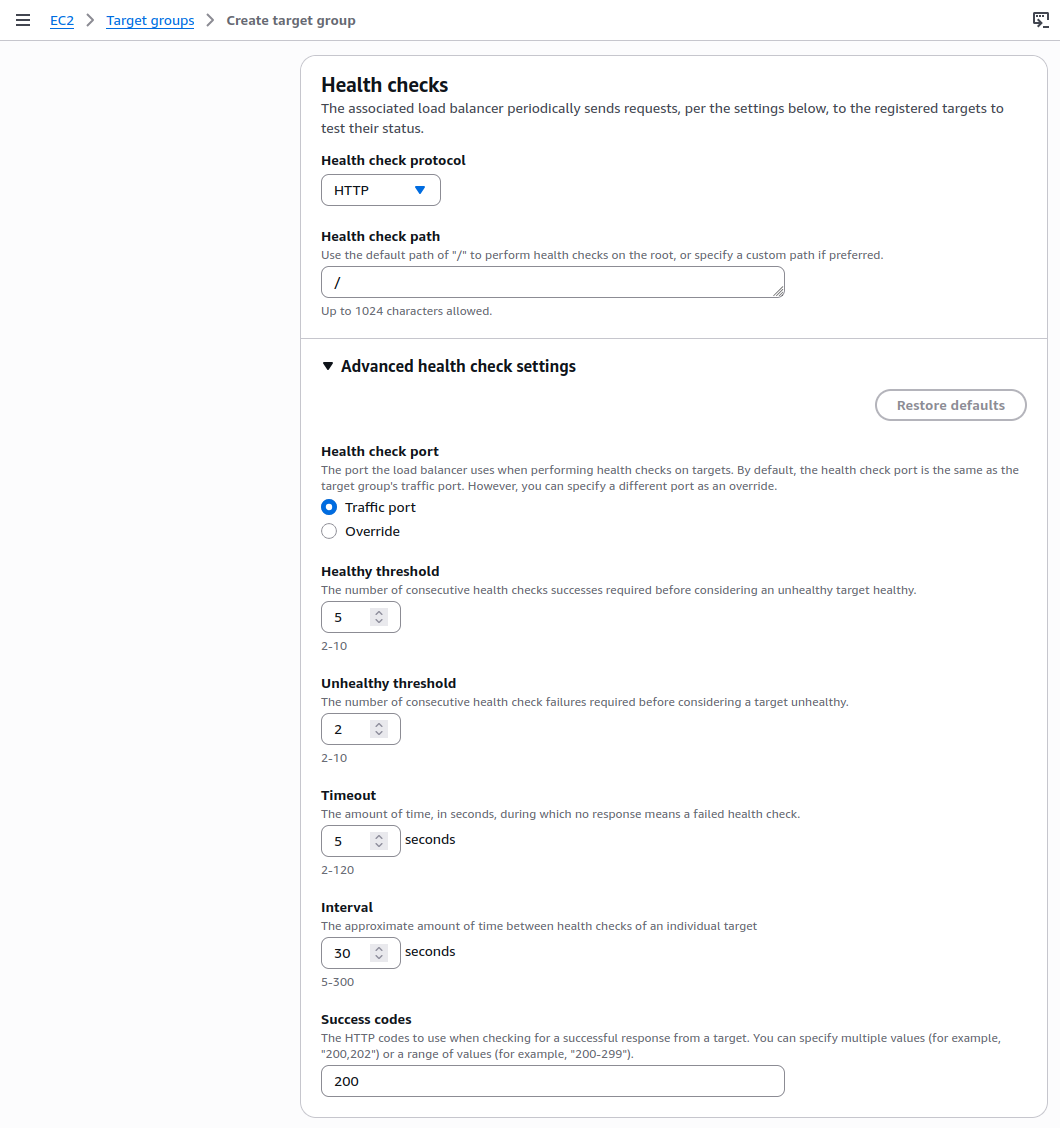
- Health Check Settings:
- Path:
/ - Interval: 30 seconds
- Healthy threshold: 3
- Path:
- Unhealthy threshold: 2
Step 3: Create an Application Load Balancer (ALB)
The ALB receives traffic from the internet and forwards it to healthy EC2 instances across multiple AZs, ensuring both availability and load distribution.
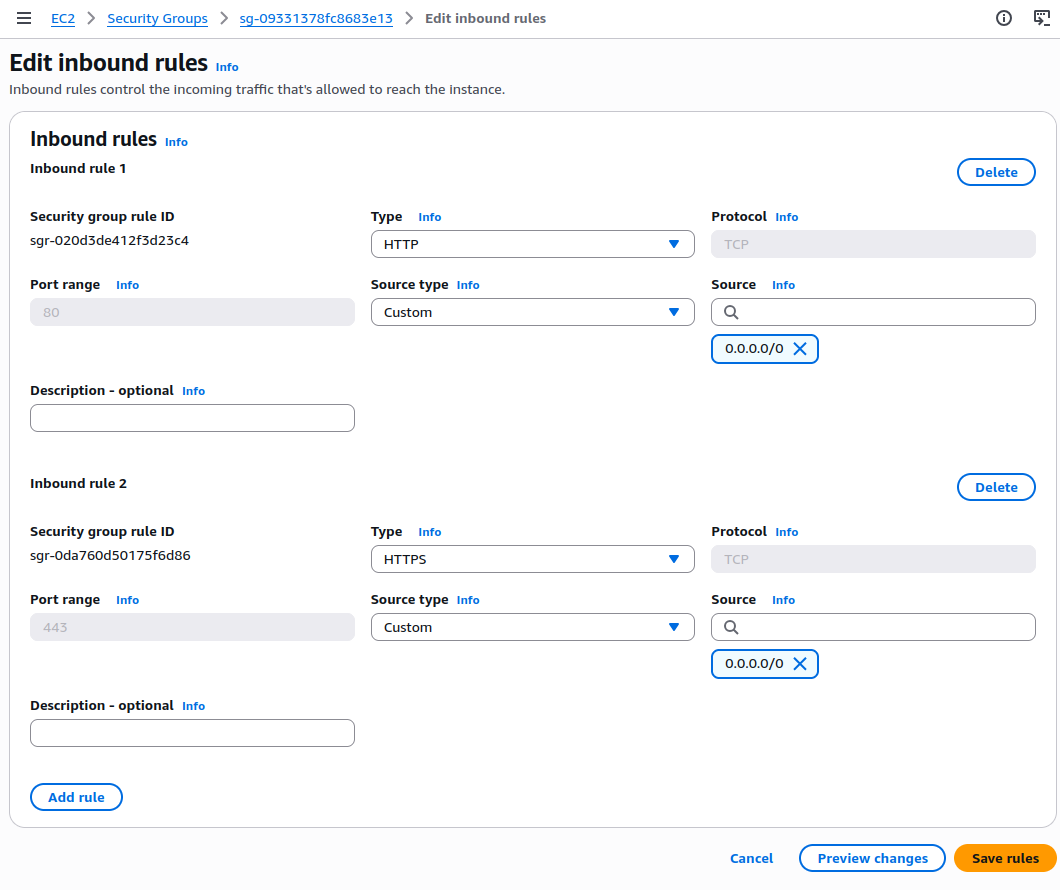
Firstly, let’s create the security group for the ALB.
- Visit EC2, click Security Groups, click Create security group
- Name: alb-sg
- Setup the following inbound rules for port 80:
- Type: HTTP
- Port: 80
- Source:
0.0.0.0/0(allows public access to ALB)
- And for port 443
- Type: HTTPS
- Port: 443
- Source:
0.0.0.0/0(allows public access to ALB)
- Setup the following outbound rules (important!)
- Type: HTTP
- Port: 80
- Source: select flashsale-sg (ensure the outbound traffic only goes to ASG)
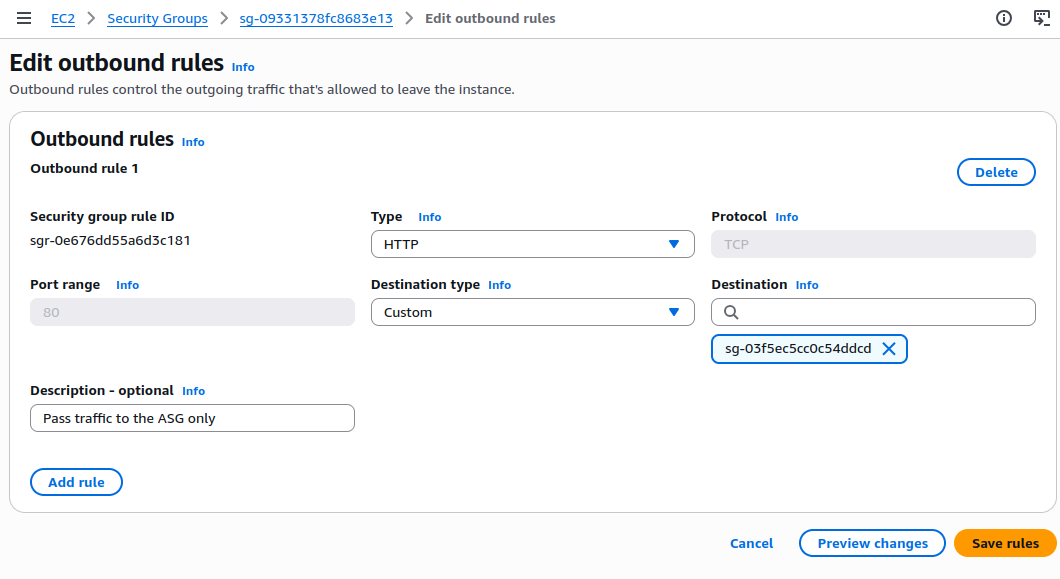
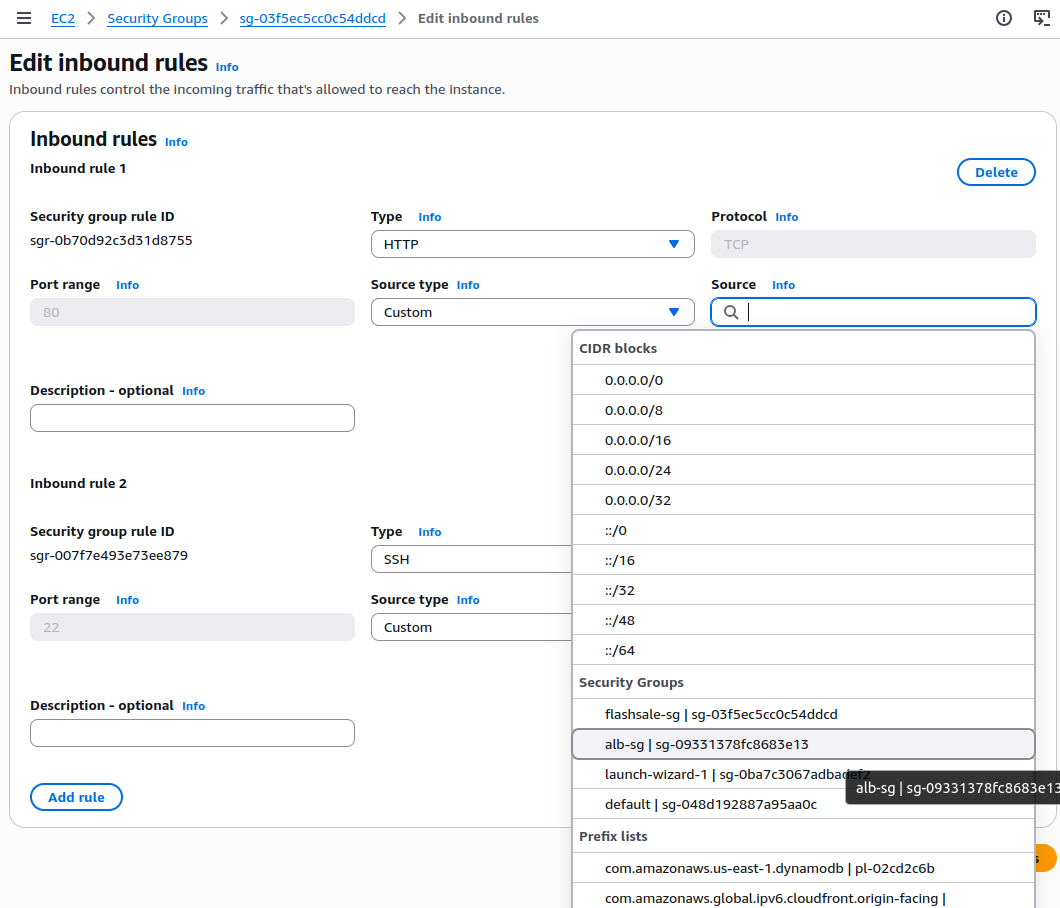
After that, we return back to the flashsale-sg and edit it the inbound rule to only accept the traffic from the chosen ALB
- Visit EC2, click Security Groups, click flashsale-sg
- Type: HTTP
- Port: 80
- Source Type: Custom
- Source: (select from source list alb-sg)
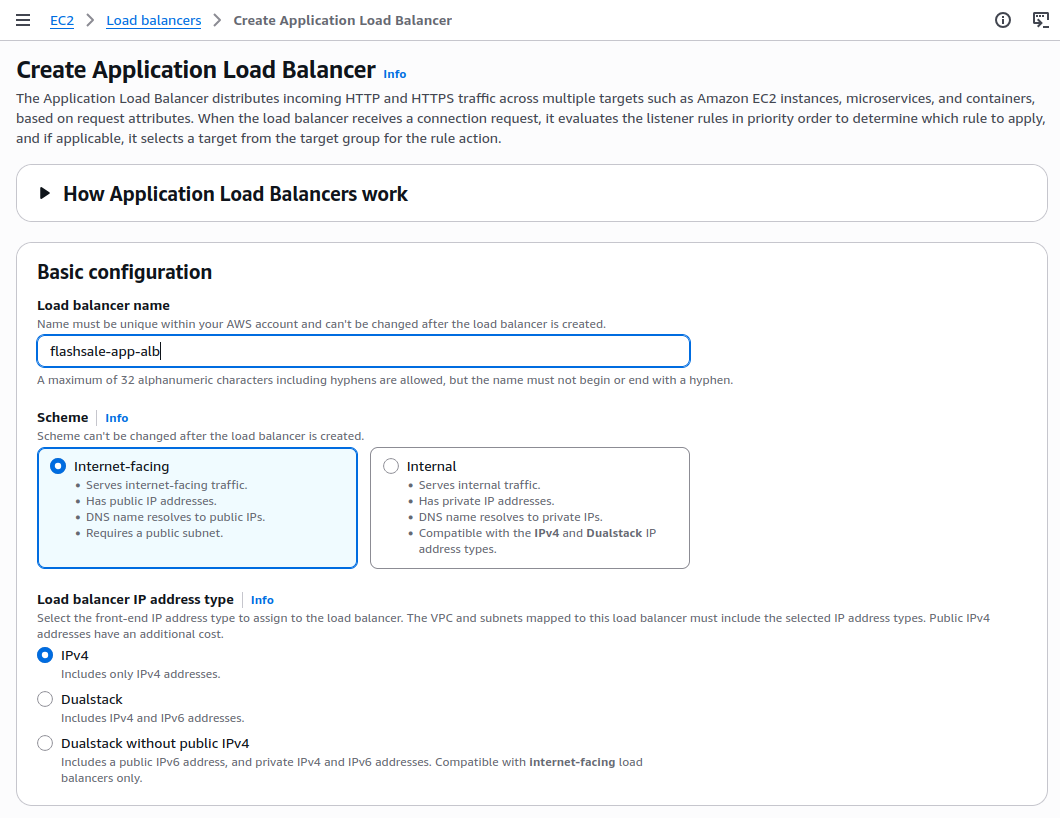
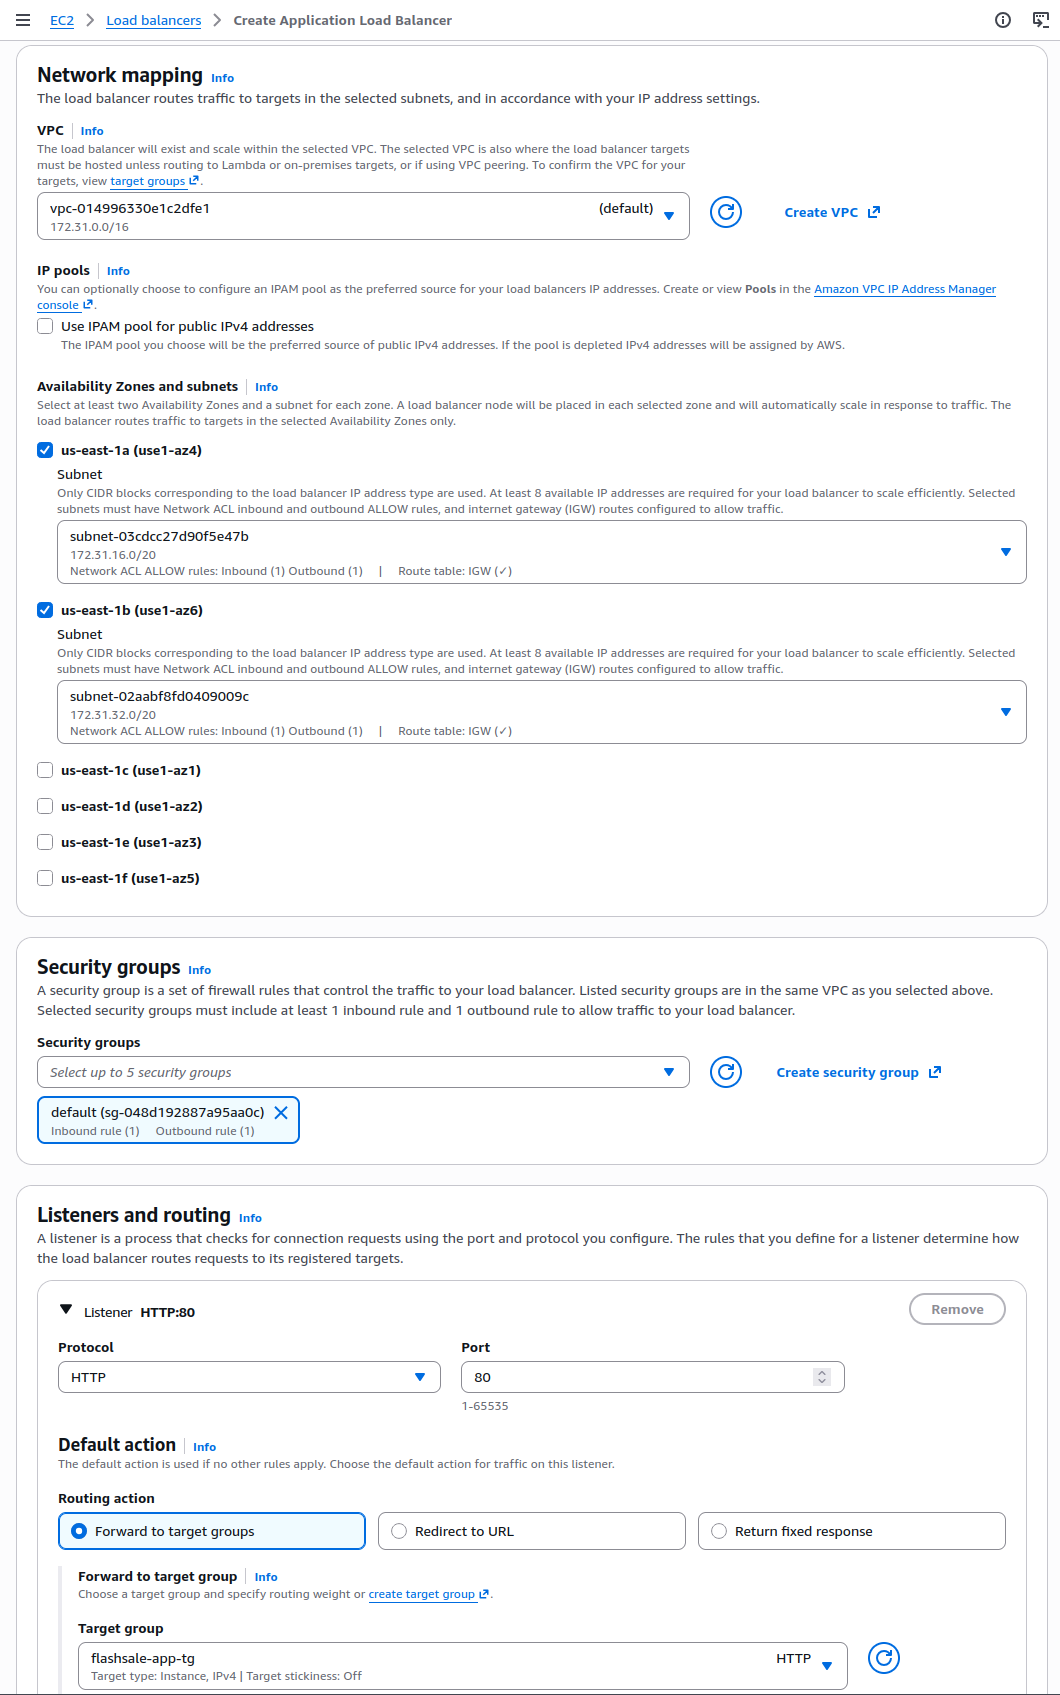
Next, we start to create the load balancer (ALB)
- Visit EC2, click Load Balancers, click Create Load Balancer
- Choose Application Load Balancer and then fill in the following:
- Name:
flashsale-app-alb - Scheme: Internet-facing
- IP address type: IPv4
- Name:
- Availability Zones: Select at least two AZs
- Listeners: Add one listener on HTTP (port 80)
- Under Target Group, select
flashsale-app-tg
Step 4: Create the Auto Scaling Group (ASG)
Auto Scaling helps maintain the desired number of EC2 instances at all times. If an instance becomes unhealthy, it is automatically replaced. If traffic increases, more instances can be added based on defined rules.
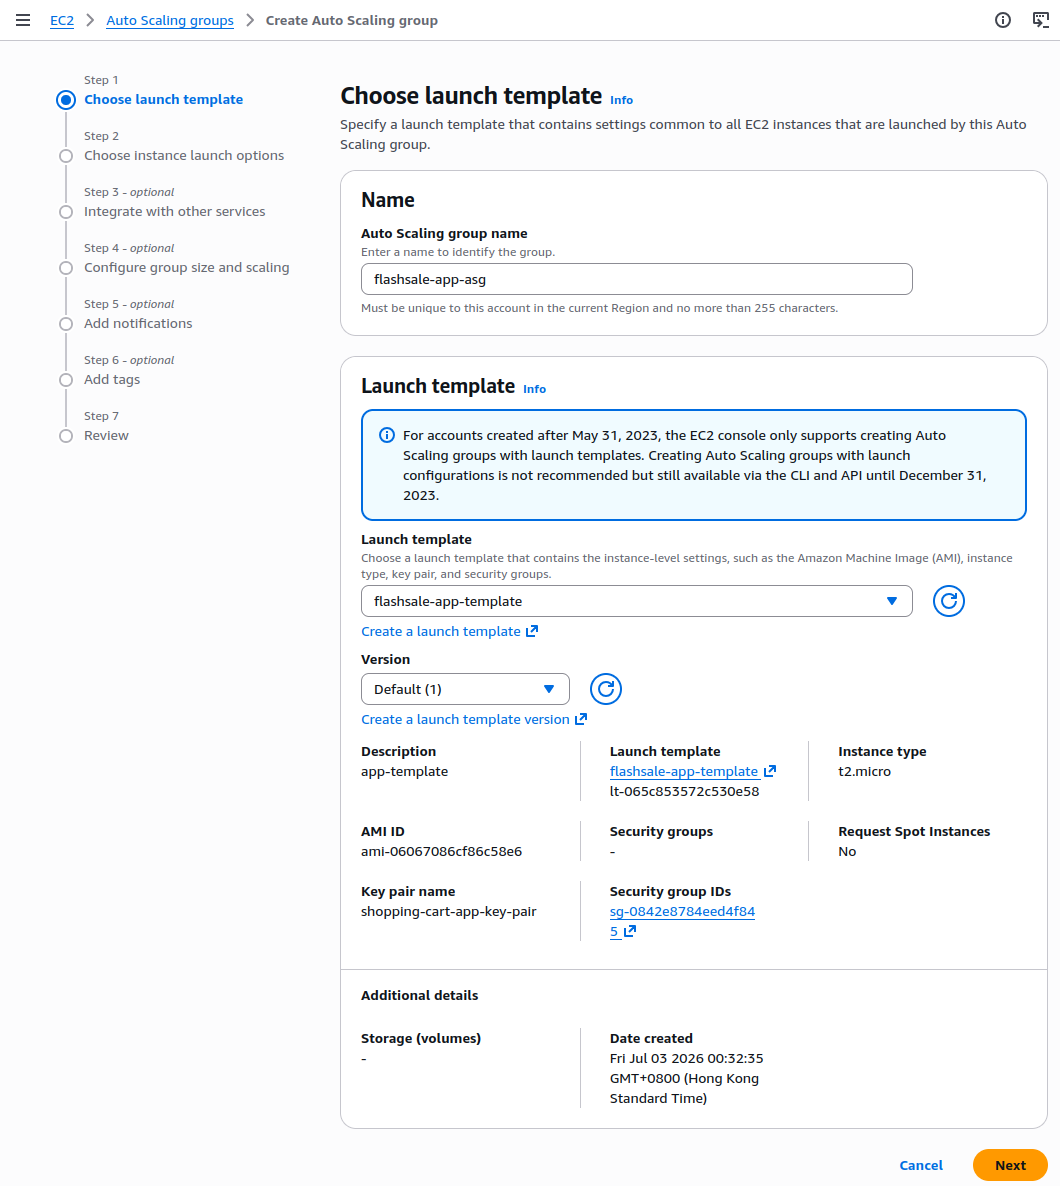
- Go to EC2, click Auto Scaling Groups, click Create Auto Scaling Group and then Fill in:
- Name:
flashsale-app-asg - Launch Template: Select
flashsale-app-template
- Name:
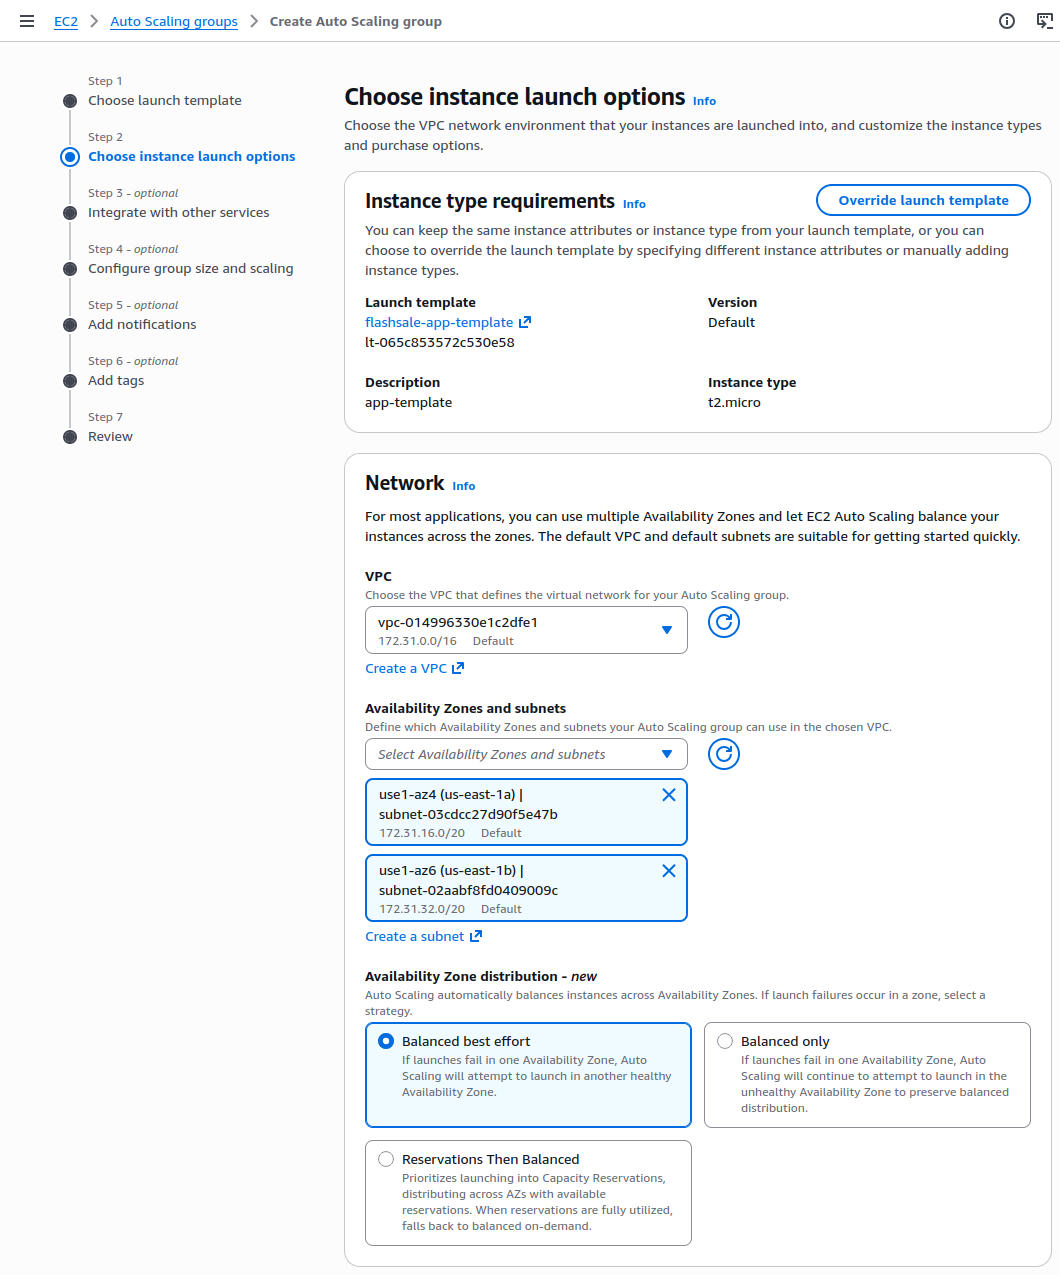
- Availability Zones: Select two AZs in our region
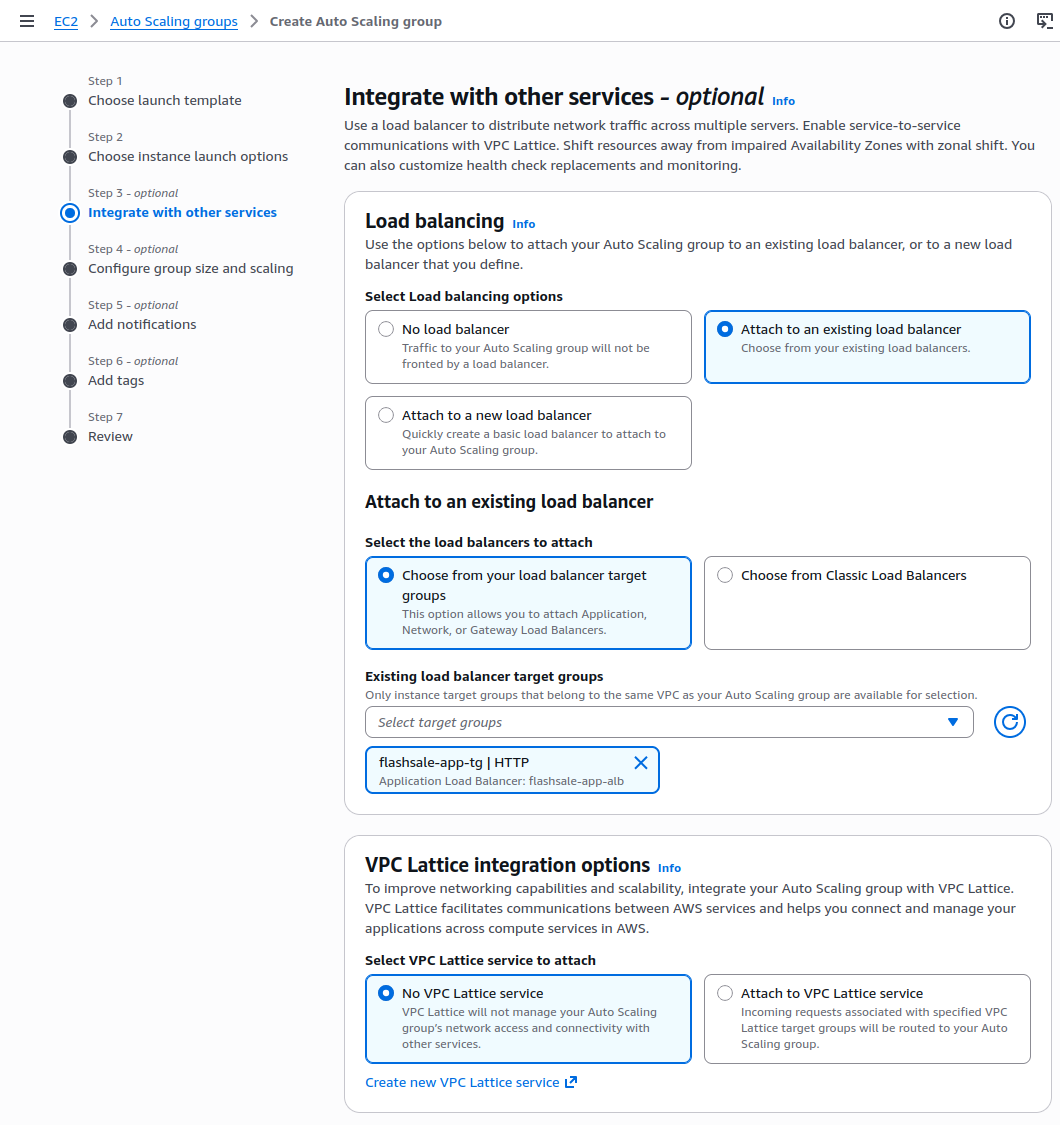
- In the Load Balancing section:
- Attach to an existing Application Load Balancer
- Choose
flashsale-app-alband selectflashsale-app-tgas the target group
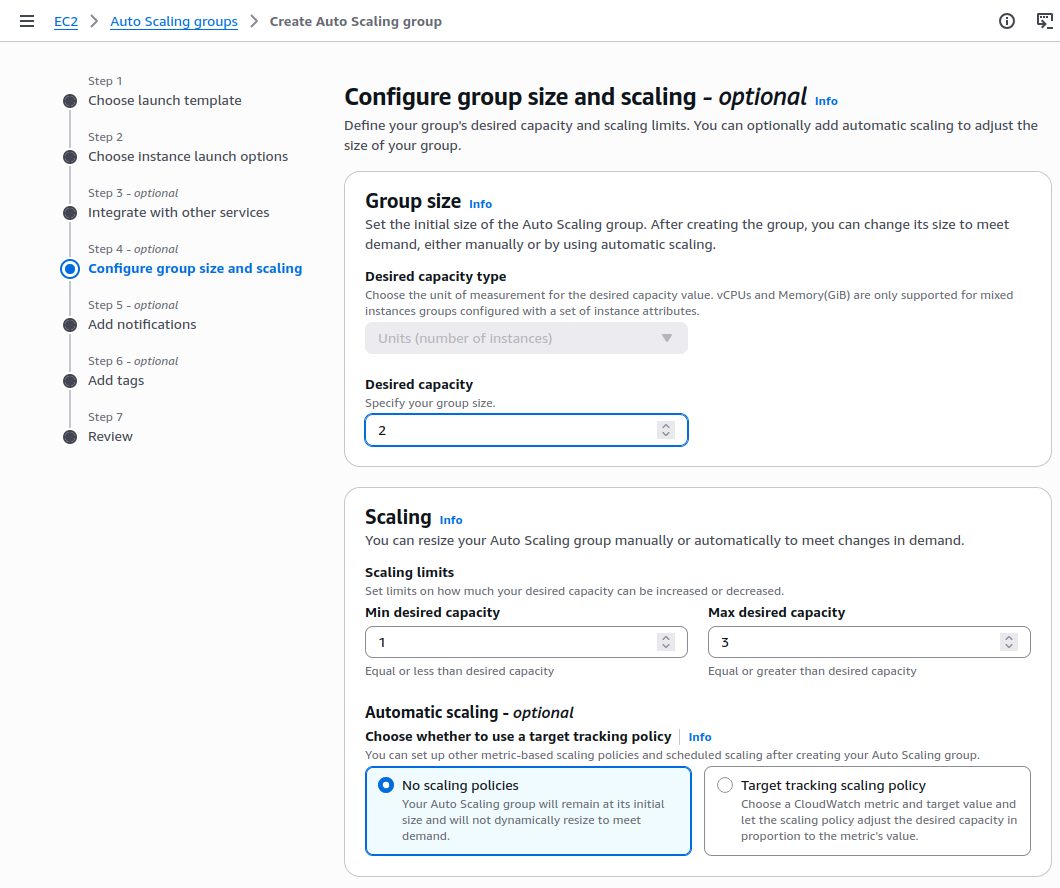
- Configure desired capacity:
- Desired: 2 instances
- Minimum: 1 instance
- Maximum: 3 instances
- Leave advanced scaling policies as default (we’ll configure CloudWatch later)
- Click Create Auto Scaling Group
Step 5: Verify the Application
Once the Auto Scaling Group and its EC2 instances are active, we can verify if the application is running by accessing them through ALB
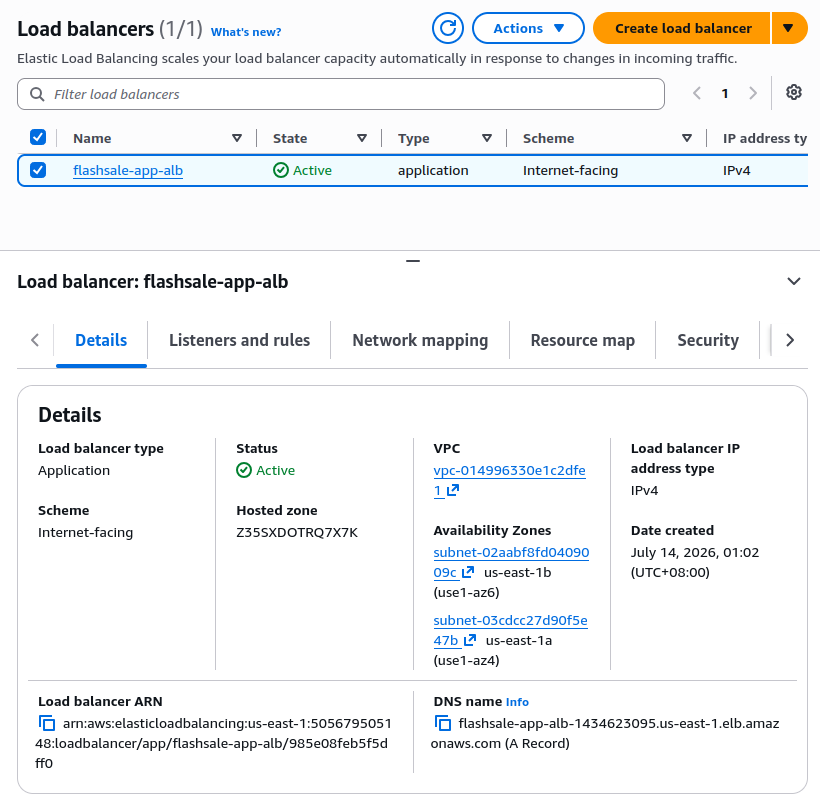
- Select to EC2, click Load Balancers
- Select
flashsale-app-alb - In the Description tab, copy the DNS name (e.g.,
flashsale-app-alb-1434623095.us-east-1.elb.amazonaws.com)
- Select
And open it on the browser
http://flashsale-app-alb-1434623095.us-east-1.elb.amazonaws.com/And the application should be showing like below

Summary
In this part, we have setup the foundation for a highly available and auto-healing compute layer.
- If one instance failes, ASG will replace it
- If demand spikes, more instances can be added automatically
- The ALB keeps traffic flowing only to healthy instances
- The setup spans multiple AZs for fault tolerance
In part 2, we’ll build the application backend by deploying a multi-AZ RDS instance as the database to simulate the whole architecture