As an integral part of most application, database is such a crucial part where it also need a resilience design and implementation. In this part, we will setup a secure multi-AZ enabled Amazon RDS for the Flash Sale app where it can only be accessed from the EC2 instances. The scope of RDS in this project is to simulate the usage of database since the Flash Sale application is a front-end app only.
Step 1: Launch Multi-AZ RDS Instance – Highly Available Database Layer
The multi-AZ enabled RDS ensures automatic fail-over to the standby replica in another AZ during maintenance or outages.
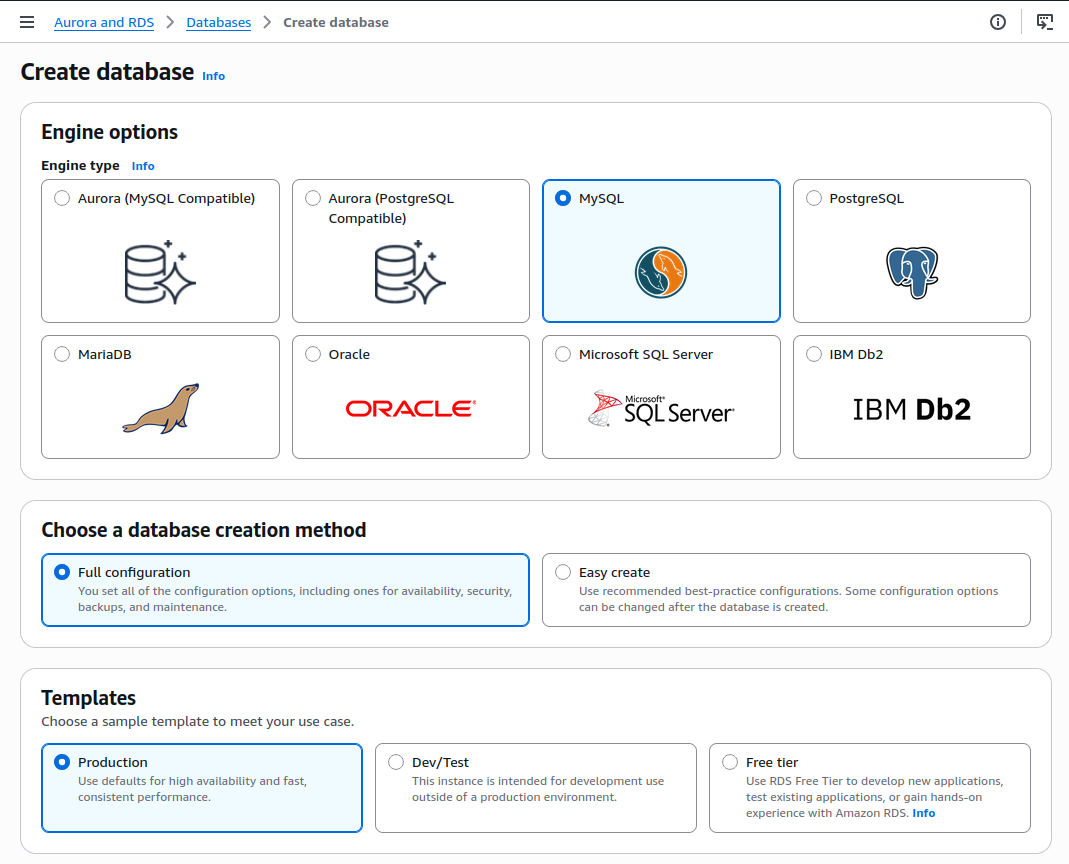
- Visit to RDS Dashboard, click Create database (Choose full configuration)
- Engine options:
- Engine: MySQL
- Use template: Production
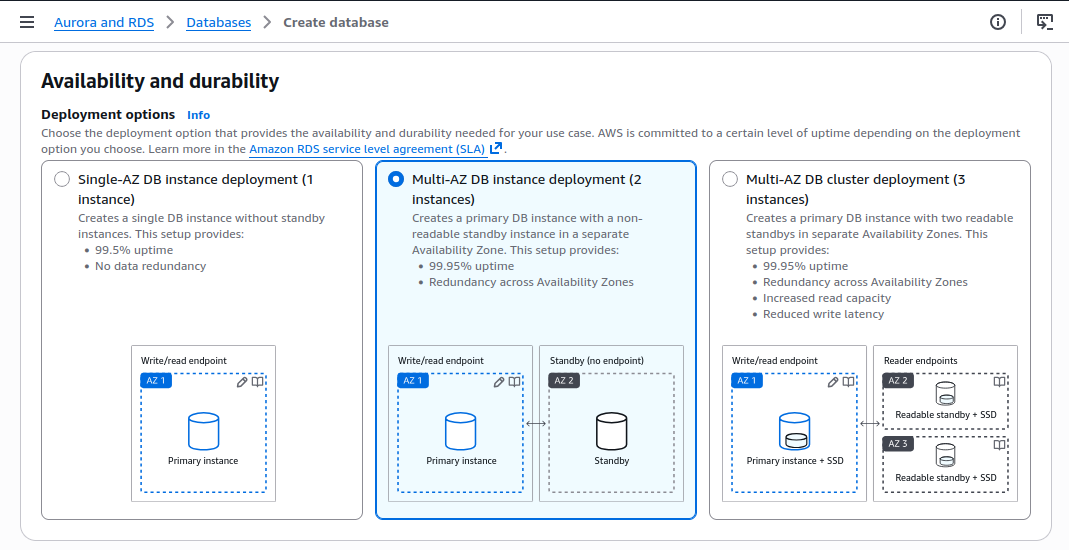
- Deployment Options: Multi-AZ DB cluster deployment (2 instances)
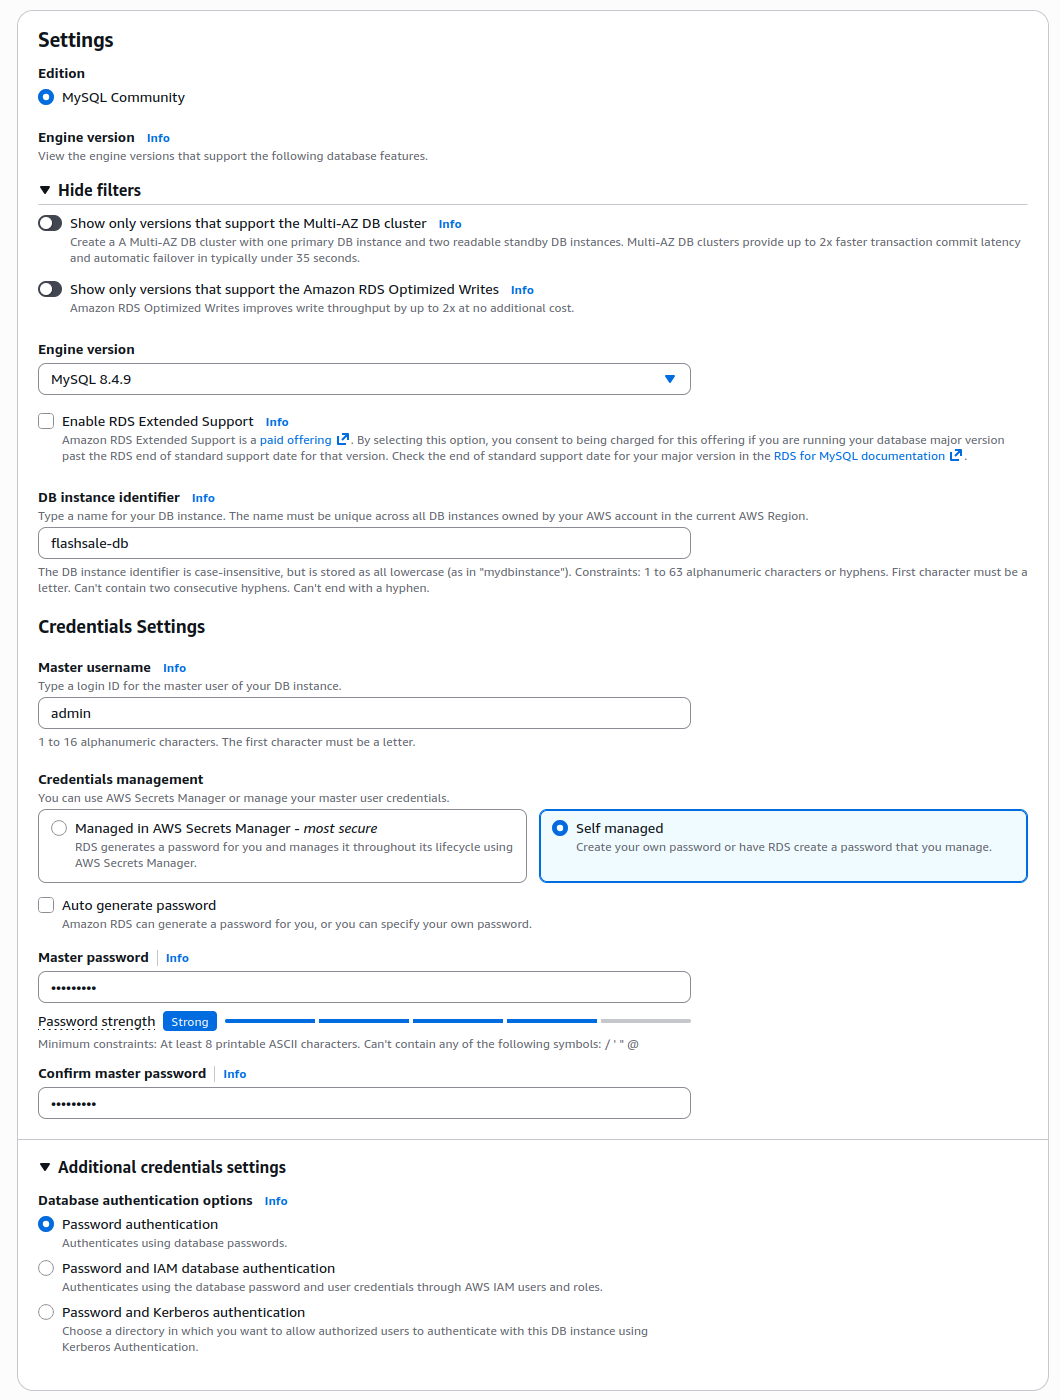
- Settings:
- DB instance identifier:
flashsale-db - Master username:
admin - Master password: Self-managed >
yoursecurepassword(for prod implementation, please always use strong password. This is only for demonstration)
- DB instance identifier:
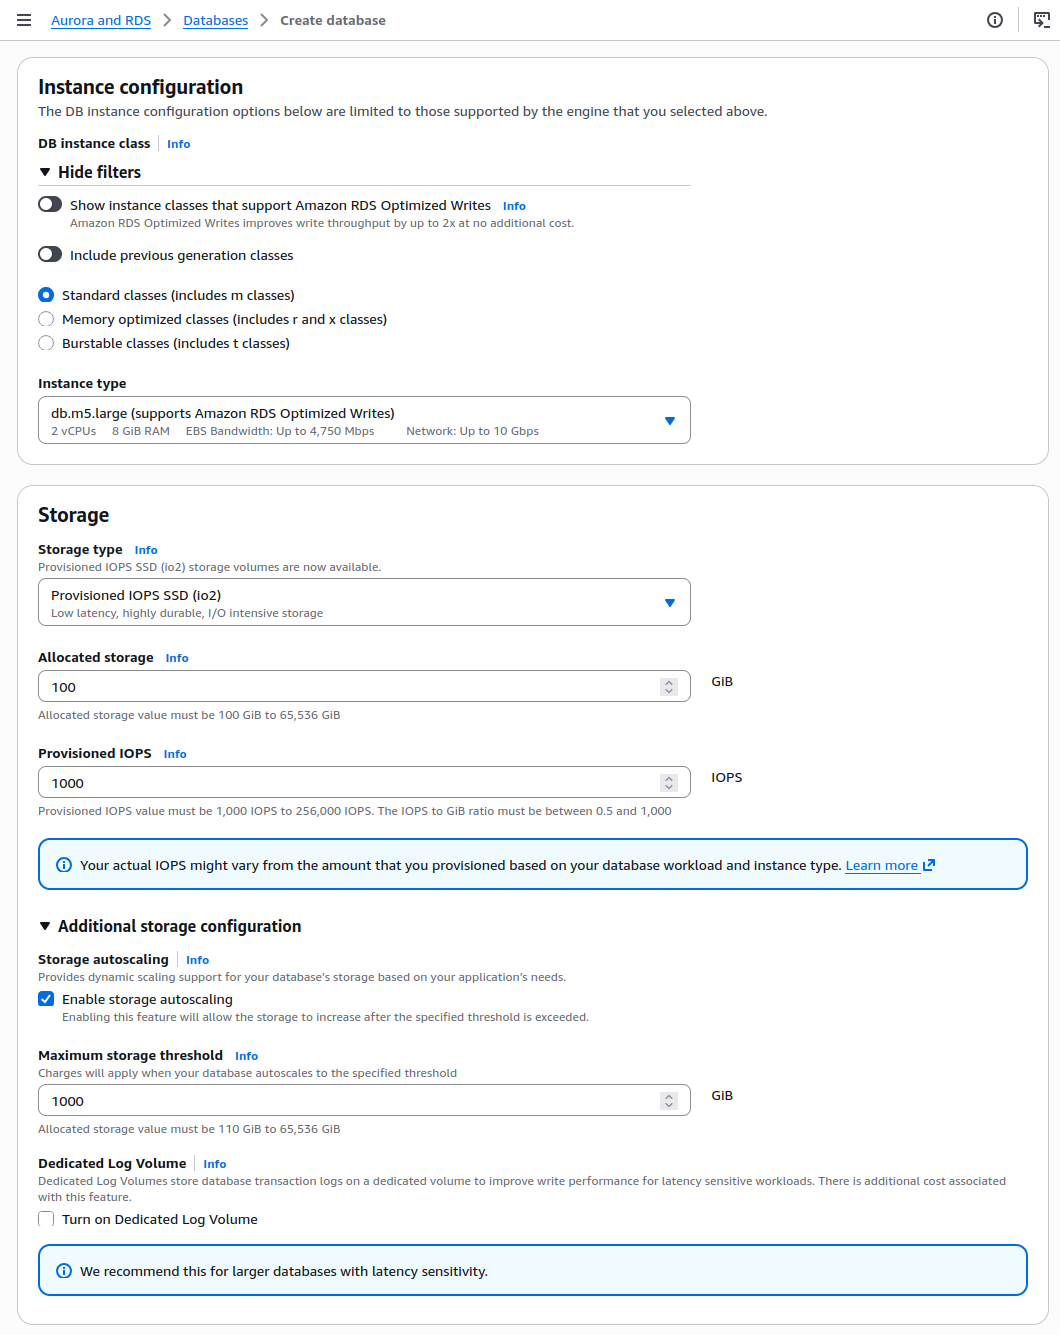
- Connectivity:
- VPC: Choose your VPC (default or custom)
- Subnet group: Use default or create one if needed
- Public access: No
- VPC security group: Create a new security group (e.g.,
rds-db-sg)- Skip the inbound rules configuration for now — we’ll update them in the next step to allow access from the EC2 security group
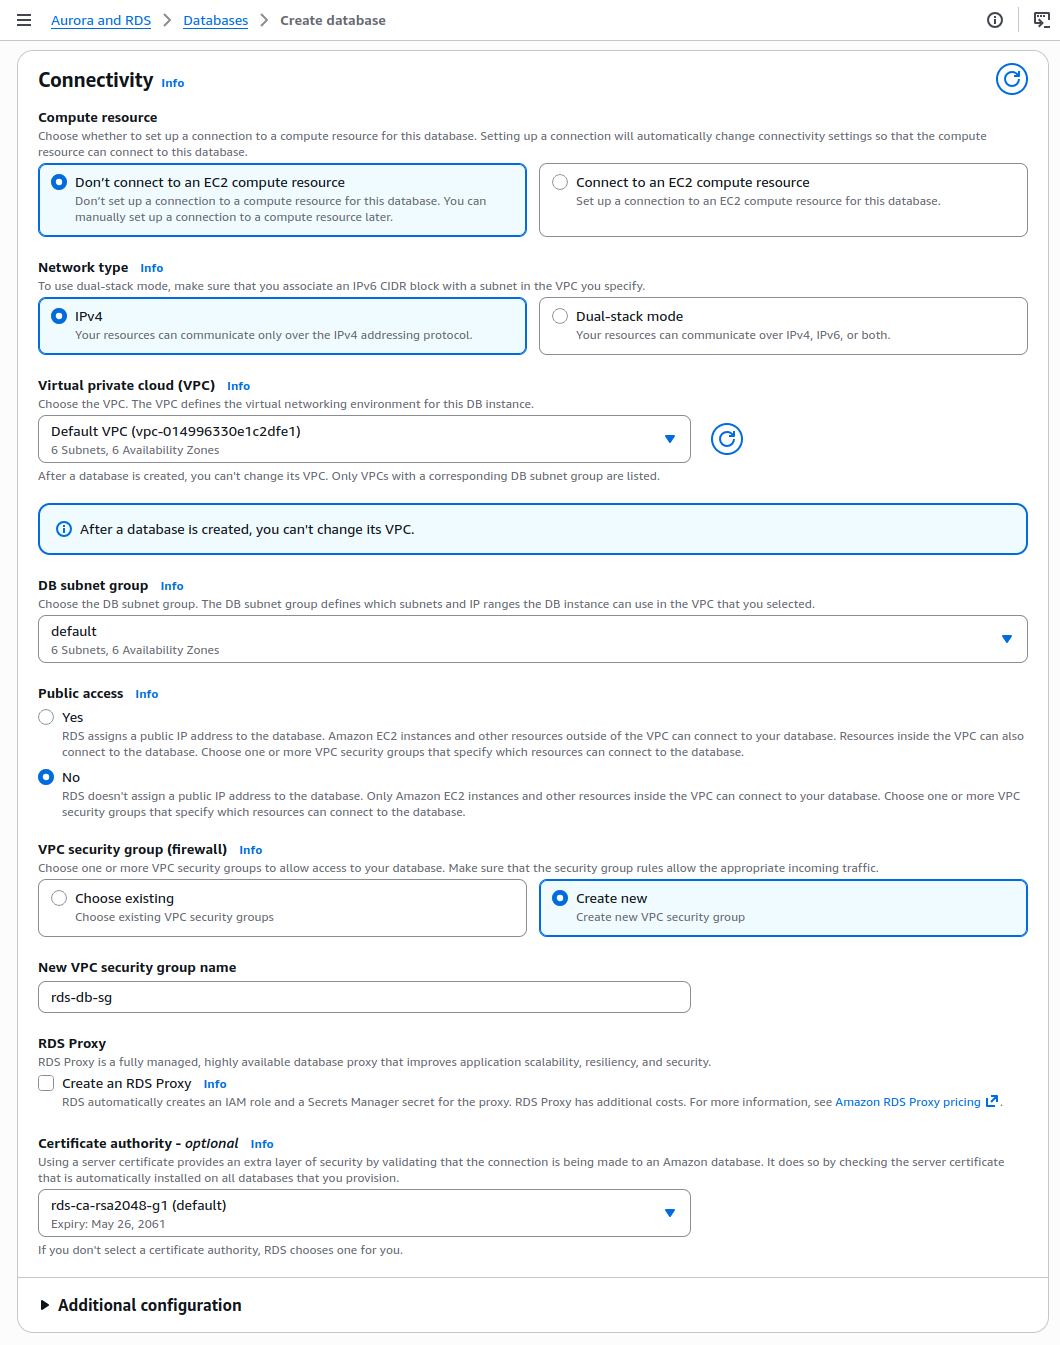
Step 2: Setup and Update RDS Security Group
The goal of this step is we need to ensure only EC2 instances (within ASG) can have the access to RDS Database
- Visit EC2, click Security Groups
- Locate the security group attached to our EC2 Launch Template
- Copy its Security Group ID
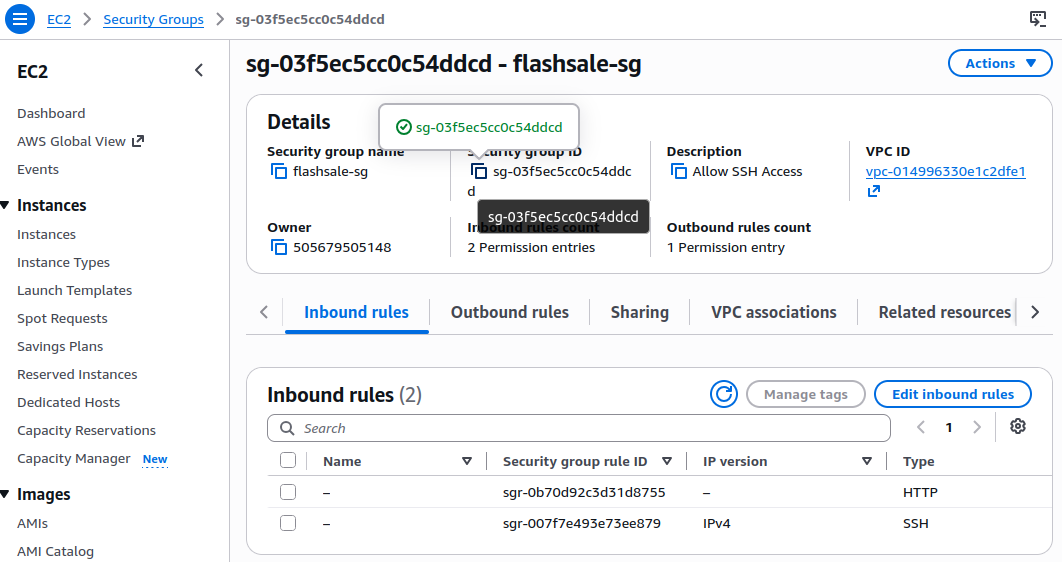
- Now edit the RDS DB Security Group:
- Visit RDS, click Databases, Select our DB, View Security groups rules
- Click the linked security group name (i.e.: rds-db-sg)→ Inbound rules → Edit inbound rules
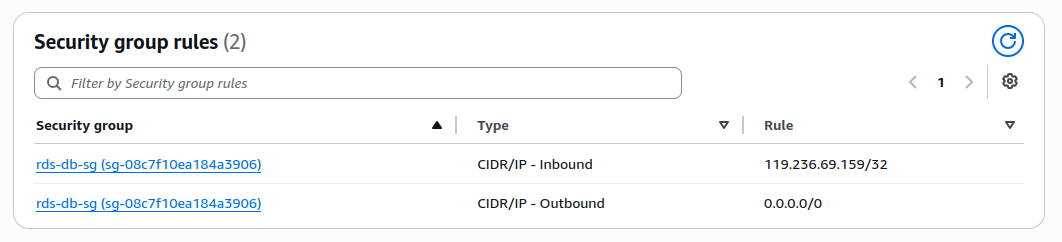
- Add a new rule:
- Type: MySQL/Aurora
- Port:
3306
- Source: Custom → Paste EC2 Security Group ID (e.g.,
sg-03f5ec5cc0c54ddcd)
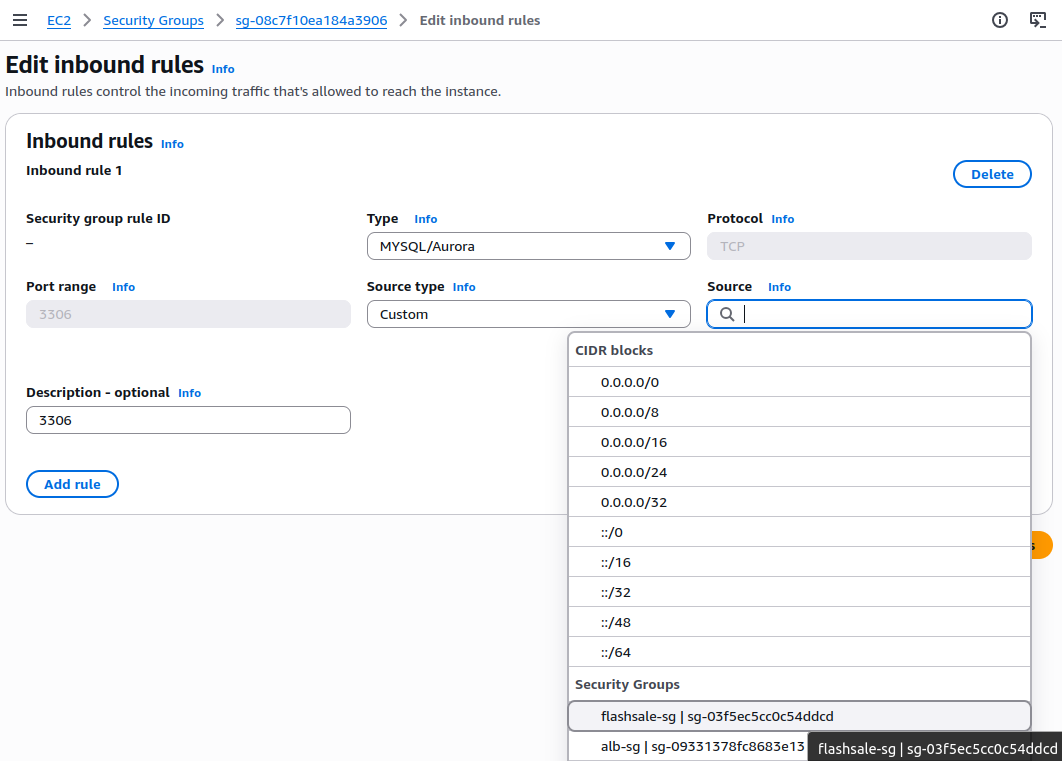
- Click Save rules
Step 3: Connect the application to RDS database
This is an optional step for this project scope. If our application has the backend logic (either written in Node.JS or PHP). For example, we can use the following steps to get the RDS credential for DB connection.
- Go to RDS, click Databases, select our RDS instance
- Copy the endpoint URL (e.g.,
flashsale-db.cet8q42samot.us-east-1.rds.amazonaws.com
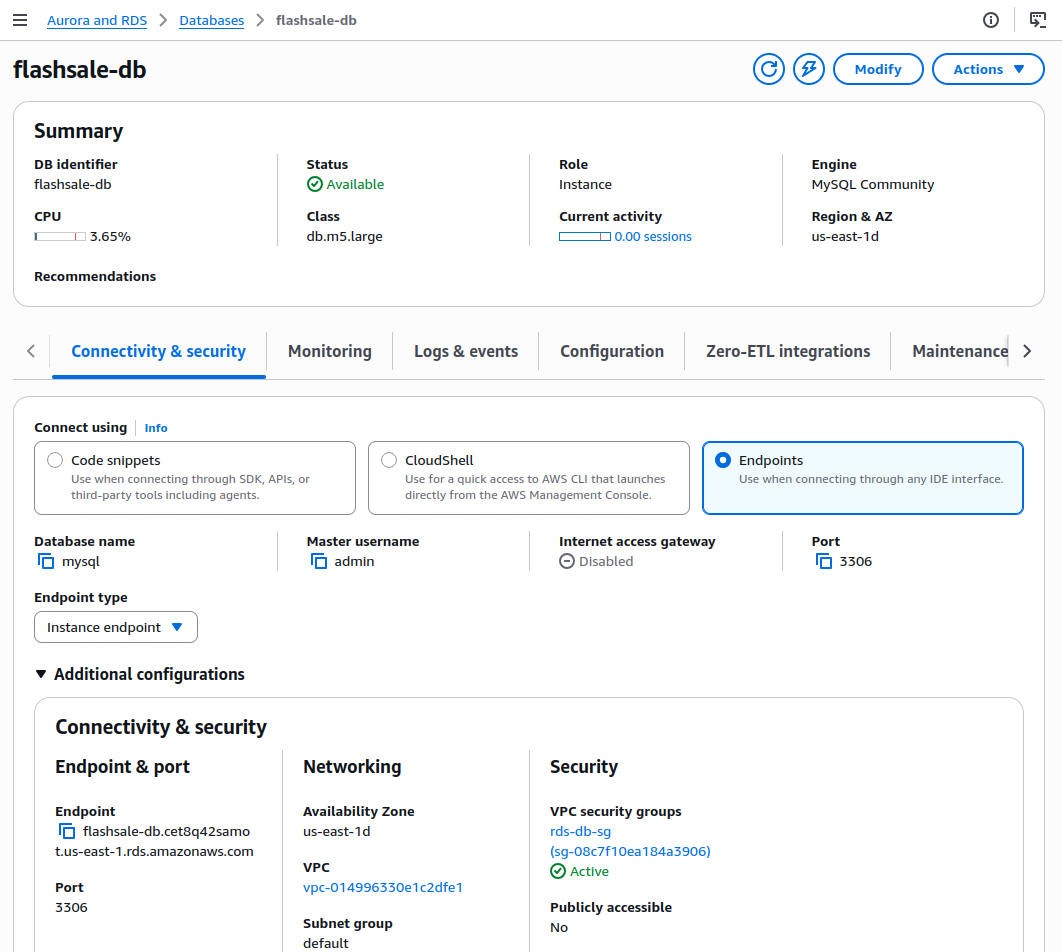
- If needed in the future, we can set the following environment variables in our app:
DB_HOST=flashsale-db.cet8q42samot.us-east-1.rds.amazonaws.comDB_PORT=3306
DB_USER=admin
DB_PASSWORD=<yourpassword>
DB_NAME=medical-db- Remember to re-deploy EC2 instances if we change config (ASG handles replacement automatically)
Summary
In this part, we have setup the foundation of highly available and failover-ready database layer
- Multi-AZ deployment with standby replica
- Restricted access via Security Groups
- Future-ready for backend integration
- Fault-tolerant and managed by AWS
In part 3, we’ll setup the DNS failover with Route53 where it is a good practice to ensure the ALB behind it is in healthy condition before forward the traffic further.