After intentionally deploy the insecure ShoppingCart application in the part 1, in the 2nd part, we will start to rebuild the proper architecture for with AWS security best practices. In essence, the goal of security pillar is to minimise risk by default through a layered security model such as: network isolation using private subnets, controlled access as the principle of least access through security groups, and AWS WAF to block common threats (i.e. SQL injection, XSS, malware, and IP bots)
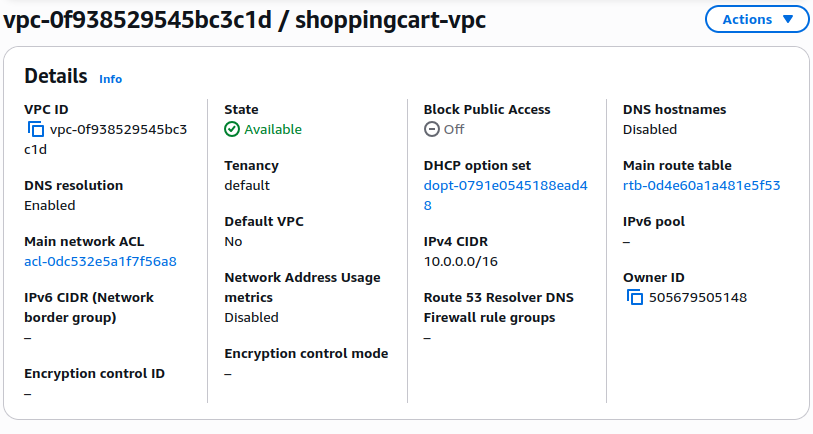
Step 1: Setup Secure Networking Using Custom VPC, Subnets, and Gateways
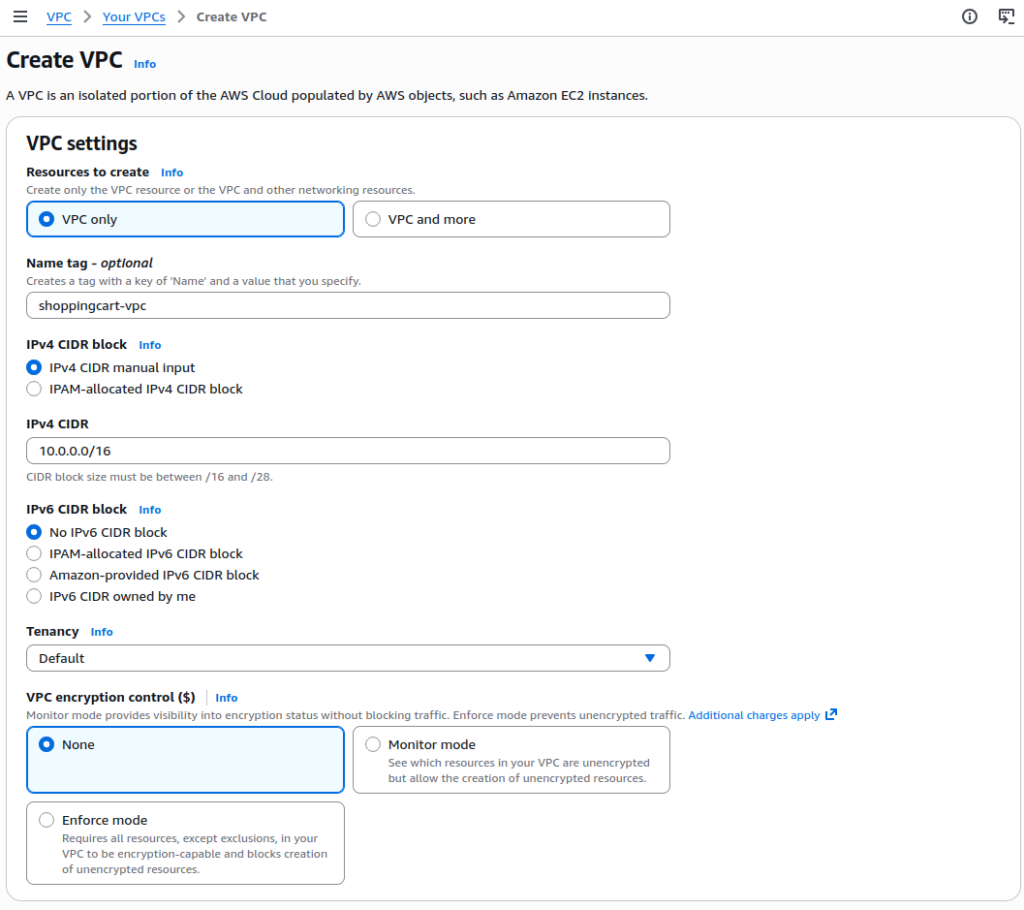
- Go to the VPC Dashboard, click Create VPC
- VPC Settings:
- Name tag:
shoppingcart-vpc - Resource to create: VPC only
- IPv4 CIDR block:
10.0.0.0/16 - IPv6 CIDR block: No IPv6 CIDR block
- Tenancy: Default
- Name tag:
Step 2: Setup Public and Private Subnets
We’ll configure 4 subnets across two availability zones:
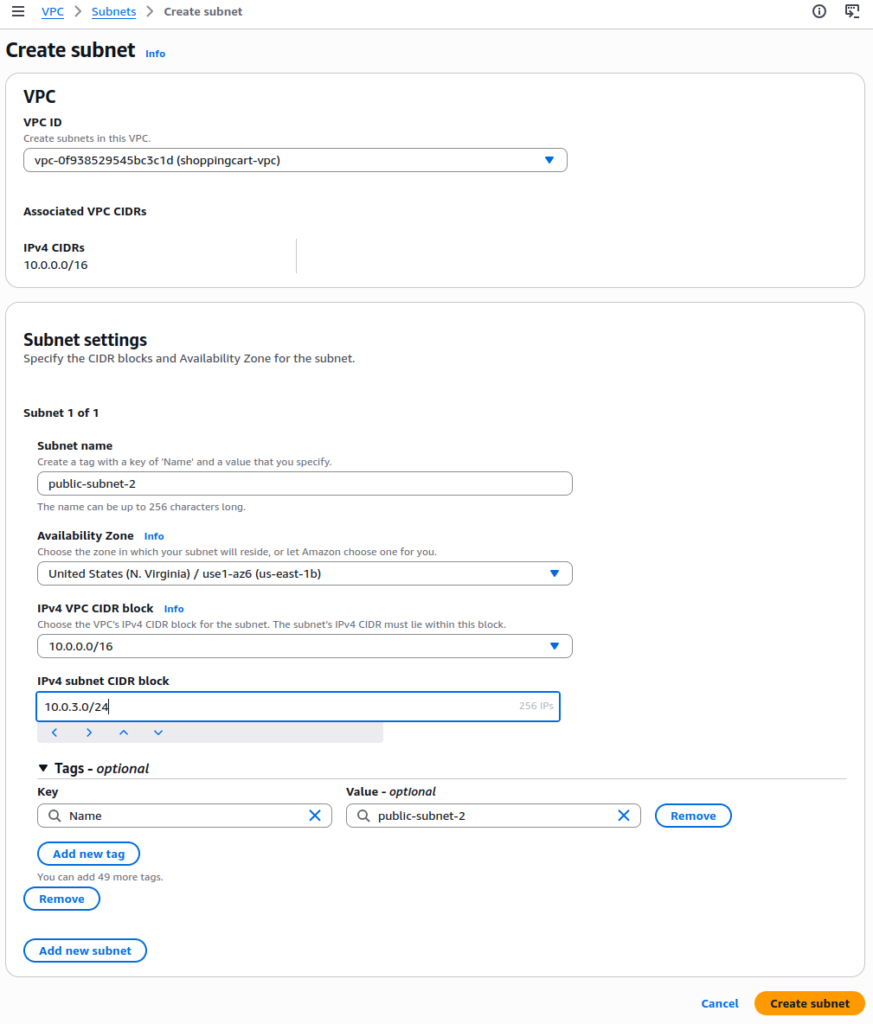
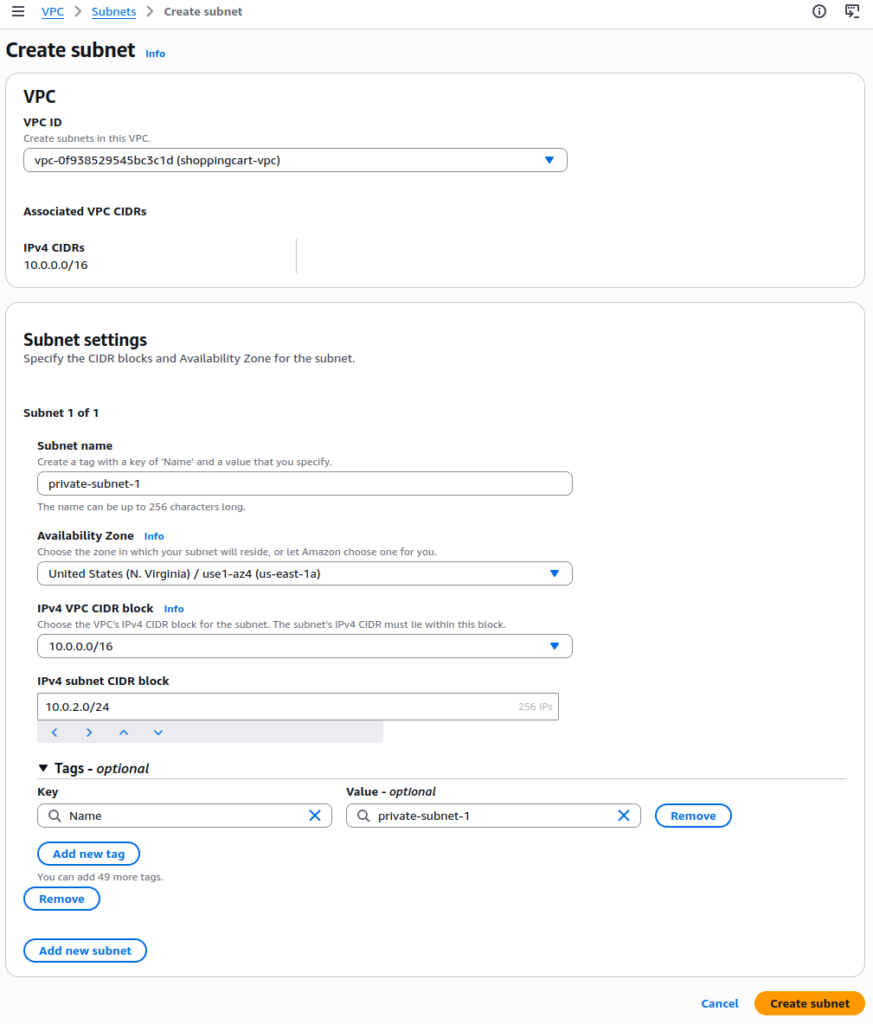
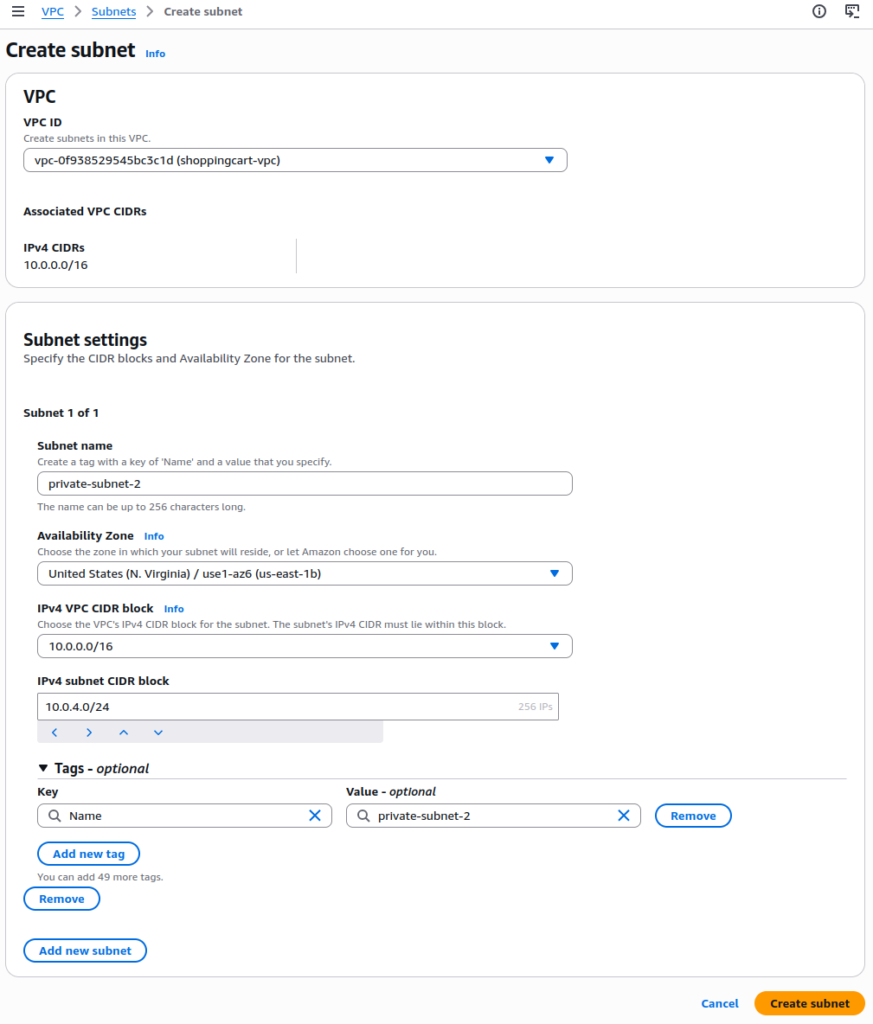
| Name | Availability Zone | CIDR Block | Type |
| public-subnet-1 | us-east-1a | 10.0.1.0/24 | ALB, NAT Gateway |
| public-subnet-2 | us-east-1b | 10.0.3.0/24 | ALB, NAT Gateway |
| private-subnet-1 | us-east-1a | 10.0.2.0/24 | App Servers |
| private-subnet-2 | us-east-1b | 10.0.4.0/24 | ALB, NAT Gateway |
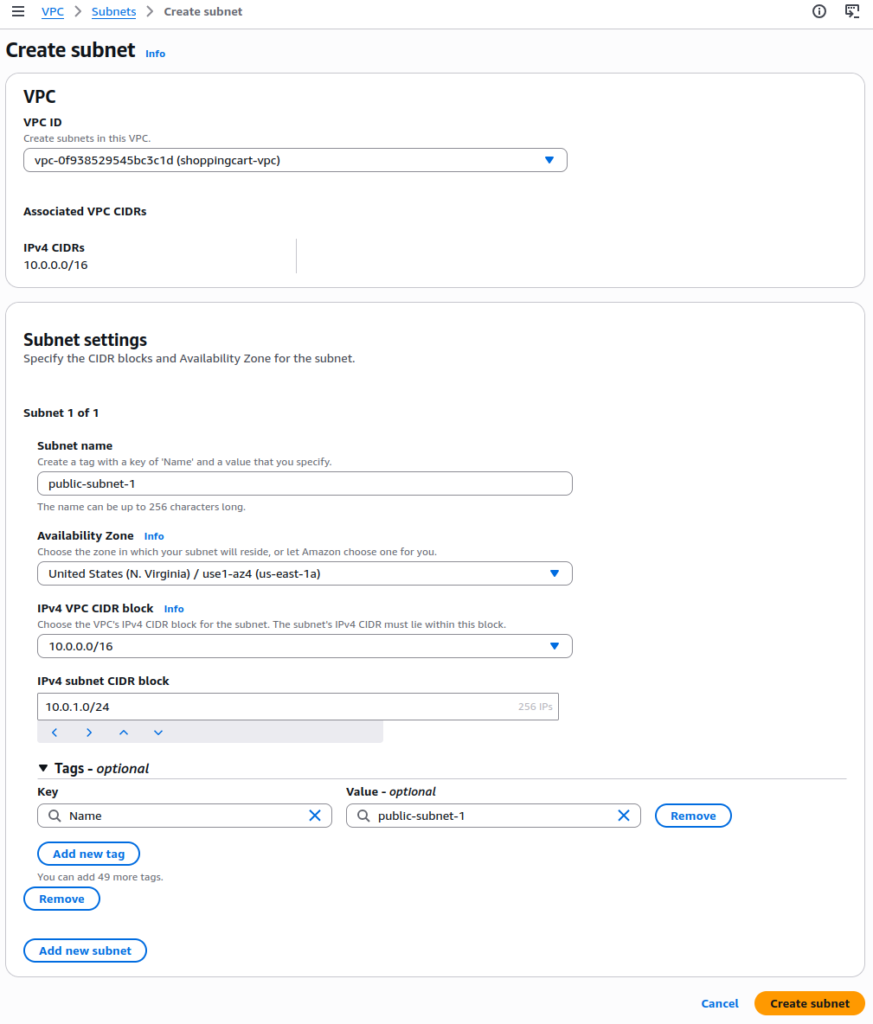
- Navigate to Subnets, click Create Subnet
- Select VPC: Choose
shoppingcart-vpc - Create each subnet with the specifications above
- For public-subnet-1:
- Subnet name:
public-subnet-1 - Availability Zone: us-east-1a
- IPv4 CIDR block:
10.0.1.0/24
- Subnet name:
- For public-subnet-2:
- Subnet name:
public-subnet-2 - Availability Zone: us-east-1b
- IPv4 CIDR block:
10.0.3.0/24
- Subnet name:
- For private-subnet-1:
- Subnet name:
private-subnet-1 - Availability Zone: us-east-1a
- IPv4 CIDR block:
10.0.2.0/24
- Subnet name:
- For private-subnet-2:
- Subnet name:
private-subnet-2 - Availability Zone: us-east-1b
- IPv4 CIDR block:
10.0.4.0/24
- Subnet name:
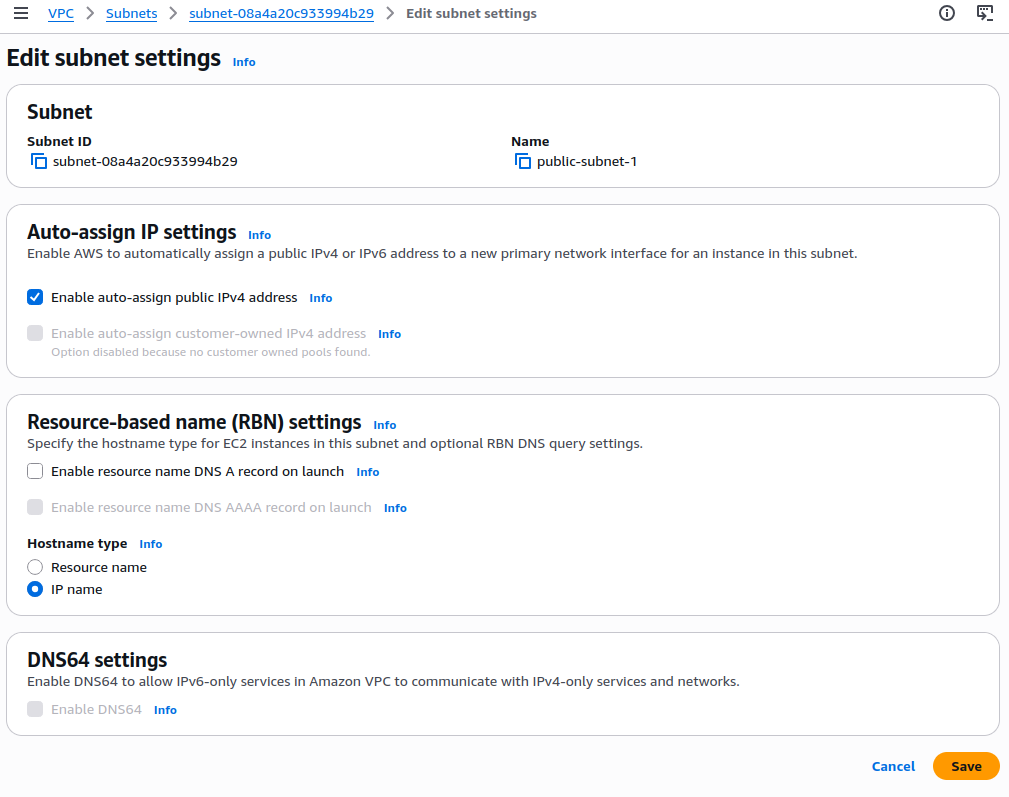
- Setup public IP for public subnets
- Select public-subnet-1, click Actions, click Edit subnet settings
- Check Enable auto-assign public IPv4 address
- Click Save
- Repeat for public-subnet-2
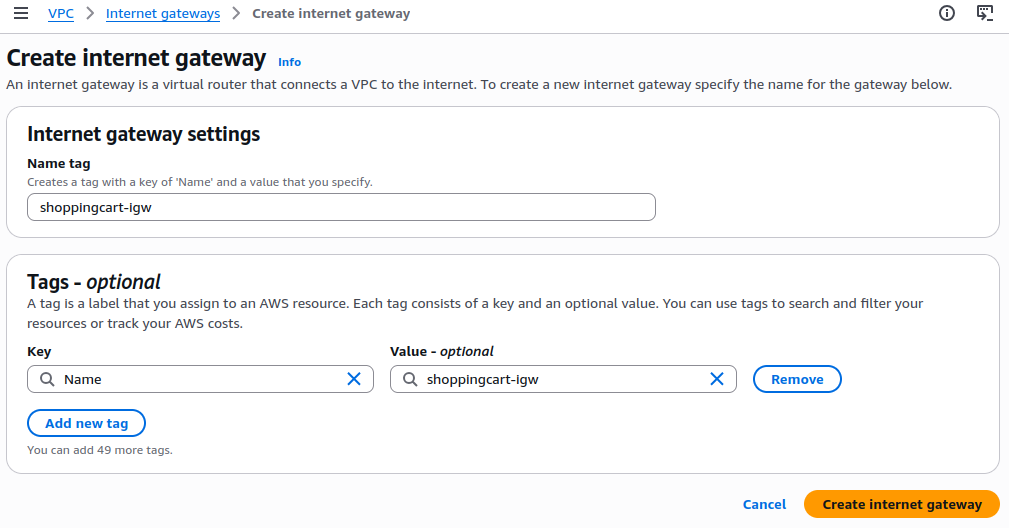
Step 3: Setup Internet Gateway and NAT Gateway
- Select Internet Gateways, click Create Internet Gateway
- Configuration:
- Name tag:
shoppingcart-igw
- Name tag:
- Configuration:
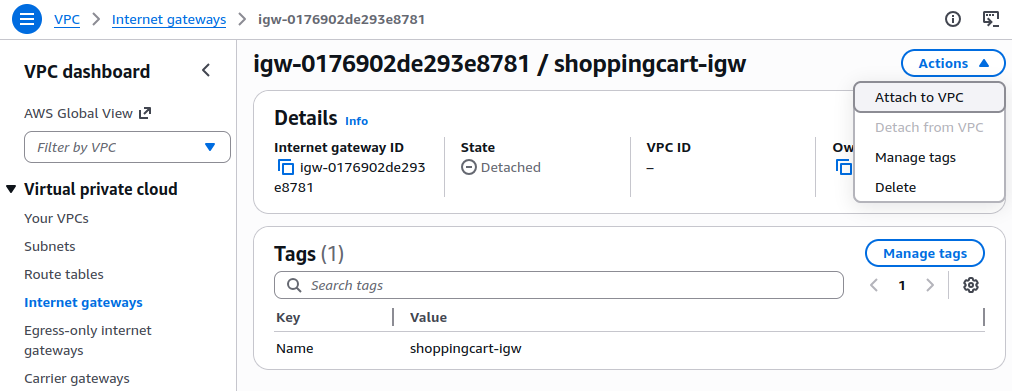
- And then attach it to the VPC
- In order to setup NAT gateway, let’s do the following steps
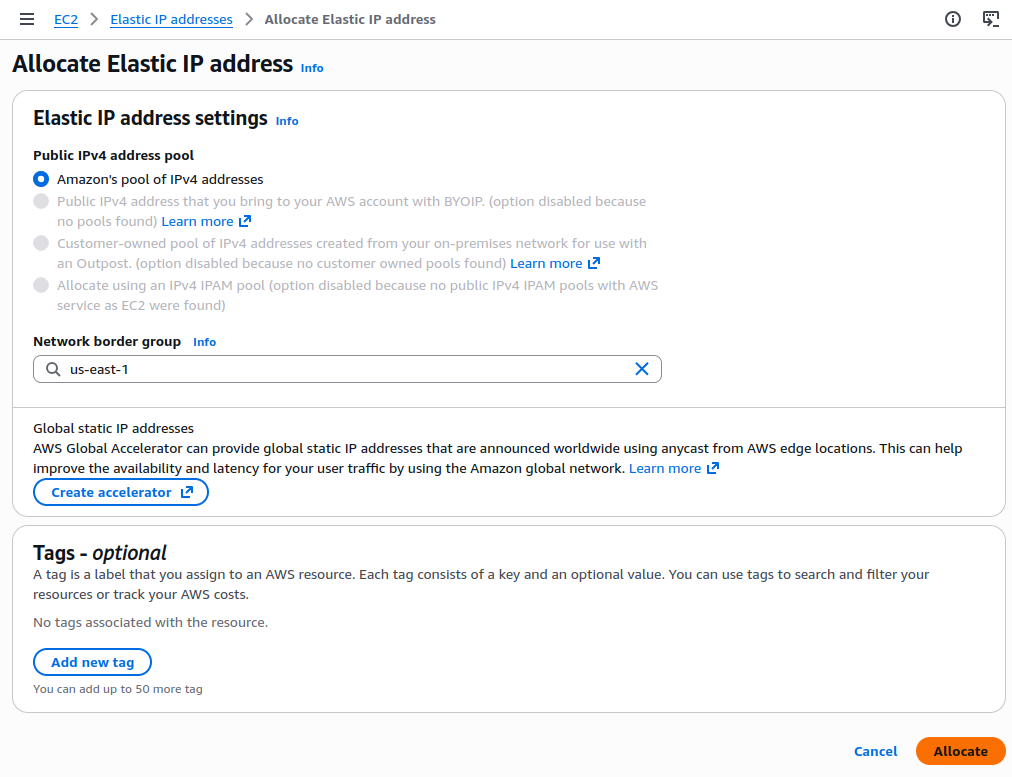
- Go to EC2 Dashboard, click Elastic IPs (under Network & Security), click Allocate
- Configuration:
- Public IPv4 address pool: Amazon’s pool of IPv4 addresses
- Network Border Group: Default
- Click Allocate
- Note the Allocation ID for the next step
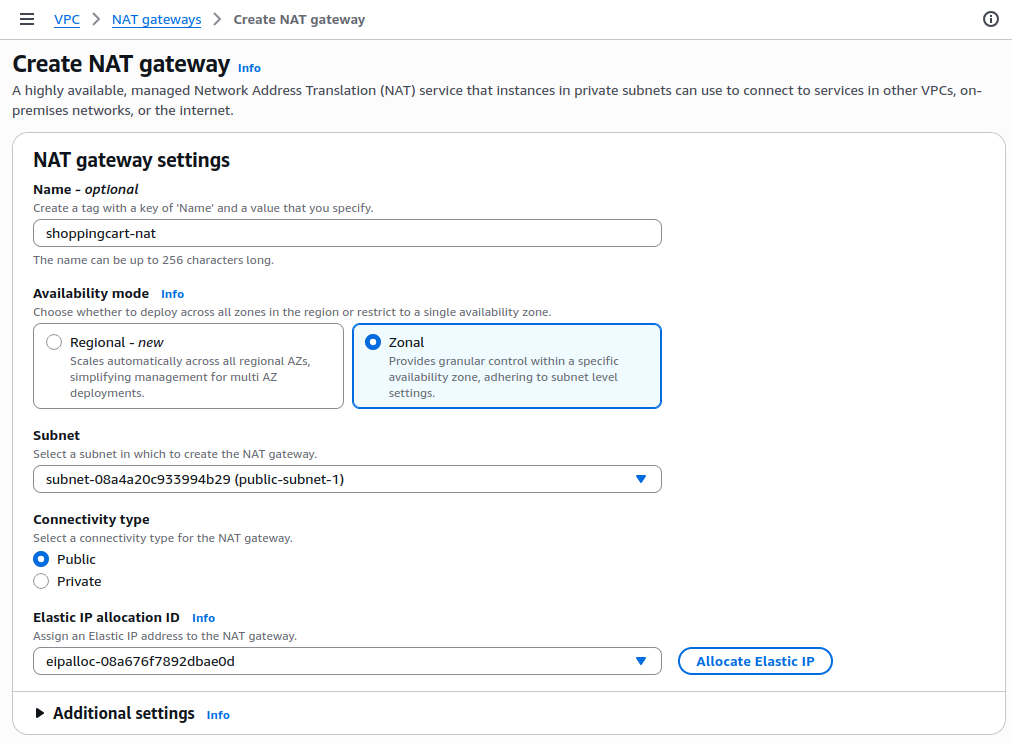
- Next, we’ll create NAT Gateways
- Go to VPC Dashboard, click NAT Gateways from the sidebar menu
- Click Create NAT Gateway
- Configuration:
- Name:
shoppingcart-nat - Subnet: Select
public-subnet-1(NAT Gateway must be in a public subnet) - Connectivity type: Public
- Elastic IP allocation ID: Select the Elastic IP you just created
- Name:
Step 4: Setup Route Table
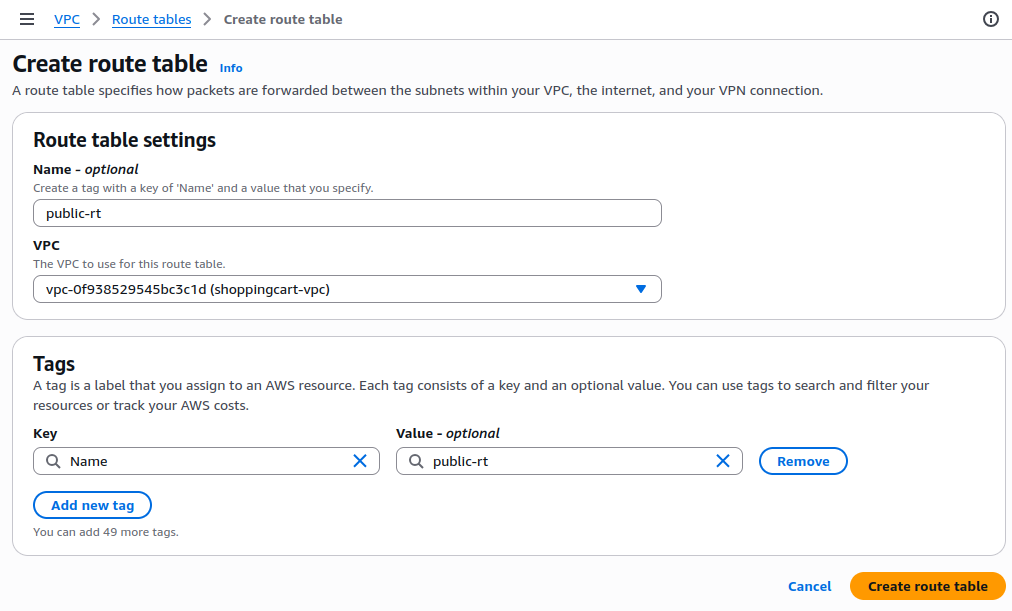
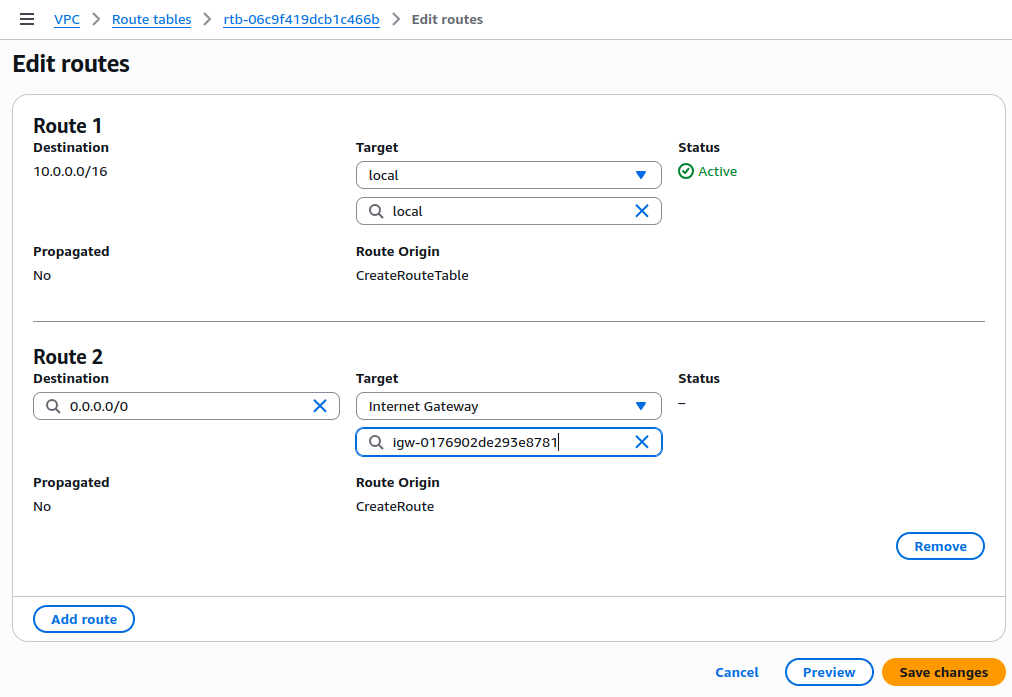
In order to direct the network traffic within VPC, we need the routing configuration on the route table. For this case, the goal is to direct the traffic from the public subnets to internet gateway for the internet access.
- Go to Route Tables from sidebar menu, and click Create Route TableConfiguration:
- Name:
public-rt - VPC:
shoppingcart-vpc - Click Create route table
- Name:
- Next, we add internet route
- Select the newly created route table
- Go to Routes tab, click Edit routes, click Add route
- Destination:
0.0.0.0/0(all internet traffic) - Target: Internet Gateway, select
shoppingcart-igw - Click Save changes
- Destination:
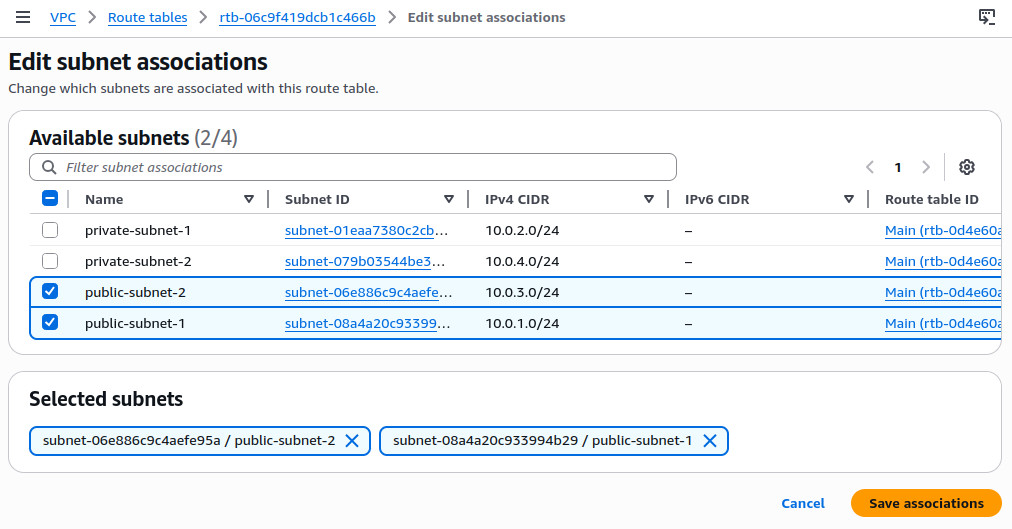
- Next, we associate the Public Subnets:
- Go to Subnet associations tab, click Edit subnet associations
- Select both public subnets:
public-subnet-1public-subnet-2
- Click Save associations
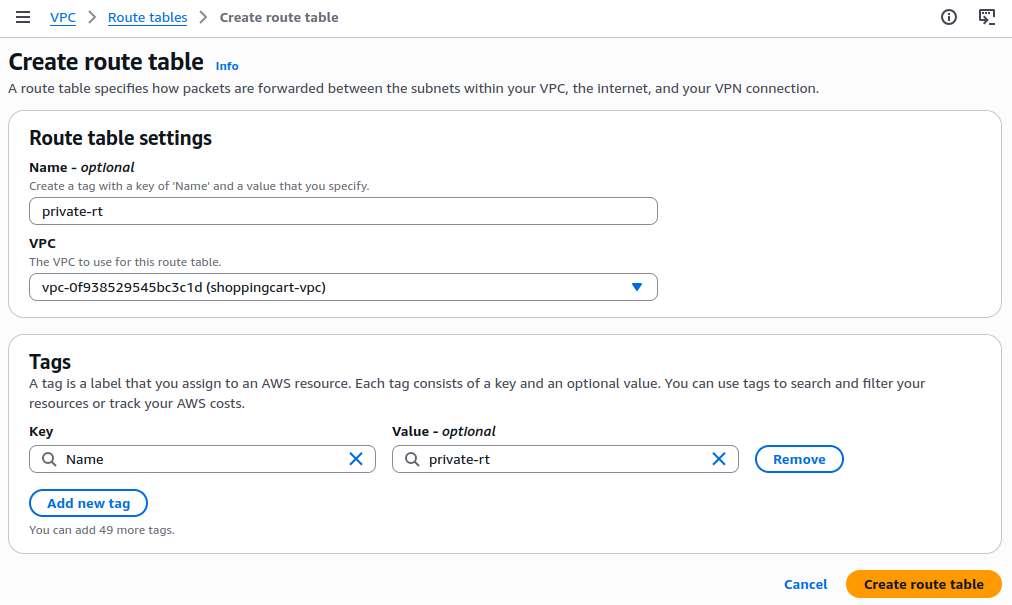
In order to direct outbound traffic from the private subnets via the NAT gateway while preventing direct inbound internet access, we need to setup the private route table
- Navigate to Route Tables, click Create Route Table
- Configuration:
- Name:
private-rt - VPC:
shoppingcart-vpc - Click Create route table
- Name:
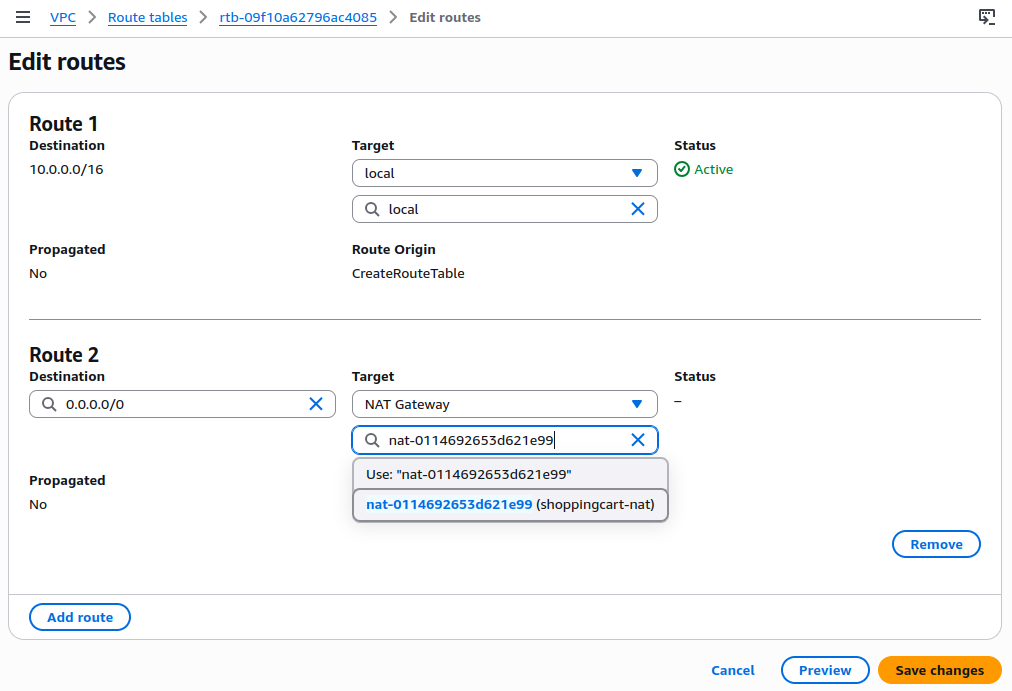
- Next, we add NAT Gateway Route:
- Select the newly created route table
- Go to Routes tab, click Edit routes
- Click Add route
- Destination:
0.0.0.0/0(all internet traffic) - Target: NAT Gateway → Select
shoppingcart-nat - Click Save changes
- Select the newly created route table
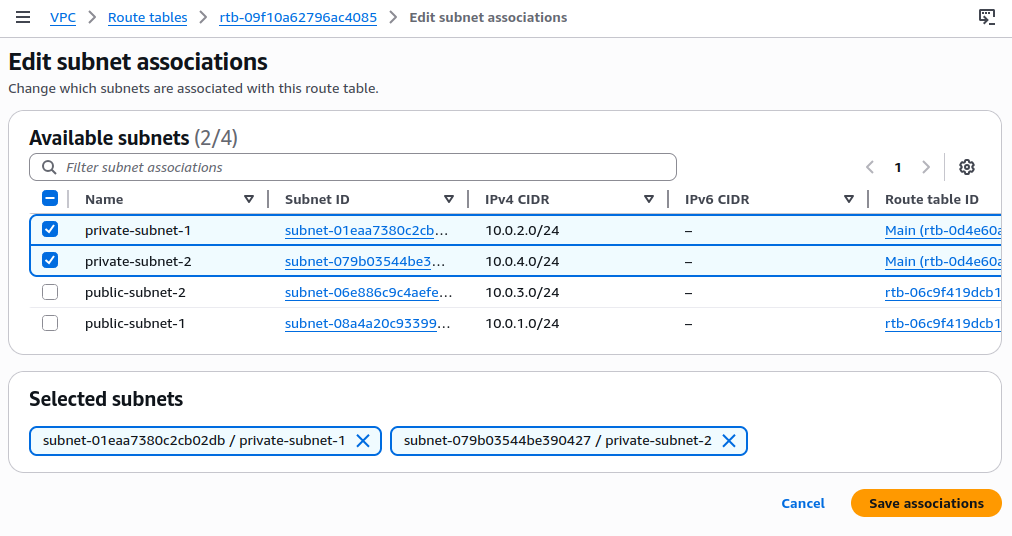
- Finally, we associate the Private Subnets:
- Go to Subnet associations tab, click Edit subnet associations
- Select both private subnets:
private-subnet-1private-subnet-2
- Click Save associations
Summary: Securing Network (VPC, Subnets, and Gateways)
In this part, we have implemented the principle of least privilege, where each network subnets on the customised VPC have only the minimum access required in order to reduce the attack surface.
- Network Segmentation Achieved
- Public tier: Hosts only internet-facing components (load balancers, bastion hosts)
- Private tier: Isolates application servers and databases from direct internet access
- Multi-AZ deployment: Provides high availability and fault tolerance
- Traffic Control Implemented
- Controlled internet access: Public subnets have direct internet access via Internet Gateway
- Secure outbound connectivity: Private subnets can access internet through NAT Gateway for updates
- No inbound internet access: Private resources cannot be directly accessed from the internet
In part 3, we’ll build the application backend by deploying EC2 inside the private subnet. This means we will be migrating the ShoppingCart application from default VPC to the secured VPC above while implementing the compute, storage, and database tiers.