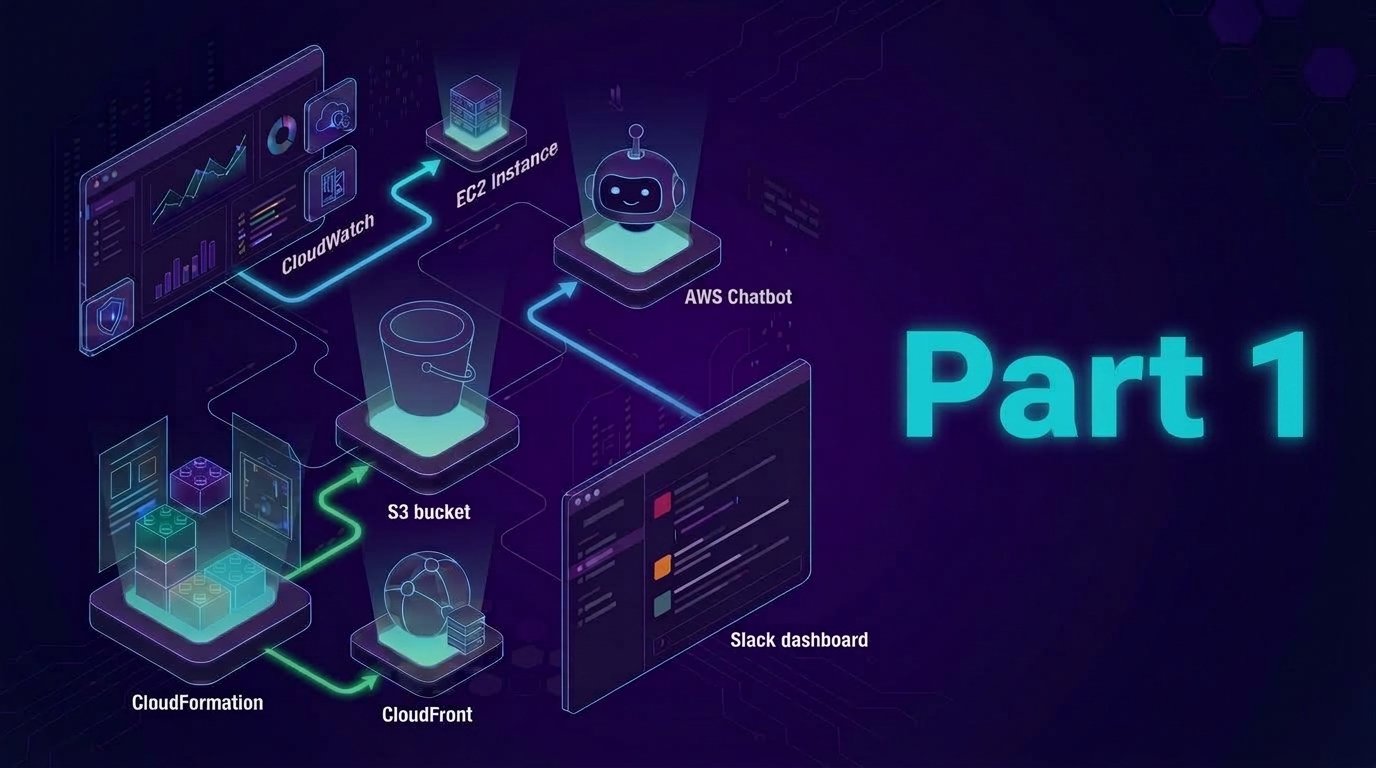
Operational excellence focuses on running and monitoring systems to deliver business value. This pillar is about how we operate our systems day-to-day, which makes it the foundation upon which everything else builds. In this project, we will integrate the AWS dashboard capabilities into Slack in real-time. This will help the efficiency of support teams just to work using Slack channels in fixing the issues instead of switching around the AWS console, CloudWatch, and various dashboards that can lead to error-prone human-error steps in handling the incident tickets.
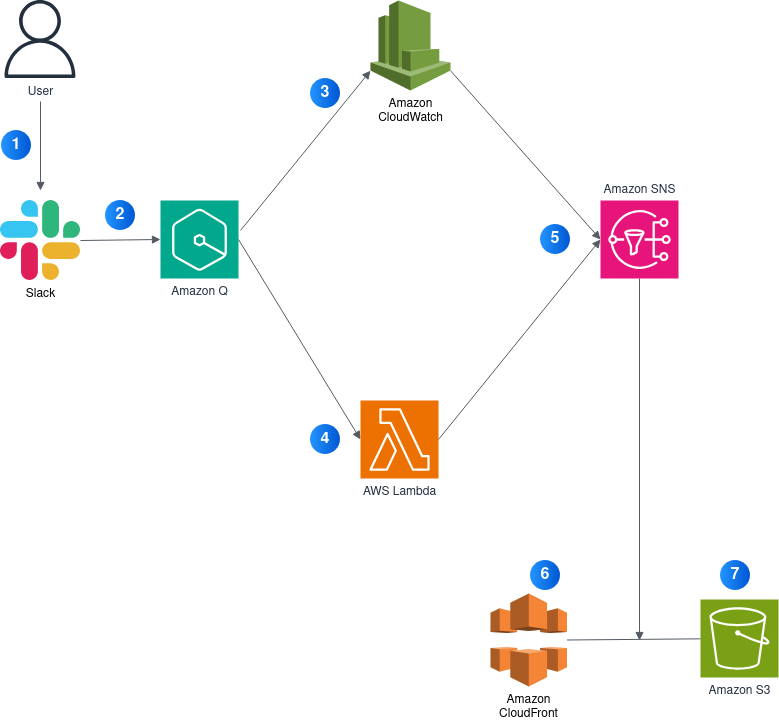
Here is the architecture diagram as the foundation of this project:
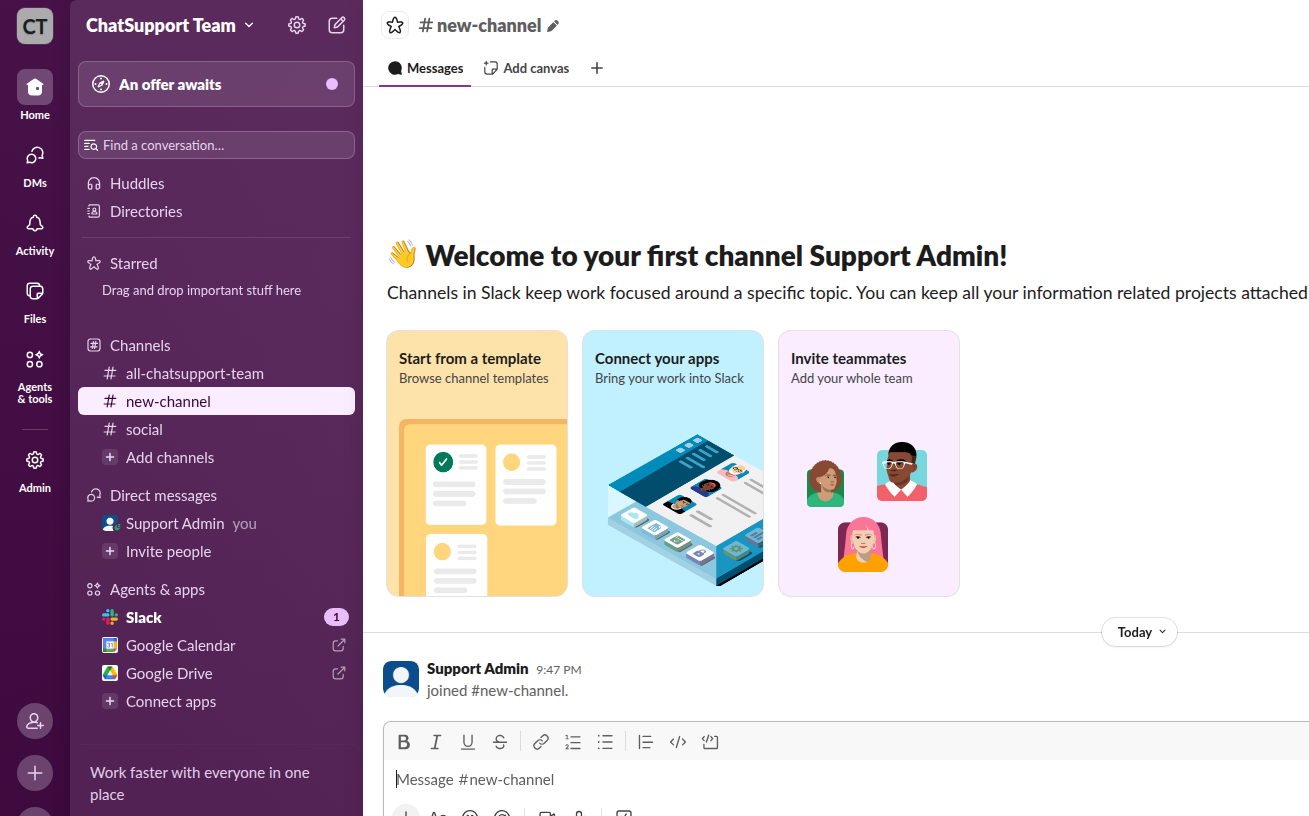
Step 1: Setup Workspace on Slack
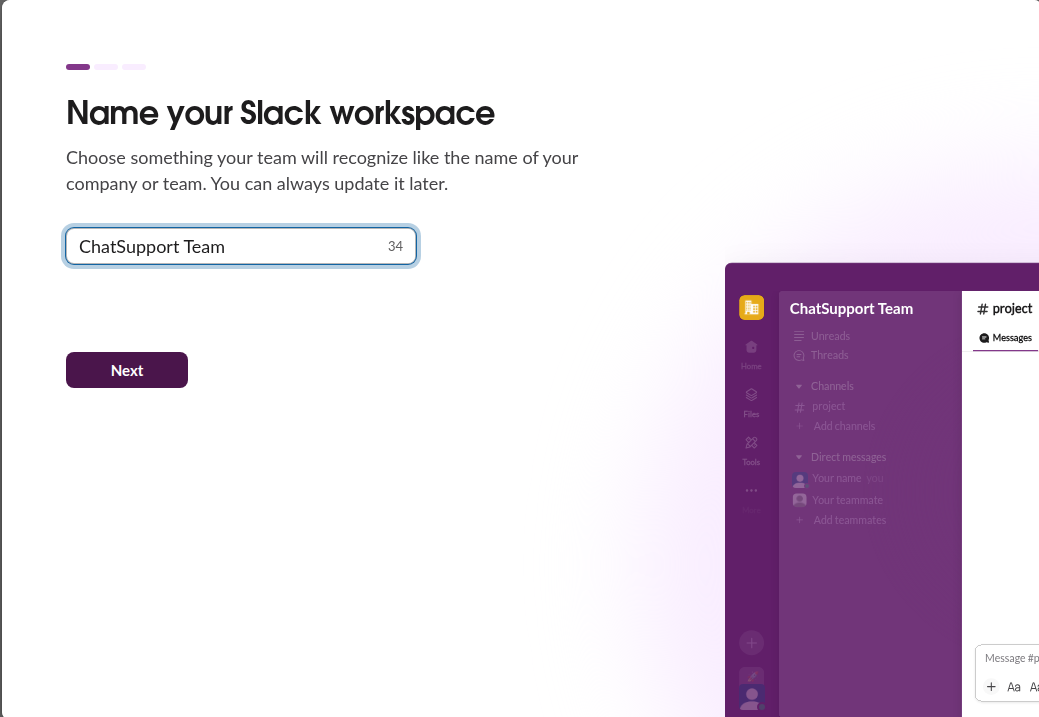
As we are going to use Slack as the tool to be connected to the Amazon Q, we need to setup a new workspace first.
- Visit https://slack.com/get-started
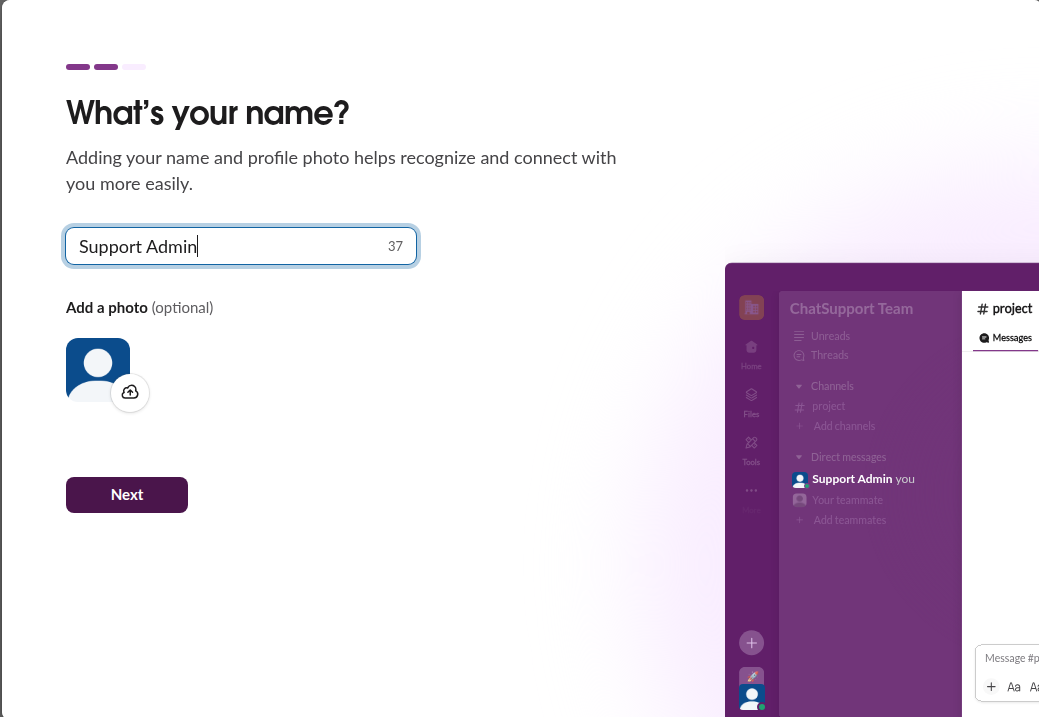
- Sign in with email or create a Slack account Follow the steps to:
- Create a new workspace
- Set a workspace name (e.g.,
ChatSupport Team)
Remember, we have to be the Slack admin to complete this workspace creation
Step 2: Setup Amazon Q for Slack
Here we are going to connect AWS Q with Slack.
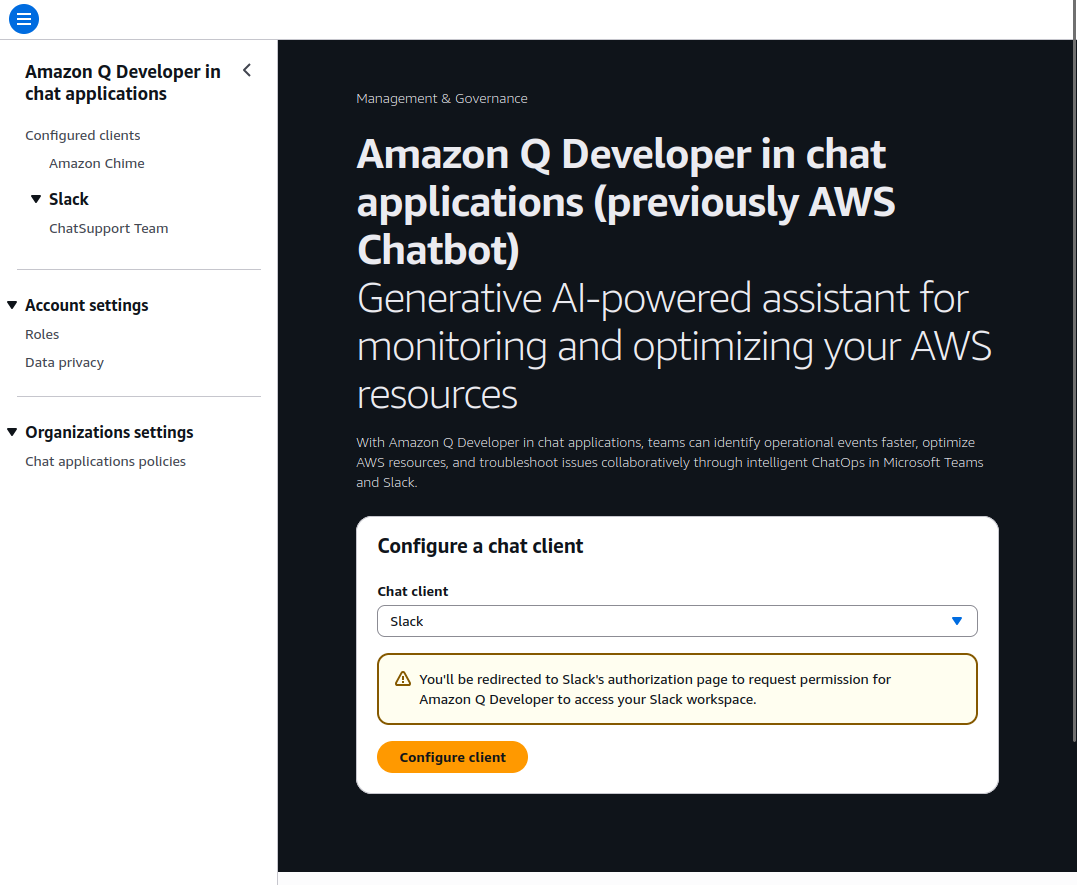
- Visit the AWS Q (Chatbot) console
- Select Slack as the client
- Click “Configure Client”
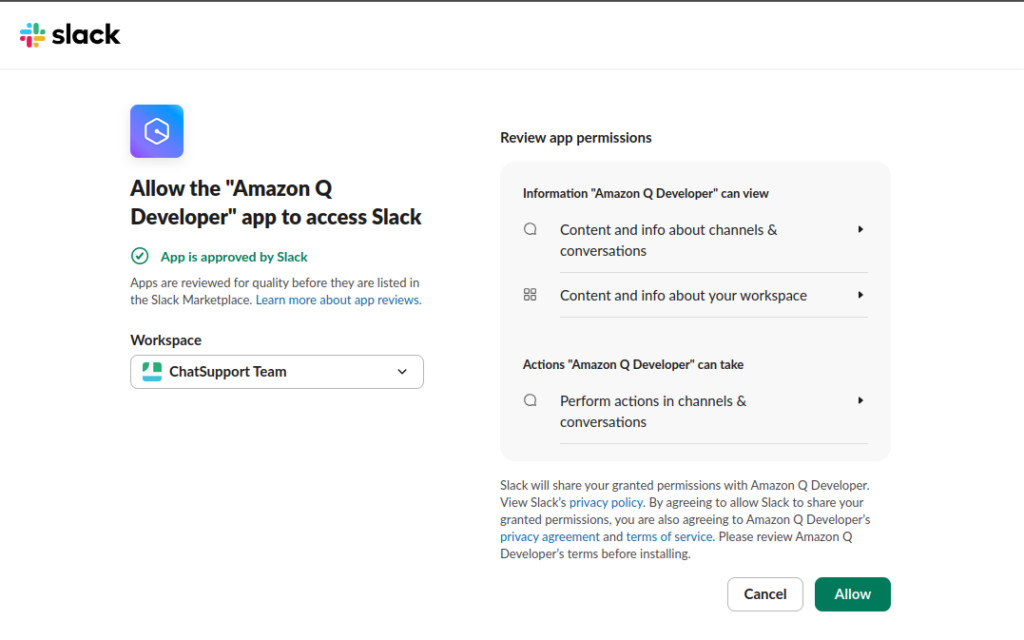
After being redirected to the Slack, then select the “ChatSupport Team” workspace to allow the connection.
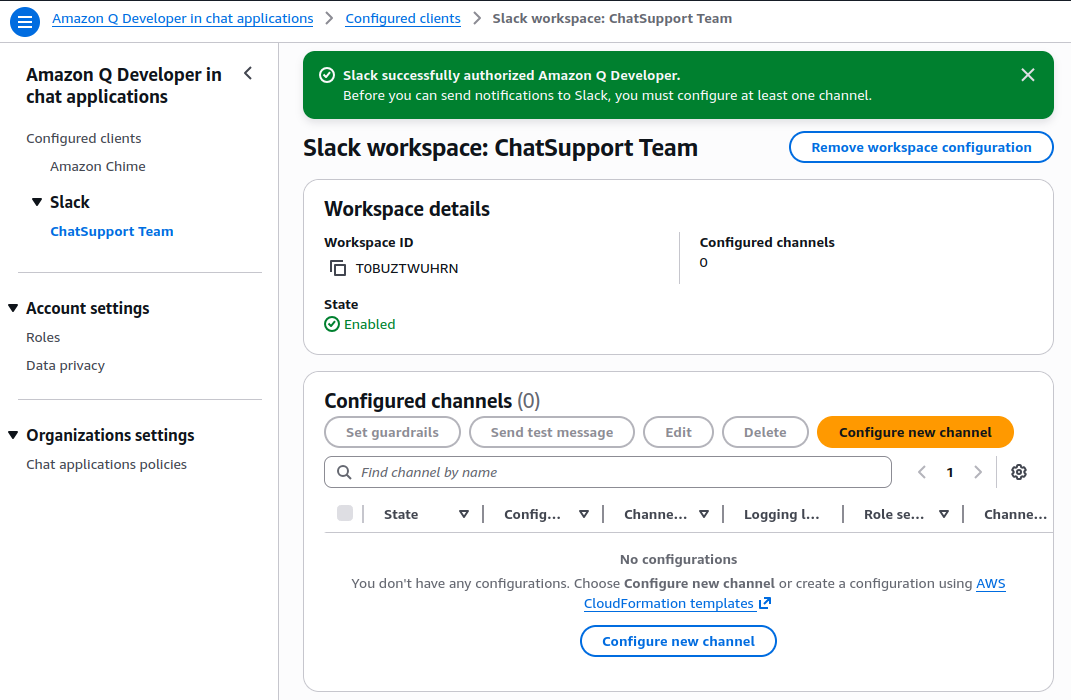
Then we will be redirected back to the AWS Q console and see the authorized connection to Slack.
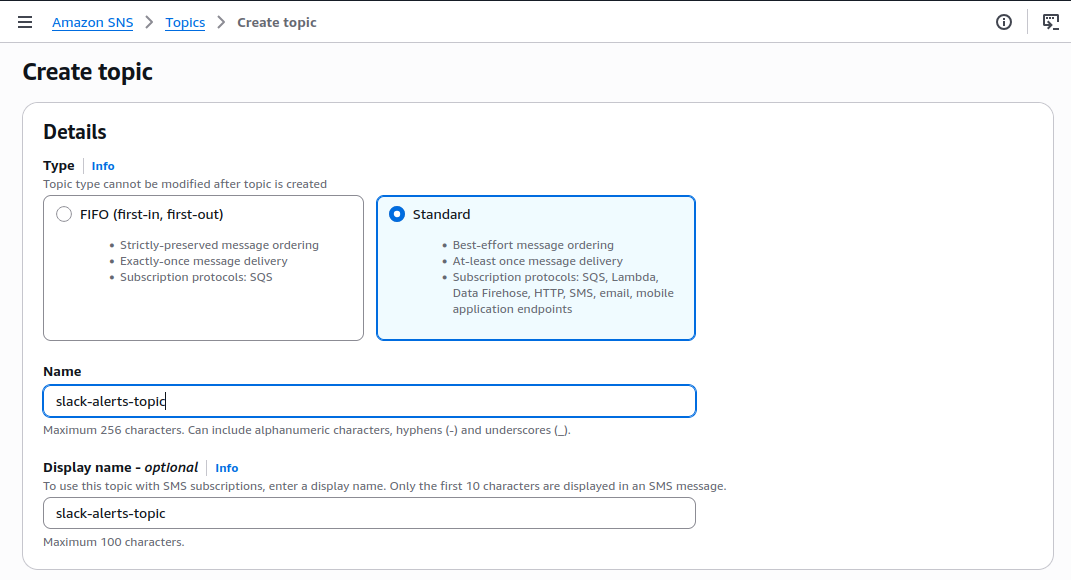
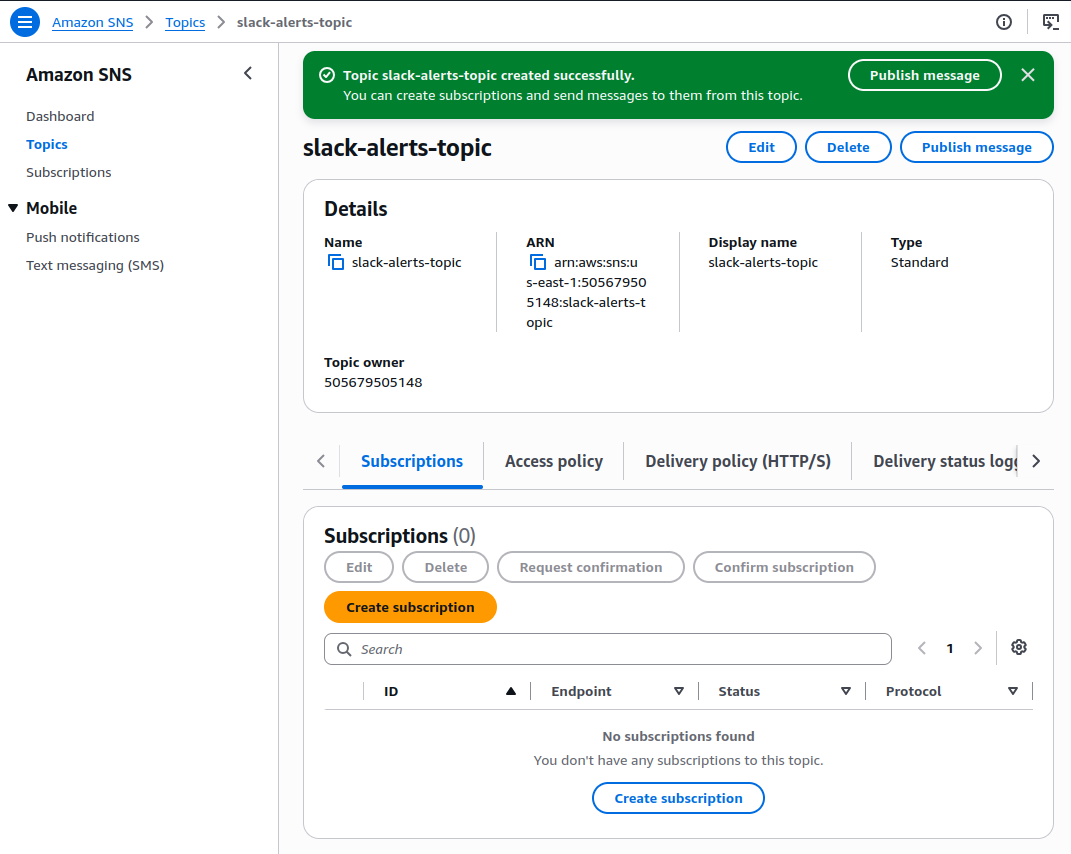
Step 3: Setup The SNS Topic for Slack Alerts
We’ll use the SNS as the message broker where Slack is subscribed on it to consume the alerts from AWS services.
- Visit the SNS Console:
- Click Topics in the left menu
- Click “Create topic”
- Choose Standard as the topic type
- Enter a name for the topic (e.g.,
slack-alerts-topic)
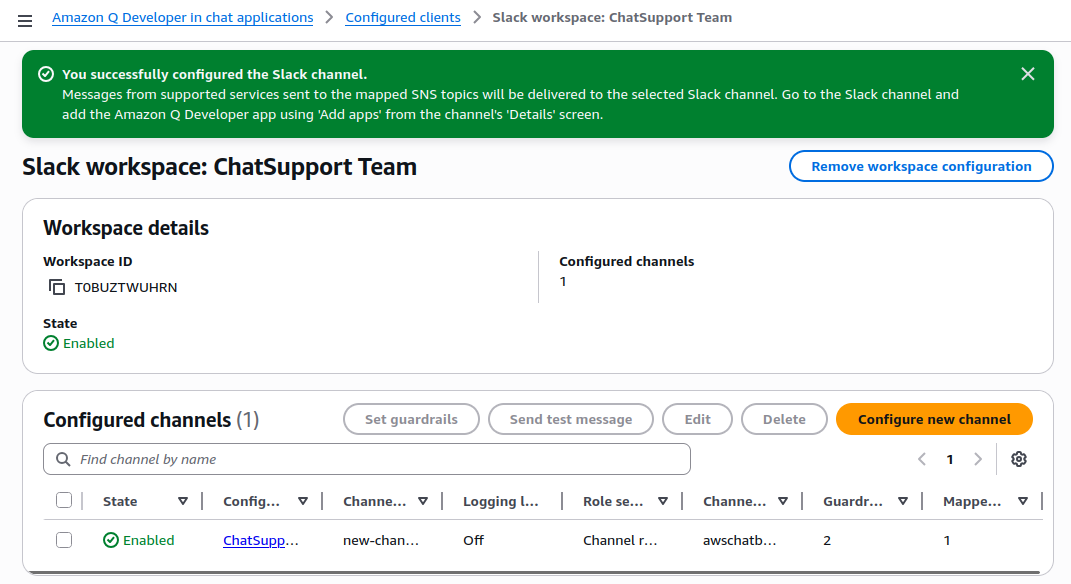
Step 4: Setup Slack Channel in AWS Q (Chatbot)
Now we return back to the AWS Q console to inform which channel to use and what alerts is allowed to receive.
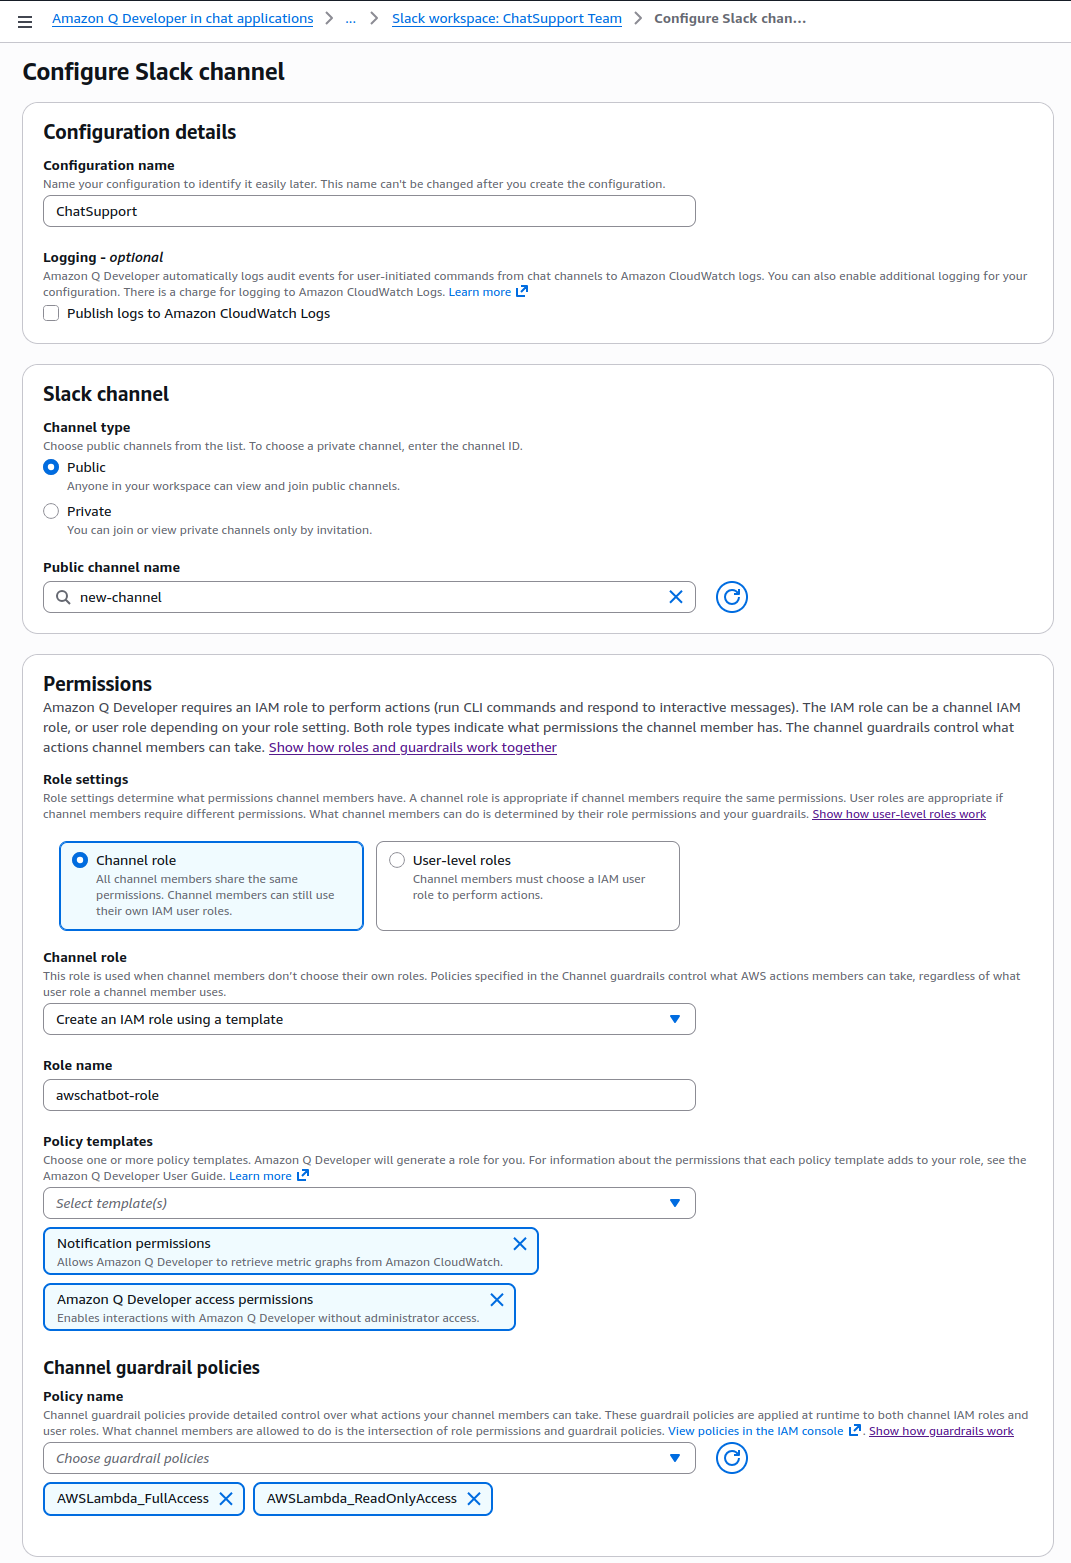
- Back to the AWS Q console and click “Configure New Channel”
- Fill up the following:
- Configuration name: ChatSupport
- Channel type: Keep it as Public
- Channel name: new-channel
- IAM Role Configuration:
- Select “Create an IAM role using a template” from the dropdown
- Set the Role name to
awschatbot-role
- Under Policy templates, check the following two options:
- Notification permissions: Allows Chatbot to retrieve CloudWatch metrics and graphs
- Amazon Q Developer access permissions: Enables interactions from Slack without full administrator access
- In the Guardrail policies section, allow the following policies:
- AWSLambda_FullAccess
- AWSLambda_ReadOnlyAccess
- CloudWatchFullAccess
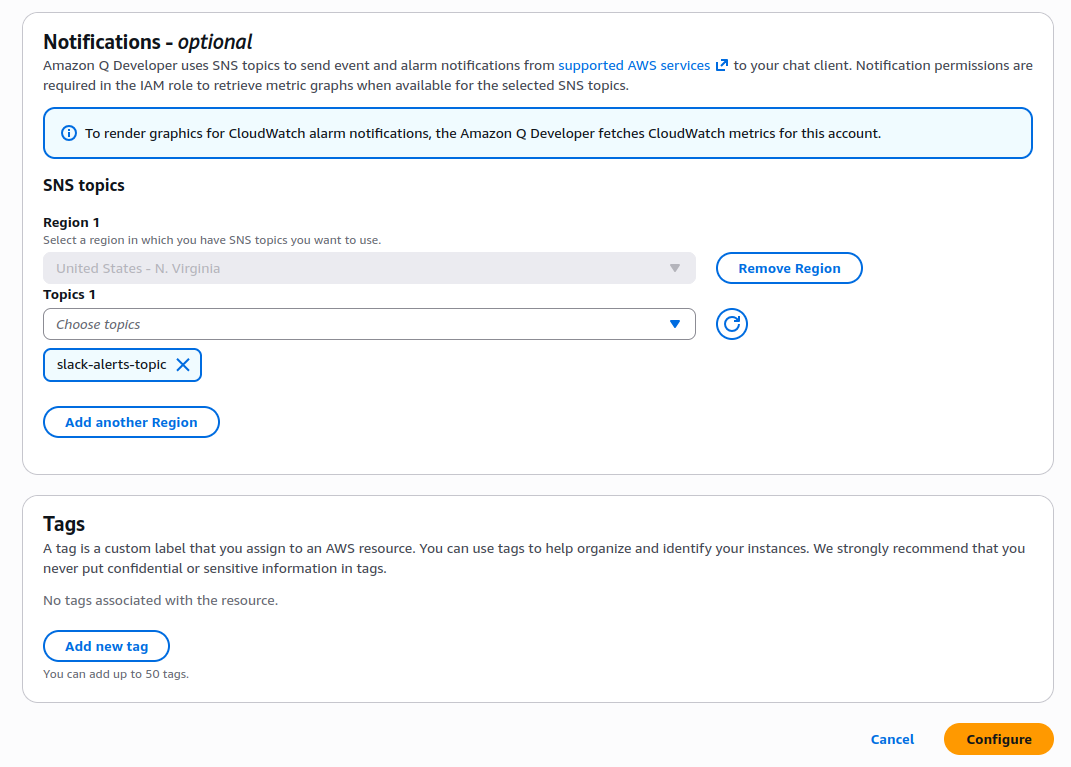
- In the Notifications section:
- Choose the Region where SNS topic exist (e.g.,
us-east-1)
- Choose the Region where SNS topic exist (e.g.,
- Select an existing SNS topic (e.g.,
slack-alerts-topic)
- Then click Configure
Step 5: Test The Integration and Configuration
It’s time to test if the connection really works.
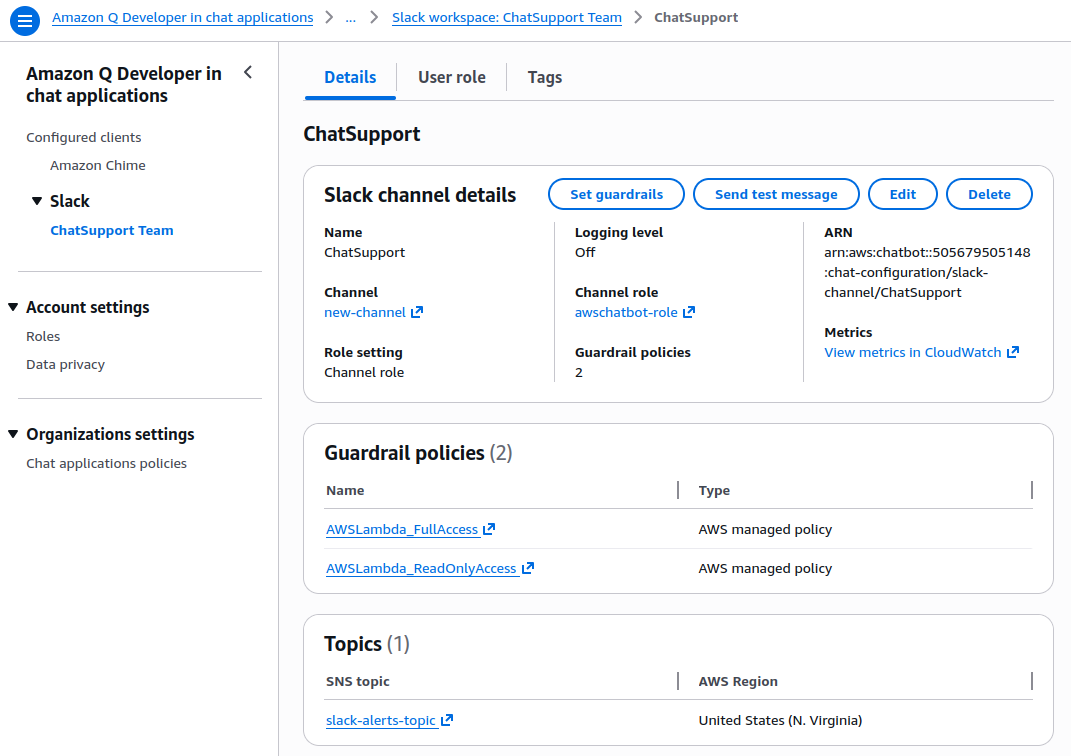
- Visit Amazon Q console, select Configured Clients > Configured Channels
- Select our channel (e.g.,
ChatSupport) - Click “Send test message”
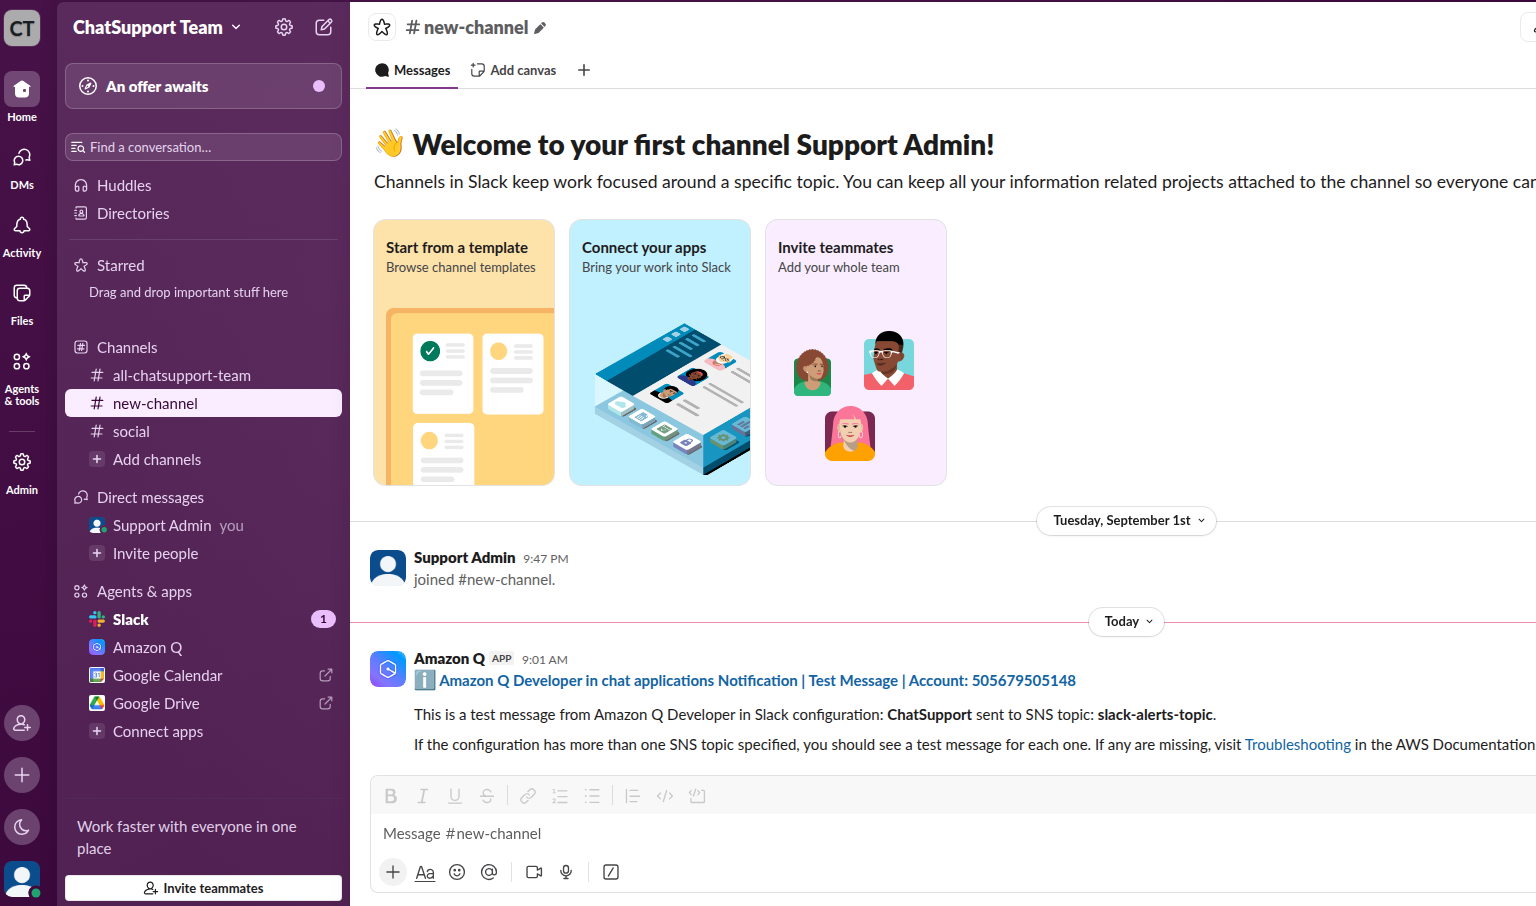
We shall receive the message on the new-channel of Slack workspace
Summary
We have setup the foundation for real-time AWS operations from Slack workspace by completing the followings:
- A secure connection between AWS and Slack using AWS Q (Chatbot )
- An SNS topic to route alerts
- IAM roles that define what can be done via Slack
- A test message to confirm everything works
In the next part, we will create CloudWatch alarms to detect the issues on AWS service and route them to Slack using SNS and Q.