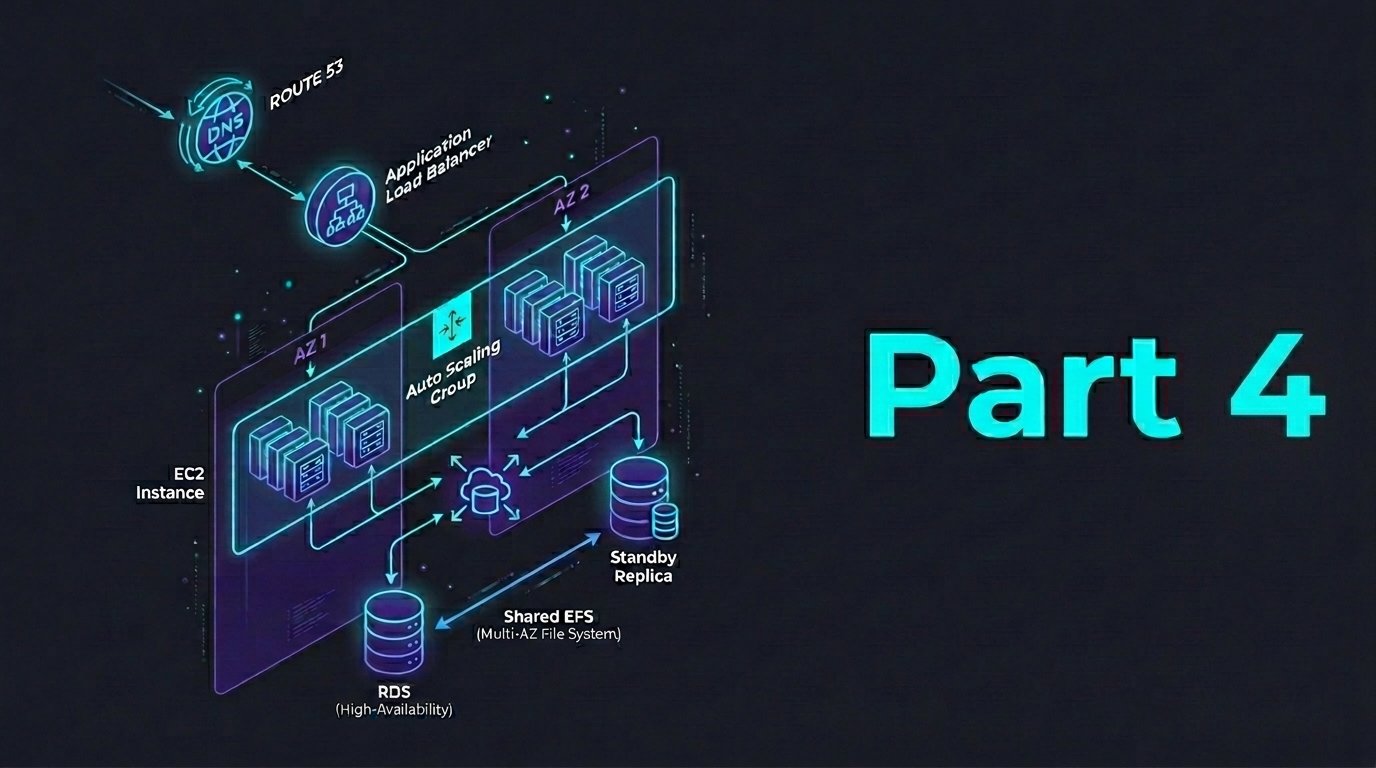
Most production application has a storage layer to be shared with multiple EC2 instances. This layer can store logs, static content, or file uploaded by users that persists across instance replacements and always be available in all AZs. In this part, we’ll use Amazon Elastic File System (EFS) where we can mount a shared and persistent file system to all EC2 instances. This means we shall replace our dependency on the GitHub clone files which unreliable whenever any EC2 instance is terminated and replaced by Auto-scaling.
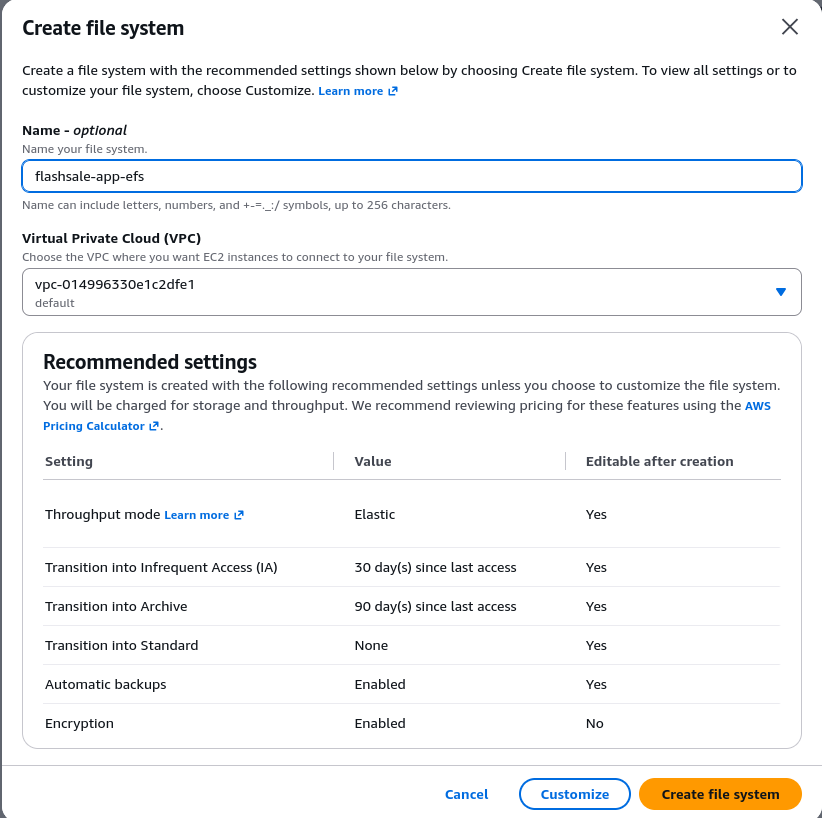
Step 1: Setup an EFS File System
- Visit the Amazon EFS console
- Click Create file system
- Name it
flashsale-app-efs - Choose the same VPC used by your EC2/ALB setup
- Select a new or existing security group for EFS (Skip for now, we’ll configure it next)
- Click Create
Step 2: Setup Security Groups for EFS Access
Our EC2 instances need to communicate with EFS over the NFS protocol (TCP port 2049). This requires a security group rule allowing traffic from our EC2s to EFS.
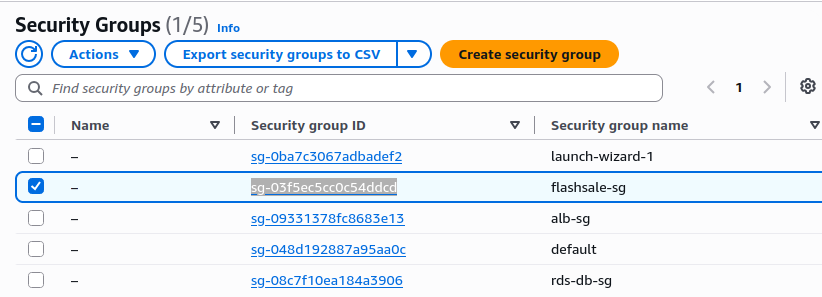
First, let’s find the security group attached to the EC2
- Visit EC2, click Security Groups
- Find the security group used in your Launch Template (e.g.,
flashsale-sg) - Copy the Security Group ID (e.g.,
sg-03f5ec5cc0c54ddcd)
Next, modify the EFS security group
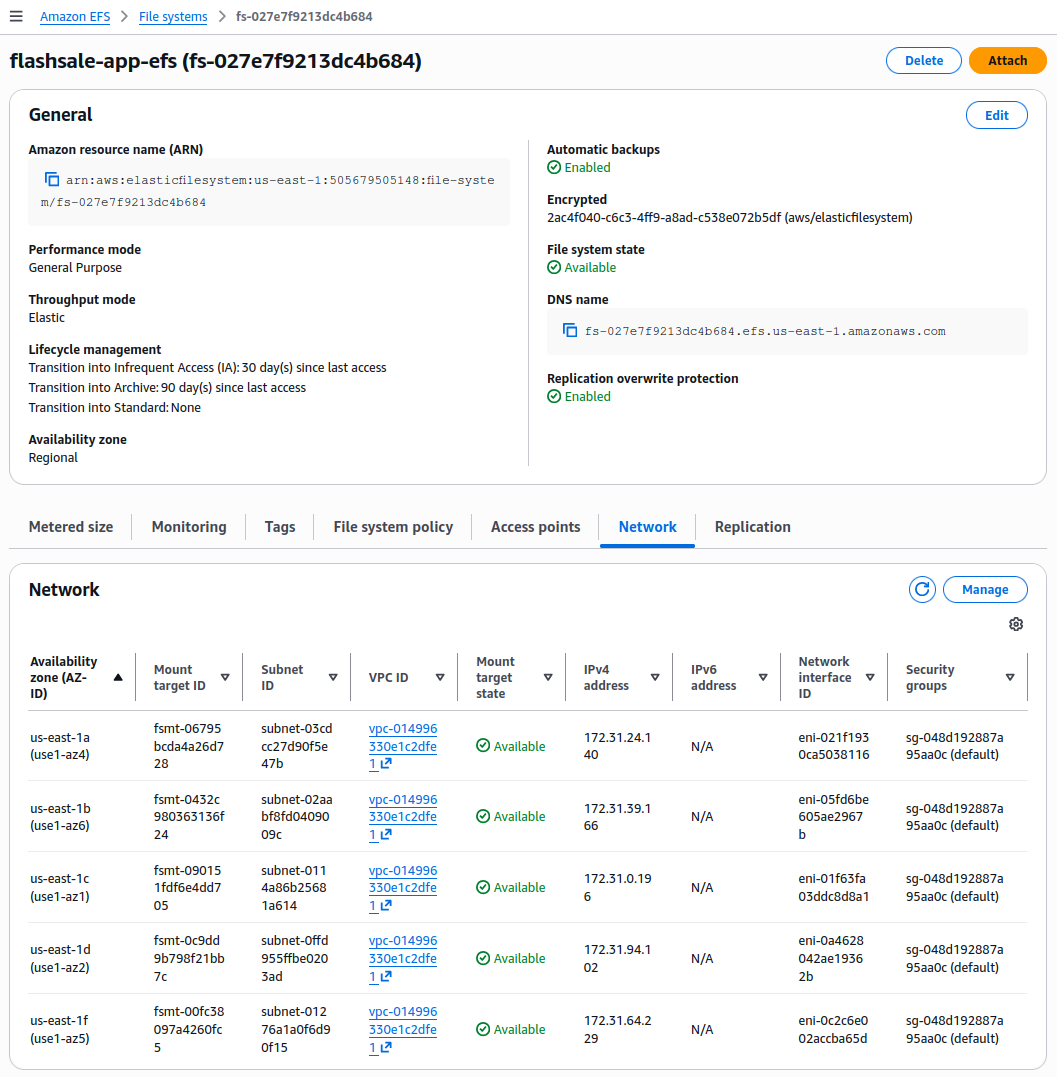
- Visit EFS Console, go to your file system
- Under the Network tab, note the security group attached to each mount target. In this case the security group ID is sg-048d192887a95aa0c
- Visit EC2, click Security Groups, select the EFS group, Edit Inbound rules
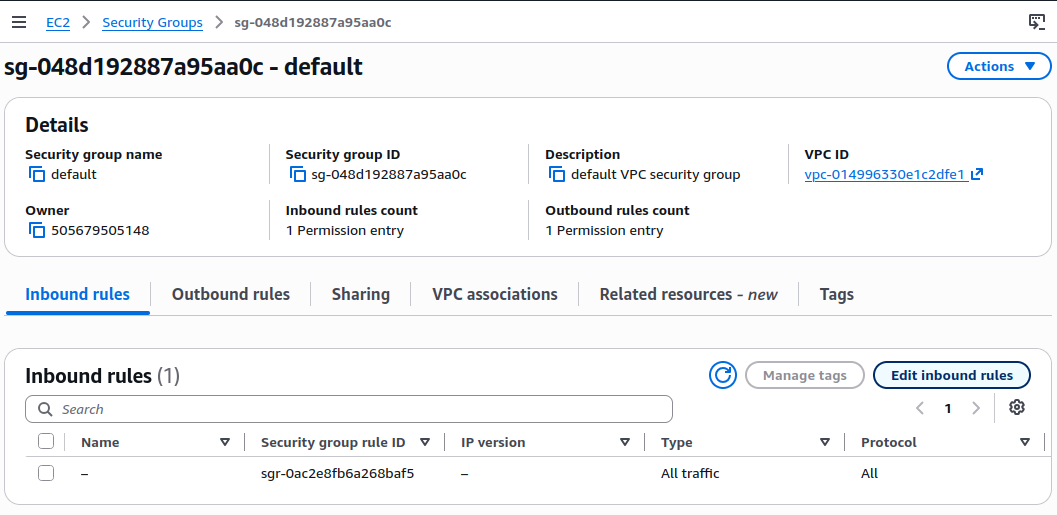
- Add the following rule:
- Type: NFS
- Protocol: TCP
- Port: 2049
- Source: Custom (paste the EC2 security group ID: flashsale-sg)
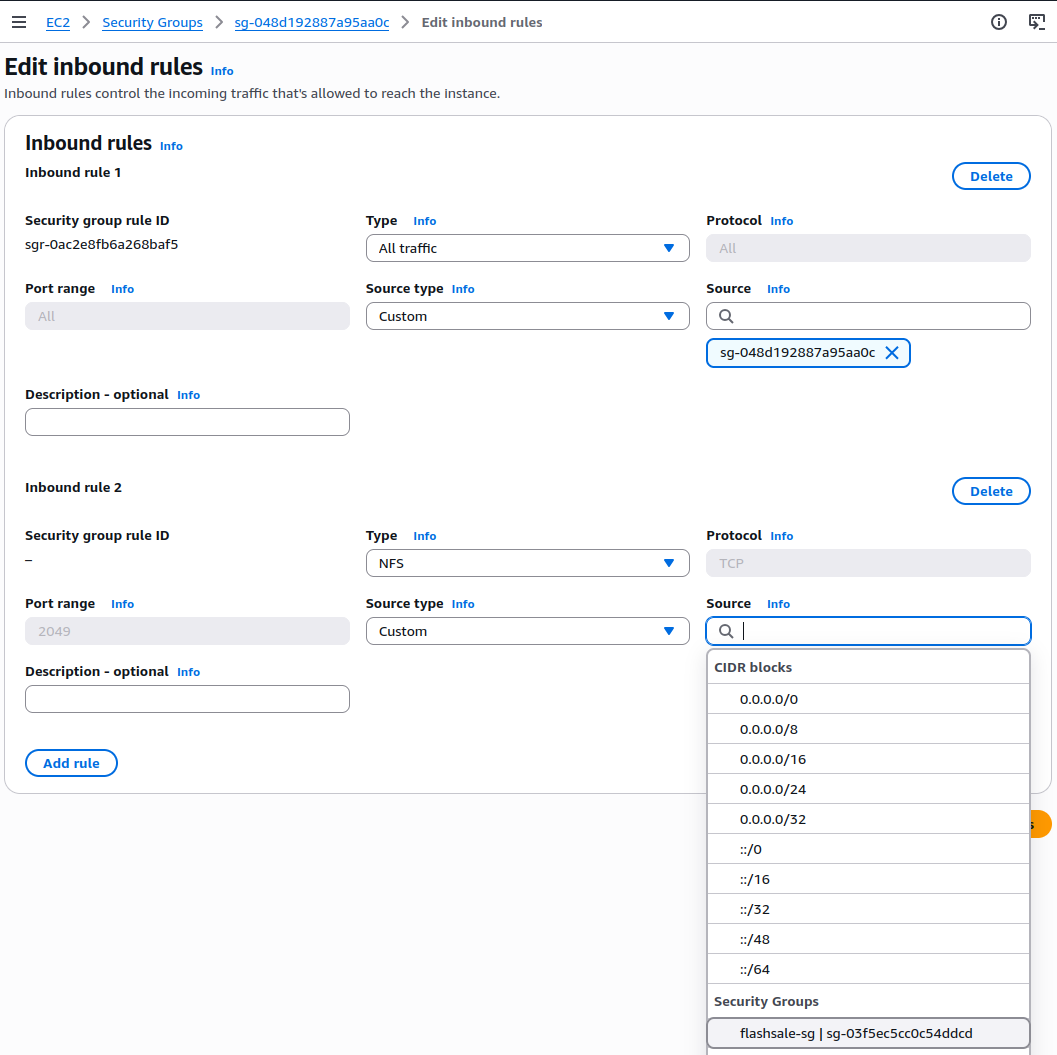
- Click Save Rule
Step 3: Update the EC2 Launch Template
Here we are going to edit the EC2 launch template and modify the user data script by installing NFS client, mounting EFS, and cloning our GitHub repository and copy files to the EFS mount.
- Visit EC2 console, select Launch Templates
- Select the flashsale-app-template
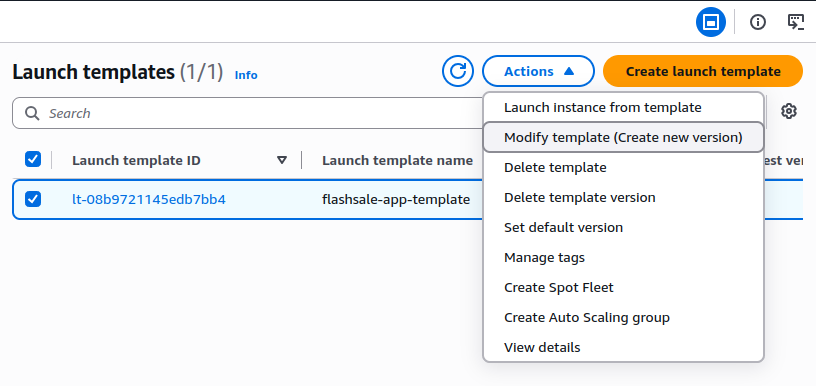
- On the Advanced Details section, modify the following script
#!/bin/bash
sudo yum update -y
sudo yum install -y httpd git amazon-efs-utils -y

# Start Apache and enable on boot
sudo systemctl start httpd
sudo systemctl enable httpd

# Create mount point for EFS
sudo mkdir -p /var/www/html

# Mount the EFS file system (replace with your EFS ID)
sudo mount -t efs fs-xxxxxxxx:/ /var/www/html

# Optional: Add to /etc/fstab to remount on reboot
sudo echo "fs-xxxxxxxx:/ /var/www/html efs defaults,_netdev 0 0" >> /etc/fstab

# Clone the full repo
sudo git clone https://github.com/isuchan/aws-sa-projects.git /tmp/fullrepo

# Copy the project files into EFS-mounted directory
sudo cp -r /tmp/fullrepo/project-2/* /var/www/html

# Restart Apache to serve the content
sudo systemctl restart httpd- Replace
fs-xxxxxxxxwith our EFS File System ID
The goal of above modification is to mount the EFS into EC2 and clone the GitHub repository into the EFS instead of into EC2 instance directly. This is commonly called a lift-and-shift process to centralized storage solution.
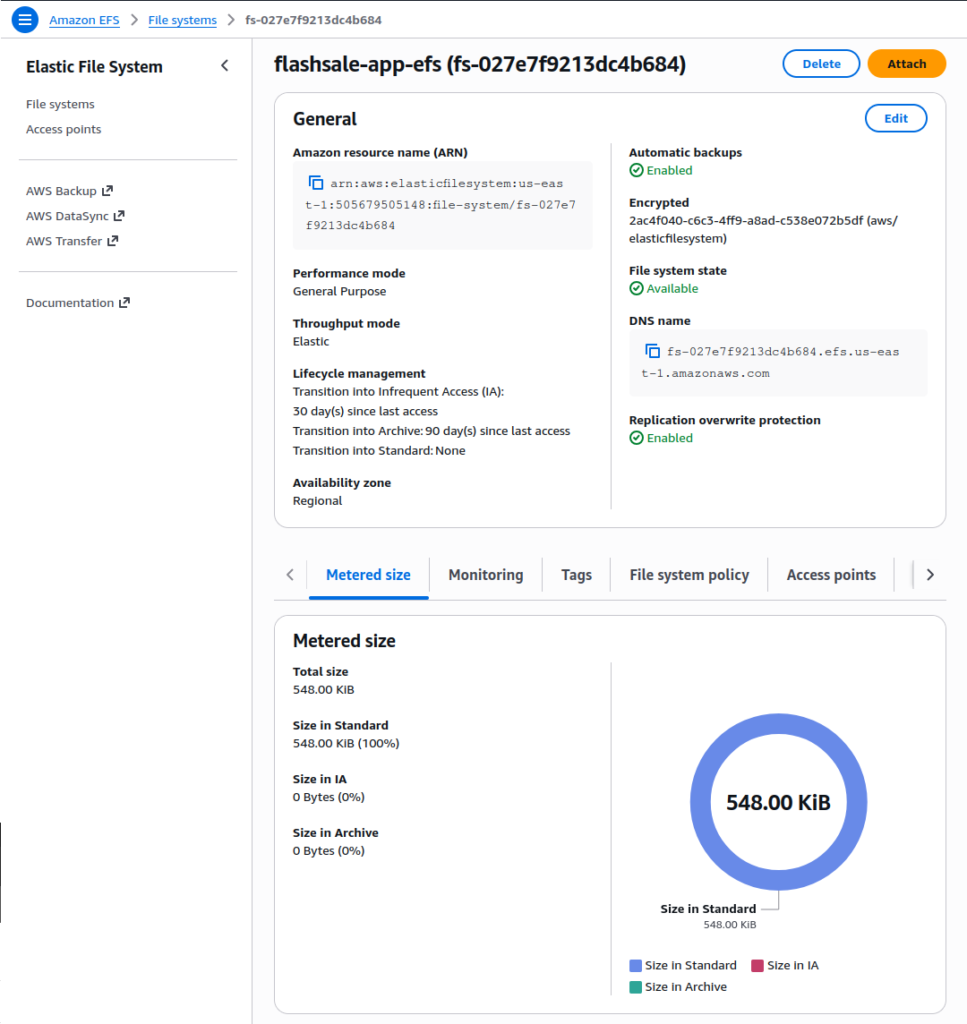
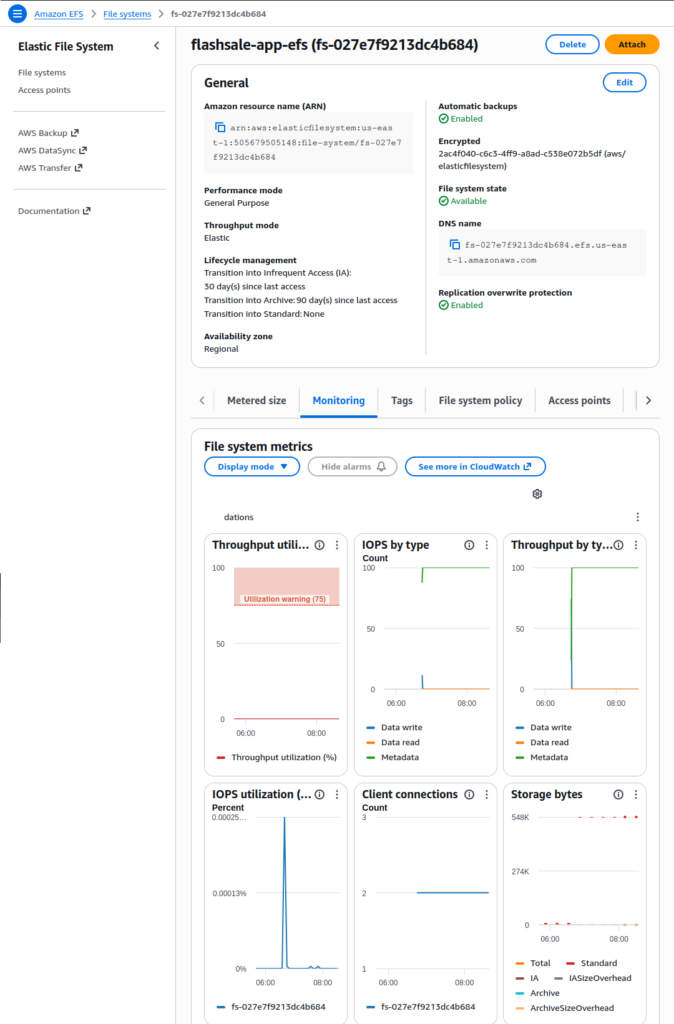
Since EFS is a managed service, we can’t see if its storage to check if there is any files on it directly. However, we can see it from the console through the following metrics:
- Metered size
If the total size is larger than 6Kb (the baseline), then it can guarantee it contains the file which is our customized user data from the launch template.
- Monitoring
- The IOPS shows the read and write of files being used during the EC2 instances creation.
- The client connections shows the mounting with 2 EC2 instances across AZ are happening.
Summary
Up to now we have create a more resilient approach to ensure the file that is being used by the auto scaling group is persistent within EFS. Mounted EFS in its multi AZ access can ensure it serves all the EC2 instances even if it’s crashed and restored by the auto scaling group.
In the last part of this project, we will validate the whole application by simulating the disaster recovery scenarios.